Listen, I get it—some days you barely have time to blink, let alone cook dinner. That’s why this dump and go chili has been my weeknight superhero for years. Picture this: it’s soccer practice night, the baby’s crying, and you’ve got 10 minutes before chaos erupts. Brown that beef, dump everything into the crockpot, and boom—dinner practically cooks itself while you handle life. The magic? That overnight rest in the fridge transforms it from “good” to “lick-the-bowl amazing.” My kids call it “Frito Bowl Night,” and honestly? Those little hands grabbing for seconds while cheese drips everywhere? That’s the real secret ingredient.
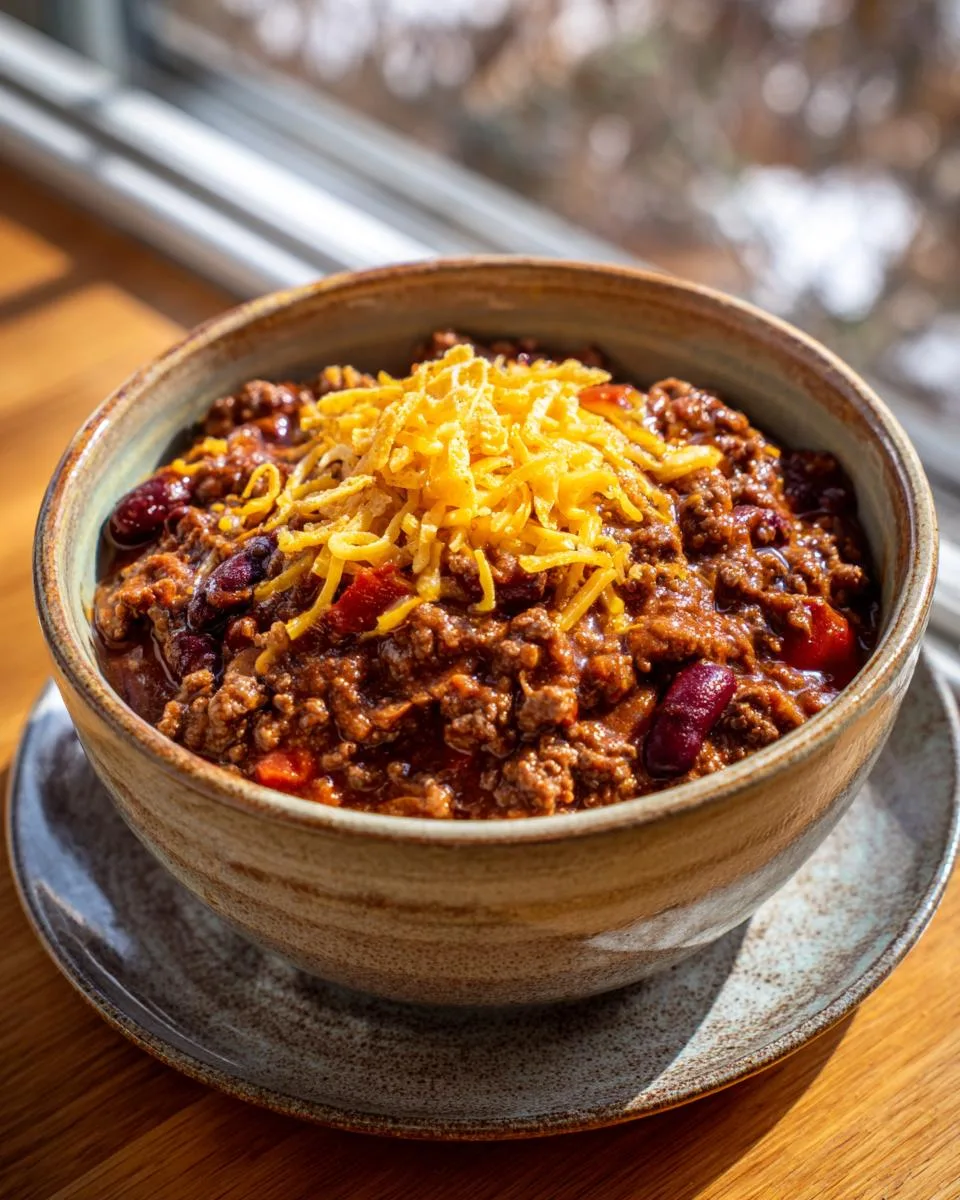
Table of Contents
Table of Contents
Why You’ll Love This Dump and Go Chili
This chili isn’t just easy—it’s *magic* for busy lives. Here’s why it’s my forever favorite:
- 10-minute prep: Brown the beef, dump the rest, and walk away. Done.
- One-pot wonder: The crockpot does the work (and the dishes stay clean!).
- Flavor for days: Overnight fridge time turns it into a rich, deep bowl of comfort.
- Spice it your way: Mild for kids? Add extra jalapeños for you? Everyone wins.
- Frito Friday approved: Crunchy, cheesy, messy perfection in every bite.
Trust me, your future self will high-five you when dinner’s ready with zero effort.
Ingredients for Dump and Go Chili
Here’s everything you’ll need to throw together this lifesaver of a meal. I call it my “pantry raid special” because half these ingredients are probably already in your kitchen!
- 1 lb ground beef (80/20 lean/fat) – That little extra fat means more flavor, but feel free to go leaner if you prefer.
- 2 cans (15.5 oz each) dark kidney beans, drained and rinsed – The rinsing is key unless you want extra starchy chili (hey, no judgment!).
- 2 cans (10 oz each) Rotel diced tomatoes and green chilies – That’s just fancy grocery-speak for “tomatoes with a kick.” Mild or original, your choice!
- 1 tablespoon minced garlic – The jarred stuff works great here (my secret shortcut).
- 1 tablespoon Worcestershire sauce – This umami bomb makes everything taste meatier. Don’t skip it!
- 16 oz water – I use the empty bean cans to measure – two full cans worth.
- 2 teaspoons celery salt – The underrated hero of spice racks everywhere.
- 2 teaspoons black pepper – Freshly ground if you’re fancy, pre-ground if you’re realistic.
- 1 teaspoon each of paprika and chili powder – Basic pantry staples doing heavy lifting.
- 1 McCormick chili seasoning packet – My weeknight cheat code. We’ll talk homemade options below.
Ingredient Substitutions & Notes
No stress if you’re missing something – here’s how to wing it:
- Ground turkey or chicken works but add 1 tbsp oil when browning – it’s leaner so needs help.
- No Rotel? Use 1 can diced tomatoes + 1 small can green chilies. Fire-roasted tomatoes add great smoky depth too.
- Homemade seasoning blend: Mix 2 tbsp chili powder, 1 tbsp cumin, 1 tsp each garlic powder, onion powder, and oregano if you’re out of packets.
- Vegetarian? Swap beef for 1 cup quinoa or lentils (add after browning step).
- Worcestershire hack: 1 tsp soy sauce + 1 tsp apple cider vinegar in a pinch.
Pro tip: The water seems like a lot, but trust the process – it cooks down into the most amazing broth-like consistency.
Equipment Needed for Dump and Go Chili
Here’s the beautiful part – you probably already own everything needed for this dump and go chili! I’ve made this recipe in college dorms, tiny apartments, and now my chaotic mom kitchen. Here’s what you’ll grab:
- 6-quart slow cooker – The sweet spot size for this recipe. Any smaller and it might bubble over (ask me how I know!).
- Large skillet – For browning that beef to golden perfection. Cast iron works great if you have it.
- Wooden spoon – My trusty sidekick for scraping up all those tasty browned bits from the skillet.
- Can opener – Because wrestling with stubborn cans when hungry is the worst.
Optional but handy:
- Immersion blender – Give it a quick pulse if you like thicker chili (my husband’s preference).
- Slow cooker liners – For the ultimate lazy cleanup – just toss when done!
- Measuring spoons – Though I often eyeball the spices straight from the jars.
That’s it! No fancy gadgets required. The beauty of dump and go recipes is they meet you right where your kitchen equipment (and energy levels) are at.
How to Make Dump and Go Chili
Okay, let’s get cooking! This is where the magic happens – minimal effort for maximum flavor payoff. I’ve made this chili probably 200 times (no exaggeration), and here’s exactly how I do it:
- Brown that beef! Crank your skillet to medium-high and toss in the ground beef with all those spices (garlic, Worcestershire, celery salt, pepper, paprika, chili powder). Break it up with your spoon until it’s nicely browned – about 5 minutes. Drain the fat (I use a spoon to scoop it out into an old can – way easier than paper towels).
- The glorious dump: Plop the beef into your crockpot. Add everything else – beans, Rotel, seasoning packet, water. Give it one good stir – don’t overmix!
- First cook: Lid on, set to LOW for 5 hours. Resist stirring! The flavors need to mingle undisturbed.
- The secret step: After cooking, refrigerate overnight (yes, really!). This isn’t just food safety – it lets the flavors deepen like crazy. My grandma called this “letting the chili get happy.”
- Final cook: Next day, cook on LOW another 5 hours. Your house will smell incredible.
Watch out! Skipping the fridge step makes sad, flat-tasting chili. I learned this the hard way during my “I’m too tired” phase. The overnight rest transforms it from “meh” to “WOW.”
Serving Suggestions for Dump and Go Chili
Now for the fun part – loading up those bowls! Here’s how we Frosts do it:
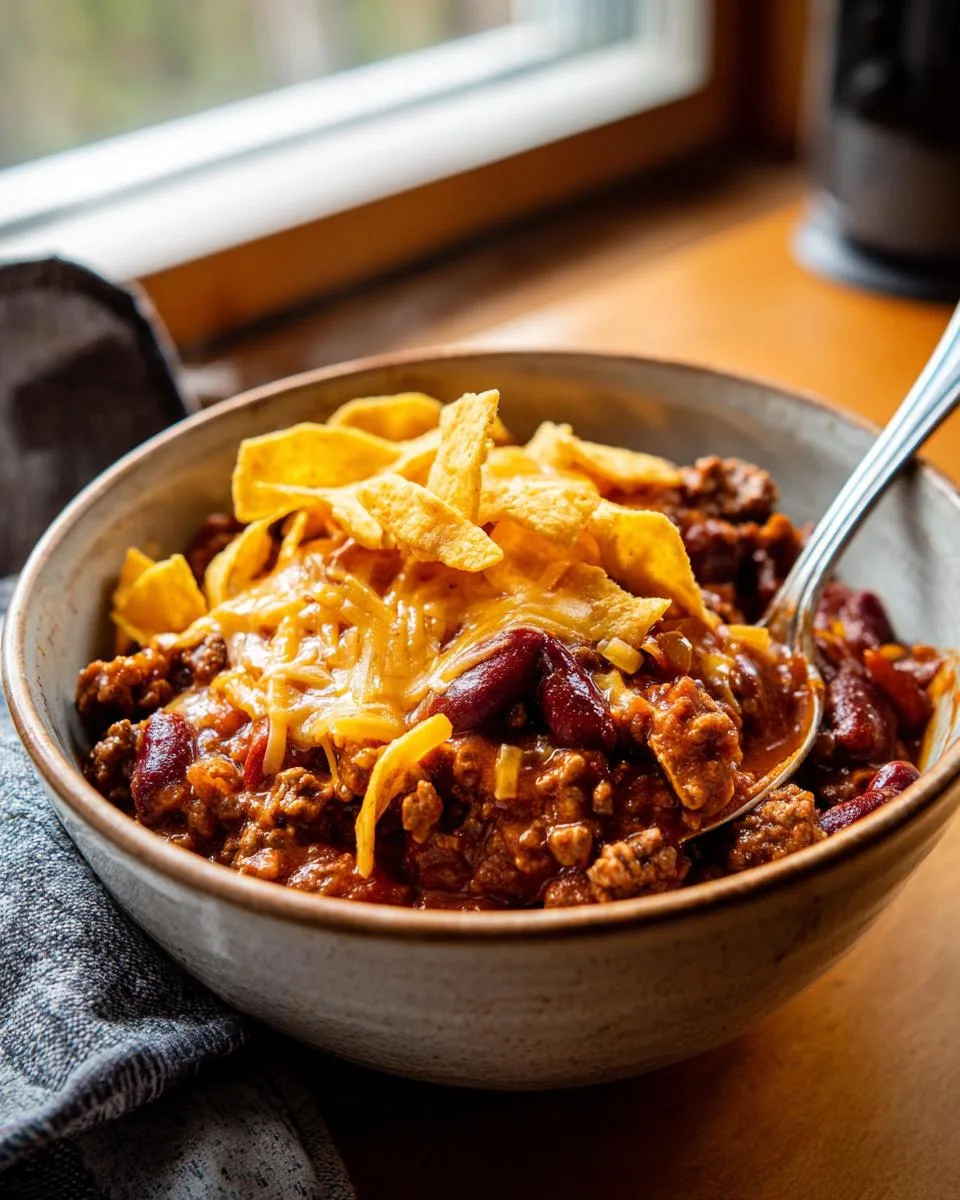
- Frito Pie: Crush Fritos in the bottom of bowls, ladle chili overtop, then bury under cheddar cheese. Let the chips get slightly soggy – that’s the good stuff.
- Chili Slaw Dogs: First night? Spoon chili over hot dogs, top with tangy coleslaw. My kids go nuts for this.
- Baked Potato Topper: Leftovers? Split open a baked potato and smother it with reheated chili.
- The Works: Sour cream, diced onions, jalapeños, shredded cheese – let everyone customize their bowl.
- Cornbread Sidekick: Sweet cornbread balances the spice perfectly. Store-bought mix works great in a pinch!
Pro tip: Double the recipe – it freezes beautifully for those “I can’t even” nights. Just thaw and reheat with a splash of water to loosen it up.
Tips for the Best Dump and Go Chili
After making this chili more times than I can count (and surviving plenty of kitchen mishaps), here are my hard-won secrets for chili perfection:
- Brown like you mean it: Don’t just gray the beef – get real caramelization going! Those crispy brown bits equal flavor gold. I wait until my skillet sizzles when the beef hits it.
- Drain smart: Tilt your skillet and use a spoon to scoop out fat into an old can (way easier than paper towel mess). Leave about 1 tbsp for flavor.
- Water works wonders: Add half the water first, then more as needed after the overnight rest. Too thin? Leave the lid off the last hour of cooking.
- Spice wisely: Go light on salt initially – the seasoning packet adds plenty. You can always stir in more chili powder or cayenne later.
- Patience pays: That overnight fridge time isn’t optional! The flavors develop so much depth – like chili magic happens while you sleep.
- Fat is flavor: Using 80/20 beef makes a noticeable difference. If you go leaner, add 1 tbsp olive oil when browning.
- Bean prep matters: Rinse those beans well unless you want thick, starchy chili (which some folks prefer – no judgment!).
One last thing – if your chili looks too watery at first, don’t panic! It thickens beautifully during the second cook. I’ve ruined batches by adding thickeners too soon. Now I just walk away and trust the process.
Print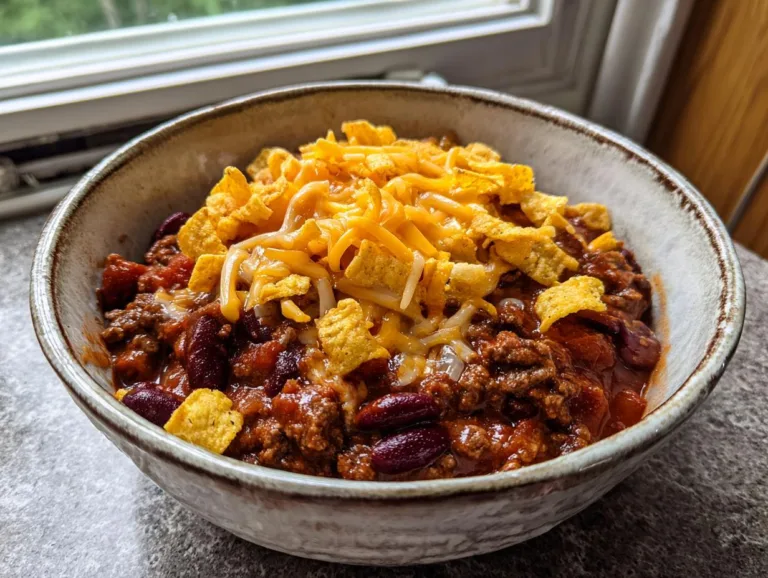
10-Minute Dump and Go Chili: Effortless Perfection
Easy dump-and-go crockpot chili with ground beef and beans. Perfect for busy days.
- Total Time: 10 hours 15 mins
- Yield: 8 servings 1x
Ingredients
- 1 lb ground beef
- 2 cans dark kidney beans (32 total oz)
- 2 cans Rotel diced tomatoes and green chilies (20 total oz)
- 1 tablespoon minced garlic
- 1 tablespoon Worcestershire sauce
- 16 oz water
- 2 teaspoons celery salt
- 2 teaspoons black pepper
- 1 teaspoon paprika
- 1 teaspoon chili powder
- 1 McCormick chili seasoning packet
- Scoops Fritos (for serving)
- Shredded cheddar cheese (for serving)
Instructions
- Season the ground beef with minced garlic, Worcestershire sauce, celery salt, black pepper, paprika, and chili powder. Brown the beef and drain.
- Add beef, beans, Rotel, chili seasoning, and water to the crock pot. Stir well.
- Cook on low for 5 hours. Refrigerate overnight.
- The next day, cook on low for another 5 hours.
- Serve with shredded cheese and Fritos.
Notes
- Use for chili slaw dogs on the first night.
- Adjust spices to taste.
- Prep Time: 15 mins
- Cook Time: 10 hours
- Category: Main Dish
- Method: Slow Cooker
- Cuisine: American
- Diet: Low Lactose
Nutrition
- Serving Size: 1 bowl
- Calories: 350
- Sugar: 5g
- Sodium: 800mg
- Fat: 12g
- Saturated Fat: 4g
- Unsaturated Fat: 6g
- Trans Fat: 0g
- Carbohydrates: 35g
- Fiber: 8g
- Protein: 25g
- Cholesterol: 50mg
Storage and Reheating Instructions
Okay, let’s talk leftovers – because this chili actually gets better as it sits! Here’s how to keep it tasting amazing:
- Fridge storage: Scoop cooled chili into airtight containers (I use old deli containers – free and perfect size). It’ll keep for 4 days easy. The flavors keep deepening – day 3 chili might be the best!
- Reheating magic: On the stove? Add a splash of water and warm gently, stirring often. Microwave? Cover with a damp paper towel and zap in 1-minute bursts, stirring between. The steam keeps it from drying out.
- Freezer friendly: Portion into freezer bags (lay flat to save space) or containers. It’ll stay good for 3 months – just thaw overnight in the fridge before reheating.
Pro tip: When freezing, leave about an inch of space at the top – chili expands as it freezes. Learned that the messy way when my favorite container cracked!
My favorite freezer hack? Freeze individual portions in muffin tins, then pop out the “chili pucks” into a bag. Perfect for quick lunches – just microwave one or two pucks with a little water.
Dump and Go Chili FAQs
I’ve gotten so many questions about this chili over the years – here are the ones that pop up most often with my tried-and-true answers:
Can I skip the overnight refrigeration step?
Oh honey, I wish! But no – that fridge time is non-negotiable if you want the deep, rich flavor this chili is famous for. The first time I tried skipping it? Total disappointment – tasted flat and one-dimensional. Trust me, plan ahead for that overnight rest.
What if I only have ground turkey or chicken?
No problem! Just add 1 tablespoon of olive oil when browning since poultry is leaner. The flavor changes slightly but still tastes amazing. My sister makes it with turkey all the time and raves about it.
How can I make this chili spicier?
Three easy ways: 1) Use hot Rotel instead of mild, 2) Add 1/2 teaspoon cayenne with the other spices, or 3) Stir in diced jalapeños when serving. My husband adds all three – his bowl looks dangerous!
Can I cook this faster on high heat?
Technically yes (4 hours on high), but low and slow gives better flavor. The longer cook time lets the spices really bloom. If you’re rushed, do the first cook on high but still refrigerate overnight before finishing.
Why does my chili look watery after the first cook?
Don’t panic! The beans and meat absorb liquid during the overnight rest. By the second cook, it thickens perfectly. If it’s still too thin at the end, remove the lid and cook another 30 minutes to evaporate excess liquid.
Nutritional Information
Okay, let’s talk numbers – but remember, these are just estimates since ingredients vary. Here’s the breakdown per serving (about 1 generous bowl):
- 350 calories – Perfectly hearty without being heavy
- 12g fat – Mostly from that flavorful beef
- 35g carbs – Hello, beans and Fritos!
- 25g protein – Keeps you full for hours
A few notes: These numbers don’t include toppings (cheese lovers, I see you!). Using leaner meat or turkey drops the fat content. And if you’re watching sodium, go easy on the seasoning packet or use a low-sodium version.
Honestly? I don’t count calories with this chili – I just enjoy every messy, delicious bite. But it’s nice to know it’s got decent nutrition hiding under all that cheesy Frito goodness!
Rate This Recipe
I’d love to hear how your dump and go chili turns out! Did your kids go crazy for the Frito topping like mine do? Maybe you discovered an amazing new spice combo? Drop a comment below – your tips might help another busy cook out there.
Snap a pic of your cheesy, messy masterpiece and tag me on social – nothing makes me happier than seeing your kitchen wins! And hey, if something didn’t work quite right, tell me that too. I’ve been making this recipe for years and still learn new tricks from readers. Follow along for more kitchen updates!
This chili has been my family’s lifeline on crazy nights, and I hope it becomes yours too. Now go enjoy that first bite – you’ve earned it!