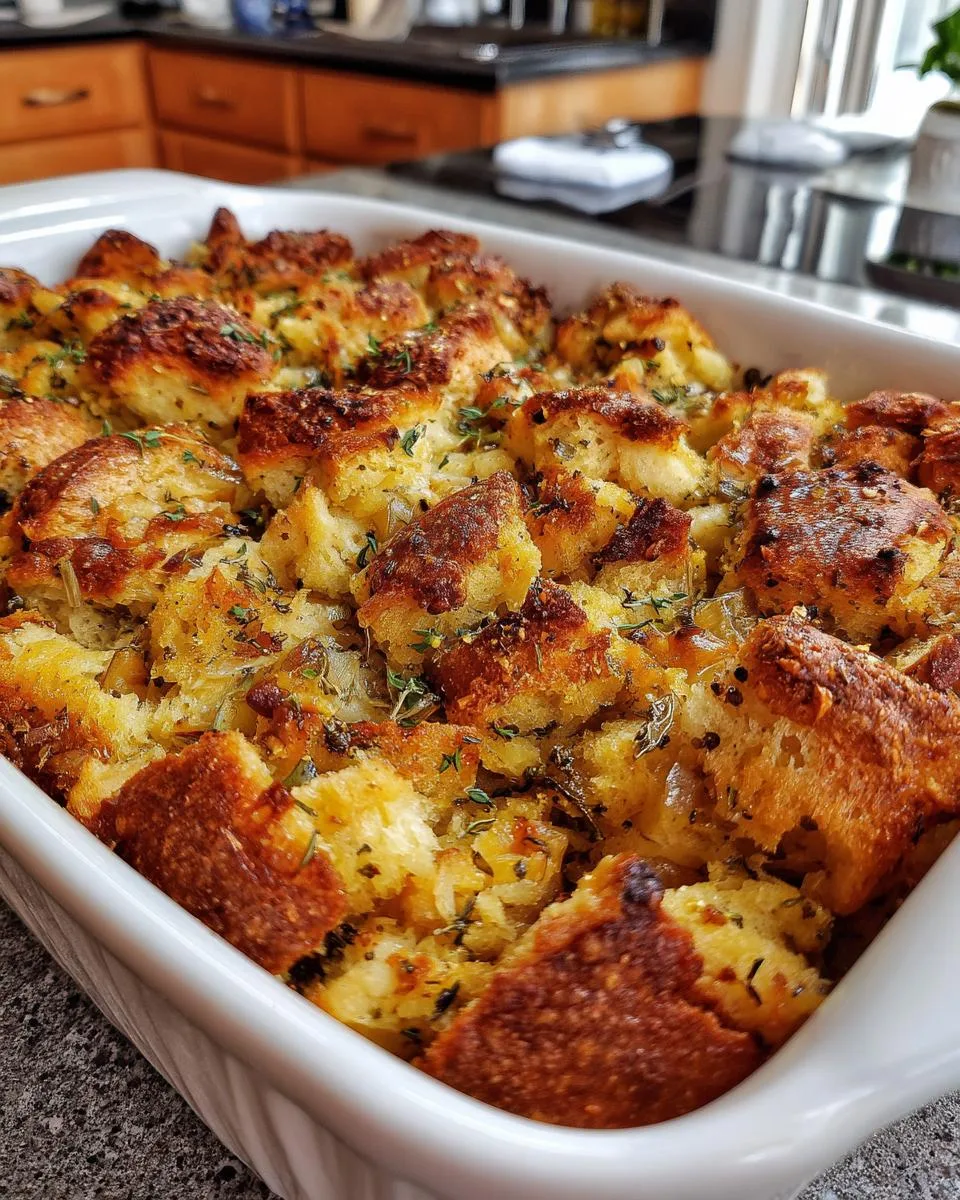
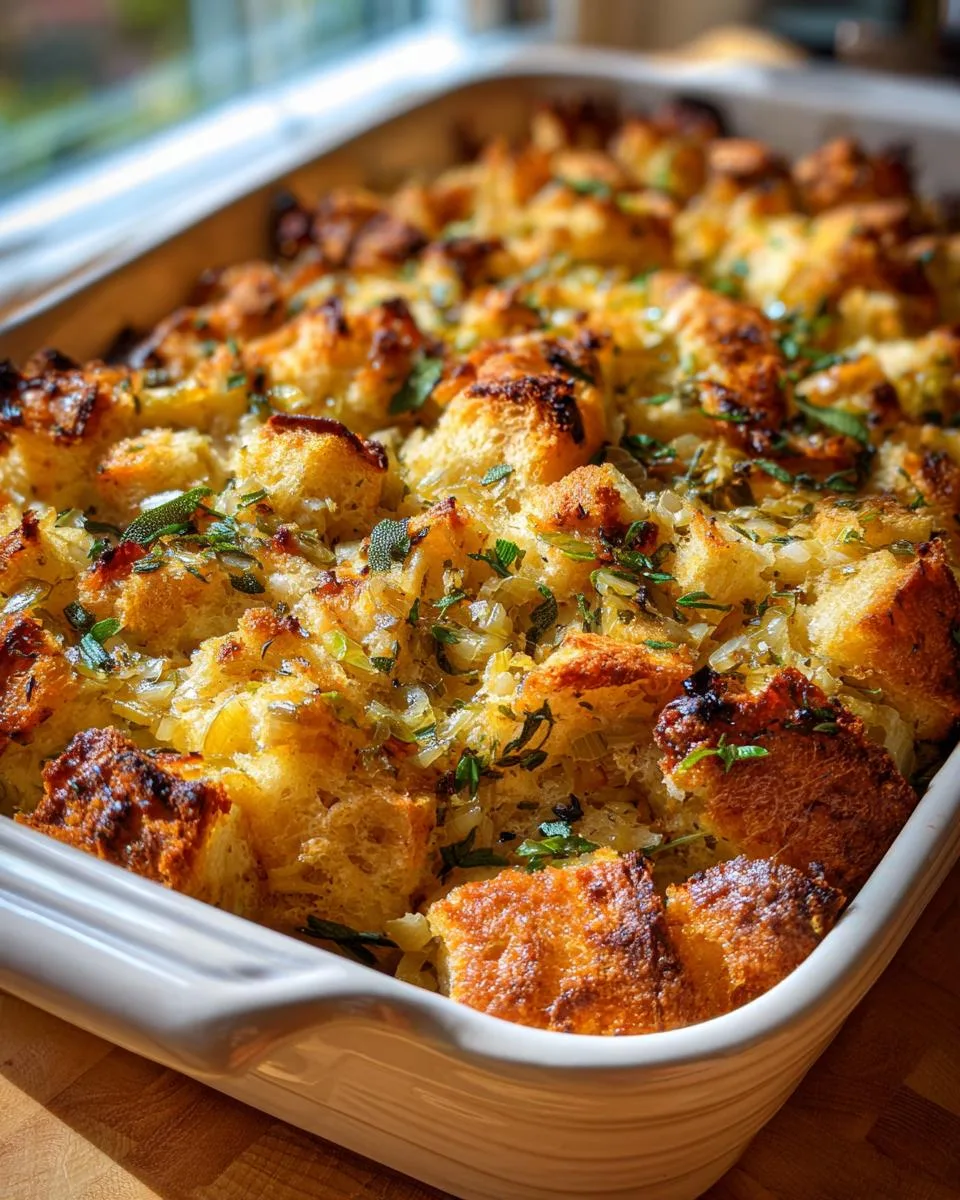
When I think of Thanksgiving, I can almost smell the aroma of Grandma’s stuffing wafting through the house. It’s the scent of tradition, love, and a table full of laughter. Her recipe – a mix of sourdough or French bread, fresh herbs, and perfectly sautéed vegetables – has been a staple in our family for as long as I can remember. There’s something magical about the way the bread soaks up the broth, the herbs infuse every bite, and the vegetables add just the right amount of crunch.
Grandma always said, “A good stuffing is the heart of the meal.” And she wasn’t wrong. Every year, we’d gather around the table, and her stuffing would be the star of the show. It’s not just a side dish – it’s a memory, a connection to those who came before us. Whether you’re keeping it classic or adding your own twist, this recipe is more than food; it’s a piece of home. Trust me, once you try it, you’ll understand why it’s been a family favorite for generations.
Table of Contents
Table of Contents
Why You’ll Love Grandma’s Thanksgiving Stuffing Recipe
Listen, I get it—there are *a lot* of stuffing recipes out there. But Grandma’s? It’s special, and here’s why you’re going to adore it as much as we do:
- Classic flavor that tastes like home: The combo of toasted bread, buttery veggies, and fresh herbs is simple but *so* right. One bite, and you’ll swear you’re back at Grandma’s table.
- Perfect texture—every time: Crispy on top, tender underneath. No mushiness here! Letting the bread dry overnight (or toasting it) is the secret weapon.
- Easy to make, hard to mess up: No fancy techniques—just good ol’ mixing and baking. Even if you’re a stuffing newbie, Grandma’s method guides you to success.
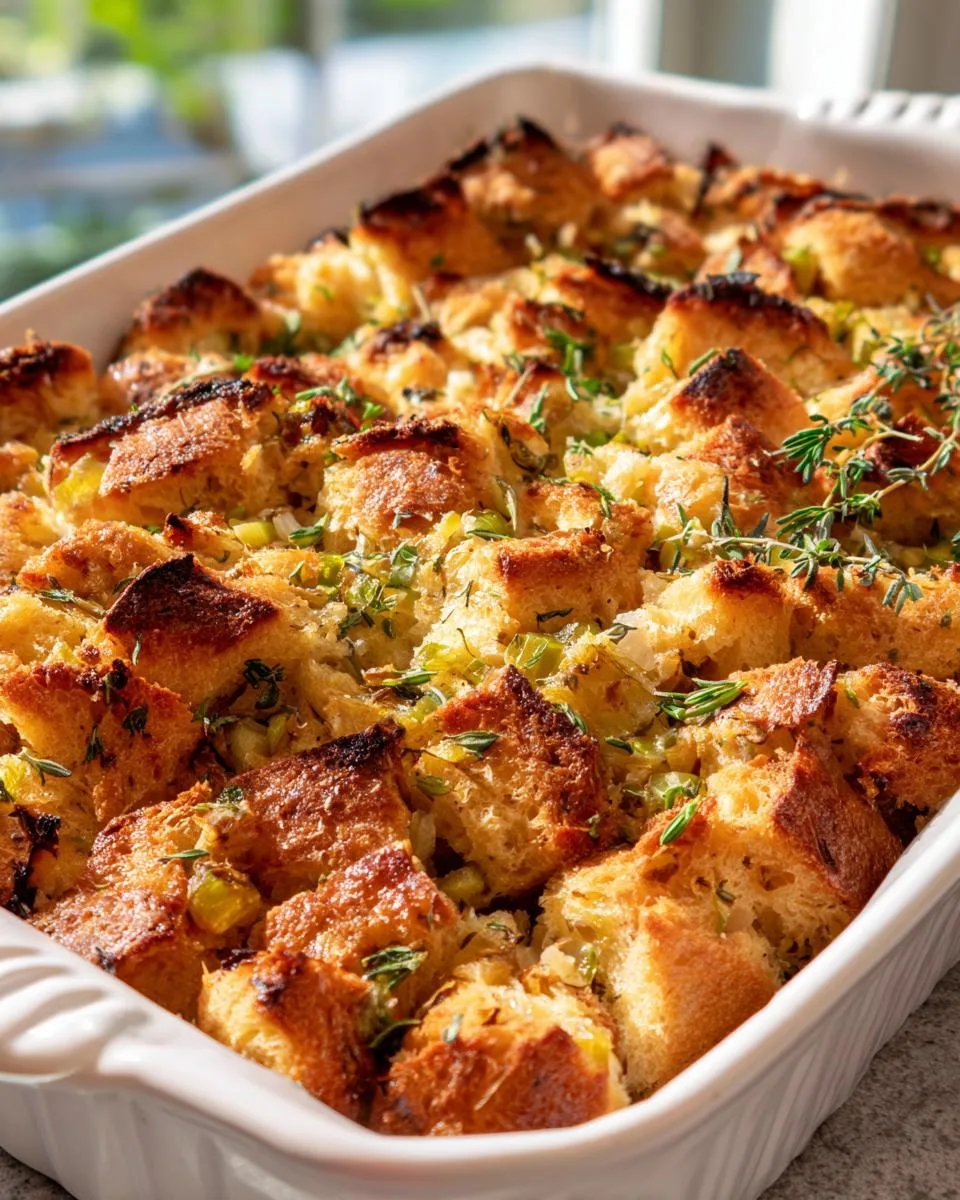
- Fresh herbs make all the difference: That sage-thyme-rosemary trio? Magic. Dried herbs can’t compete with the bright, earthy punch of fresh.
- Customize your moisture level: Like it extra moist? Add a splash more broth. Prefer it drier? Go light. Grandma’s recipe adapts to *your* taste.
- Leftovers taste even better: Seriously—the flavors cozy up overnight. Next-day stuffing sandwiches? *Yes, please.*
This isn’t just stuffing—it’s comfort food with history. And once you try it, you’ll understand why it’s been passed down in our family for decades.
Ingredients for Grandma’s Thanksgiving Stuffing Recipe
Grandma never believed in cutting corners—especially when it came to her legendary stuffing. Every ingredient mattered, and she’d waggle her wooden spoon at you if you tried to skip a step. Here’s exactly what you’ll need to make her masterpiece:
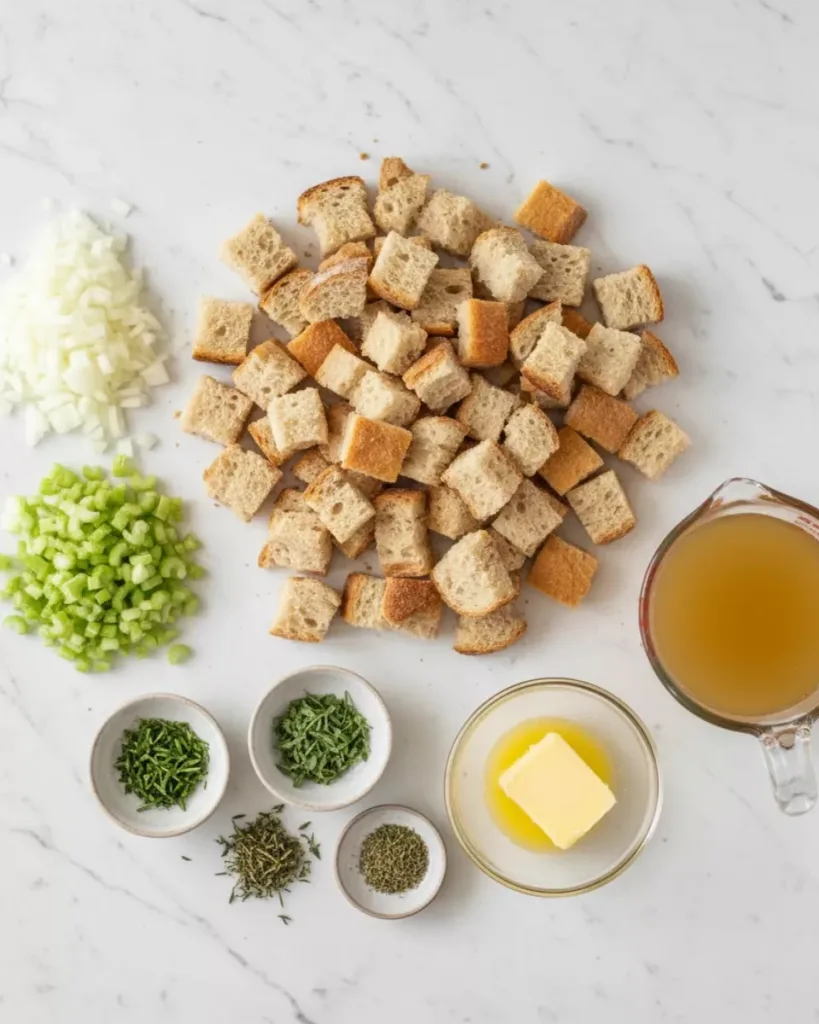
- Bread (sourdough or French): 10 cups cubed—day-old is best! Grandma insisted on letting it sit out overnight to dry, but if you’re short on time, a quick toast works too. Just don’t tell her I said that.
- Onion: 1 large, finely diced. None of those chunky pieces—Grandma wanted them small enough to melt into every bite.
- Celery: 2 cups, finely chopped (about 3-4 stalks). She’d say, “Celery’s the backbone of flavor—don’t rush it!”
- Fresh herbs: 2 tbsp sage, 2 tbsp thyme, 1 tbsp rosemary (all finely chopped). Dried herbs? “Absolutely not,” she’d huff. Fresh or bust.
- Low-sodium broth: 4 cups (chicken or vegetable). Grandma preferred chicken for richness, but vegetable works beautifully too.
- Unsalted butter: ½ cup (1 stick), melted. Real butter only—no substitutes. “Margarine belongs nowhere near my stuffing,” she’d declare.
- Salt and pepper: To taste. Start light—you can always add more later.
That’s it! Simple, honest ingredients—just like Grandma liked ‘em. Now, roll up your sleeves. We’ve got stuffing to make.
How to Make Grandma’s Thanksgiving Stuffing Recipe
Okay, here’s where the magic happens! Grandma’s stuffing isn’t hard—just a little methodical. Follow these steps, and you’ll have a dish that’ll make everyone at the table sigh with happiness. Promise.
Preparing the Bread and Vegetables
First things first: the bread. Grandma would tear into a loaf with her hands, but if you’re a neat freak like me, a serrated knife works too. Cut your sourdough or French bread into ½-inch cubes—not too big, not too small. Spread them on a baking sheet and let them dry overnight. (No time? A quick 10-minute toast at 300°F works in a pinch.)
Now, the veggies. Grab that onion and celery—dice them finely. Really finely. Grandma always said, “You shouldn’t get a mouthful of onion—just the flavor.” The celery should be in tiny, even pieces so it cooks down soft but still gives a little texture. Trust me, uneven chopping leads to uneven bites, and nobody wants that.
Cooking the Vegetable Mixture
Melt that butter in a big skillet over medium heat. (Don’t let it brown—just melt it gently.) Toss in your onions and celery, stirring often. You’re not looking for color here—just tenderness. About 5-7 minutes should do it. They’ll turn slightly translucent and smell sweet. That’s when you hit them with a pinch of salt and pepper. Grandma’s rule? Season as you go. “Flavor builds in layers,” she’d say.
Combining and Baking the Stuffing
Dump your bread cubes into a giant mixing bowl. Pour that buttery veggie mixture over them, then sprinkle in all those gorgeous fresh herbs. Toss it gently—like you’re folding a delicate blanket, not wrestling with laundry. Now, the broth. Pour it in gradually, stirring as you go. You want every cube moist but not swimming. (Grandma’s trick? Stop when the bread holds together slightly when squeezed.)
Transfer everything to a greased baking dish, cover it tightly with foil, and bake at 350°F for 30 minutes. Then, the grand finale—peel off the foil and bake another 15 minutes, until the top turns golden and crisp. That contrast of soft inside and crunchy top? *Chef’s kiss.* Grandma knew what she was doing.
Tips for Perfect Grandma’s Thanksgiving Stuffing Recipe
Alright, let’s talk pro tips—because even though Grandma’s stuffing recipe is foolproof, a few little tricks will take it from good to ”can I have thirds?” level. Here’s how to nail it every time:
Don’t rush the bread
Grandma was obsessed with texture. She’d let her bread cubes dry overnight on the counter—no covering, just spread out on a baking sheet. This gives you that perfect balance of crisp edges and soft centers after baking. In a hurry? Toast the cubes at 300°F for 10-15 minutes, tossing halfway. They should feel dry but not rock-hard.
Fresh herbs or bust
That little plastic jar of dried sage in your spice rack? Hide it. Fresh herbs are non-negotiable here—they’re brighter, more aromatic, and won’t turn your stuffing into a dusty mess. Chop them right before adding (no pre-chopping—they’ll wilt!). Pro move: rub the sage between your fingers first to release its oils. Grandma swore it made the flavor “sing.”
Broath is your best friend (or enemy)
Adding broth is like Goldilocks’ porridge: too little, and your stuffing’s dry; too much, and it’s soup. Pour slowly, stirring as you go, and stop when the bread holds together lightly when squeezed. Test a cube—it should feel moist but not soggy. And warm broth absorbs better than cold!
The foil trick
Covering with foil for the first 30 minutes steams the stuffing to tender perfection. Peek at the 20-minute mark—if it looks too dry, spritz with a little extra broth. Then, uncover and let the top get gloriously crispy. That contrast? *Chef’s kiss.* Grandma’s signature move.
Check for doneness like a pro
No thermometers needed—just press the center lightly with your finger. If it springs back, it’s done. Still squishy? Give it 5 more minutes. The edges should be golden brown, and you should smell that herby-buttery magic filling your kitchen.
Follow these tips, and your stuffing will earn a permanent spot at the Thanksgiving table—just like Grandma’s did.
Print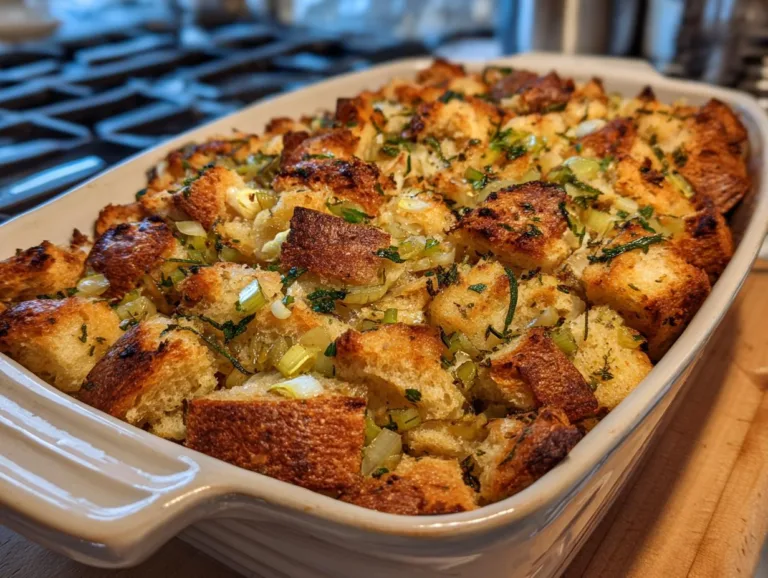
Grandma’s Thanksgiving Stuffing Recipe – 10 Cups Of Comfort
A classic Thanksgiving stuffing recipe with sourdough or French bread, fresh herbs, and sautéed vegetables.
- Total Time: 65 minutes
- Yield: 8 servings
Ingredients
- Bread (sourdough or French): 10 cups cubed
- Onion: 1 large, finely diced
- Celery: 2 cups, finely chopped (about 3-4 stalks)
- Fresh herbs: 2 tbsp sage, 2 tbsp thyme, 1 tbsp rosemary (all finely chopped)
- Low-sodium broth: 4 cups (chicken or vegetable)
- Unsalted butter: ½ cup (1 stick), melted
- Salt and pepper: To taste
Instructions
- Preheat oven to 350°F (175°C). Cube the bread and allow it to dry overnight or toast it lightly. Finely chop the onion, celery, and fresh herbs.
- Melt butter in a large skillet over medium heat. Add the onion and celery, cooking until tender (5-7 minutes). Season lightly with salt and pepper.
- Place bread cubes in a large mixing bowl. Pour the sautéed vegetable mixture over them. Add chopped herbs, then season with additional salt and pepper. Gradually stir in warm broth until the mixture is evenly moistened.
- Transfer the stuffing to a greased baking dish. Cover with aluminum foil and bake for 30 minutes. Remove foil and bake an additional 15 minutes, or until the top is golden brown and crisp.
Notes
- Let the bread dry overnight for best texture.
- Adjust broth amount based on desired moisture.
- Use fresh herbs for best flavor.
- Prep Time: 20 minutes
- Cook Time: 45 minutes
- Category: Side Dish
- Method: Baking
- Cuisine: American
- Diet: Low Salt
Nutrition
- Serving Size: 1 cup
- Calories: 220
- Sugar: 2g
- Sodium: 300mg
- Fat: 8g
- Saturated Fat: 4g
- Unsaturated Fat: 3g
- Trans Fat: 0g
- Carbohydrates: 32g
- Fiber: 2g
- Protein: 5g
- Cholesterol: 15mg
Variations for Grandma’s Thanksgiving Stuffing Recipe
Now, here’s the fun part—Grandma’s recipe is like a blank canvas. She’d wink and say, “Make it yours, honey.” Whether you’re craving something heartier, sweeter, or just a little different, here are my favorite twists that still honor her classic:
Sausage lovers, this one’s for you
Brown ½ pound of Italian sausage (casings removed) right after the onions and celery. Grandma’s neighbor, Mrs. Higgins, swore by this trick. The savory, garlicky crumbles seep into every bite—just drain excess grease before mixing with the bread. Bonus: Swap chicken broth for apple cider broth if you’re feeling fancy.
Sweet & savory with cranberries and nuts
Grandma’s cousin from Vermont always tossed in a handful of dried cranberries and toasted pecans. The tart-sweet pop against the herbs? *Divine.* Stir in ¾ cup cranberries and ½ cup chopped nuts (pecans, walnuts, even hazelnuts work) with the bread cubes. Pro tip: Toast the nuts first—Grandma said it “wakes ‘em up.”
Herb-swapping adventures
No sage? No problem. Try tarragon and parsley for a fresher vibe, or marjoram and chives for something delicate. Grandma once used lemon thyme when her sage plant froze—best accident ever. Just keep the total herb volume about the same (around 5 tbsp).
Bread experiments
Sourdough and French bread are classics, but cornbread? *Game-changer.* Use slightly less broth since it’s more absorbent. Or go wild with rye bread for a deeper flavor—Grandma’s bridge club adored that version. Day-old baguettes or ciabatta work too, but avoid super-soft sandwich bread (it turns to mush).
The beauty of this recipe? It’s forgiving. Add sautéed mushrooms, swap butter for duck fat, or throw in crispy bacon bits. Grandma’s base stays golden—literally—while you make it your own. Just promise me one thing: whatever you add, taste as you go. “Your tongue knows best,” she’d say, handing me the wooden spoon.
Serving Suggestions for Grandma’s Thanksgiving Stuffing Recipe
Let’s be real—Grandma’s stuffing could stand alone with just a fork and a happy sigh. But when it’s time to plate up for the big feast, here’s how to make it shine alongside the classics (and maybe steal the show).
The Ultimate Thanksgiving Plate
Picture this: a generous scoop of stuffing nestled next to slices of juicy roast turkey, a cloud of buttery mashed potatoes, and a river of rich gravy. That’s the dream team. Drizzle a little extra gravy over the stuffing just before serving—Grandma called it “the ribbon on the present.” Add a side of tart cranberry sauce for that sweet-savory bite, and oh boy, you’ve got perfection on a plate.
Holiday Presentation Magic
Forget boring baking dishes—Grandma believed food should look as good as it tastes. Try these simple upgrades:
- Stuffing muffins: Bake individual portions in a greased muffin tin (about 20 minutes). Pop them out, and boom—adorable, crusty-edged servings. Kids go wild for ‘em.
- Hollowed-out squash bowls: Roast small acorn or delicata squash, scoop out the seeds, and fill with stuffing. Looks fancy, tastes cozy.
- Garnish game: A sprinkle of chopped parsley or fried sage leaves on top? Instant holiday vibes. Bonus points for edible flowers if you’re feeling extra.
Beyond Thanksgiving
This stuffing isn’t just for holidays! Serve it with:
- Roast chicken: Tuck it under the bird during the last 30 minutes of roasting—the drippings? *Chef’s kiss.*
- Brunch twist: Top with a fried egg and call it “Thanksgiving hash.” (Grandma would approve.)
- Leftover sandwiches: Layer cold stuffing between slices of sourdough with cranberry sauce and turkey. Toast it. Thank me later.
However you serve it, don’t skimp on the love—Grandma’s first rule. “Food tastes better when it’s shared,” she’d say, passing the dish with flour-dusted hands. And as always, seconds (and thirds) are mandatory.
Storing and Reheating Grandma’s Thanksgiving Stuffing Recipe
Okay, let’s talk leftovers—because let’s be honest, Grandma’s stuffing is *too good* not to make extra. Here’s how to keep it tasting fresh and fabulous for days (or months!) after the feast.
Fridge Storage (The Short Game)
Got leftovers? Lucky you! Let the stuffing cool *completely* (Grandma would wag her finger at steaming-hot food going into the fridge—it creates condensation and turns your crispy top soggy). Transfer it to an airtight container, and it’ll stay delicious for up to 4 days.
Freezer Storage (The Long Game)
Grandma was a freezer queen—she’d stash individual portions for “emergencies” (her code for sudden stuffing cravings). Here’s her method:
- Divide cooled stuffing into meal-sized portions.
- Wrap tightly in plastic wrap, then foil (or use freezer bags, squeezing out all the air).
- Label with the date—it keeps for 3 months. After that? Still safe, but the texture starts to suffer.
Pro tip: Freeze flat in bags for quicker thawing. Grandma always forgot this part, hence the mystery “stuffing bricks” we’d dig out in July.
Reheating Like a Pro
Oven method (best for texture): Grandma’s go-to! Preheat to 350°F. For fridge-cold stuffing, spread it in a baking dish, sprinkle with 1-2 tbsp broth or water, cover with foil, and bake for 20 minutes. Uncover and bake 10 more minutes to re-crisp the top. Frozen? Thaw overnight in the fridge first, or add 10-15 extra minutes covered.
Microwave (for emergencies only): Grandma frowned upon this, but hey—we’re all busy. Place a portion in a microwave-safe dish, cover with a damp paper towel, and heat in 30-second bursts, fluffing with a fork between zaps. It won’t be *quite* as perfect, but it’ll do in a pinch.
Skillet revival (Grandma’s secret hack): Crumble leftover stuffing into a hot, buttered skillet over medium heat. Press lightly and let it crisp up into a stuffing “pancake.” Flip once. Serve with a fried egg on top—breakfast of champions.
However you reheat it, a little extra love (read: butter or gravy) never hurts. Just like Grandma used to say, “Leftovers are the cook’s reward for not eating it all the first night.” Wise woman.
Nutritional Information for Grandma’s Thanksgiving Stuffing Recipe
Now, let’s be real—Grandma never counted calories (her famous words: “Love isn’t measured in grams!”). But for those who like to know, here’s the approximate nutritional breakdown per 1-cup serving. Remember, these values can wiggle a bit depending on your exact ingredients—especially if you add sausage, extra butter (no judgment), or swap broths.
- Calories: 220
- Fat: 8g (4g saturated, 3g unsaturated)
- Carbohydrates: 32g
- Fiber: 2g
- Sugar: 2g
- Protein: 5g
- Sodium: 300mg (less if you use low-sodium broth and go light on added salt)
- Cholesterol: 15mg
Important note: These numbers are estimates based on the base recipe with chicken broth and unsalted butter. If you use vegetable broth, add sausage, or tweak the bread type, your mileage may vary. Grandma’s stance? “Eat what makes you happy—nutrition labels don’t tell the whole story.” (Though she’d also remind you to save room for pie.)
Frequently Asked Questions About Grandma’s Thanksgiving Stuffing Recipe
Over the years, I’ve gotten so many questions about Grandma’s stuffing—some from frantic cousins mid-cooking panic. Here are the answers to the big ones, straight from her recipe card (and my own trial-and-error disasters).
Can I use dried herbs instead of fresh?
*Grandma’s voice:* “I’d rather you skip ‘em!” But if you’re truly in a pinch, use ⅓ the amount (dried herbs are more concentrated). So, 2 tsp dried sage + 2 tsp dried thyme + 1 tsp dried rosemary. Crush them between your fingers first to wake up their flavor. Just promise me you’ll try fresh next time—it’s a game-changer.
Help! How do I prevent soggy stuffing?
Three words: dry your bread. Fresh bread turns to mush—Grandma insisted on stale or toasted cubes. Also, add broth gradually until moist but not wet (think damp sponge, not puddle). And never cover leftovers until fully cooled—steam = sogginess.
Can I make it ahead of time?
Absolutely! Grandma prepped hers the night before:
- Dry bread + chop veggies/herbs—store separately.
- Sauté veggies—cool, then fridge in a container.
- Day-of: Mix everything + broth, then bake. Easy-peasy.
Bonus: Fully baked stuffing reheats beautifully—just splash with broth before warming.
What if I don’t have sourdough or French bread?
Cornbread, ciabatta, or even whole wheat sandwich bread (toasted extra-crispy) works. Avoid super-soft white bread—it disappears into glue. Grandma once used leftover biscuits in desperation… and it’s now Uncle Dave’s favorite version.
Can I cook stuffing inside the turkey?
*Grandma clutching her pearls:* “Too risky!” Bacteria love moist, warm environments. Bake it separately—your guests (and their stomachs) will thank you. That said, drizzle turkey drippings over the baked stuffing for that classic flavor.
How do I know when it’s done baking?
No thermometers needed—Grandma’s finger test never failed. Press the center lightly: if it springs back, it’s ready. The top should be golden, edges slightly crisp, and your kitchen should smell like Thanksgiving heaven.
Still got questions? Slide into the comments below—I’m happy to help! Now go make Grandma proud (and tag me when you do—I live for stuffing photos). Connect with us on Facebook for more delicious recipes and tips!