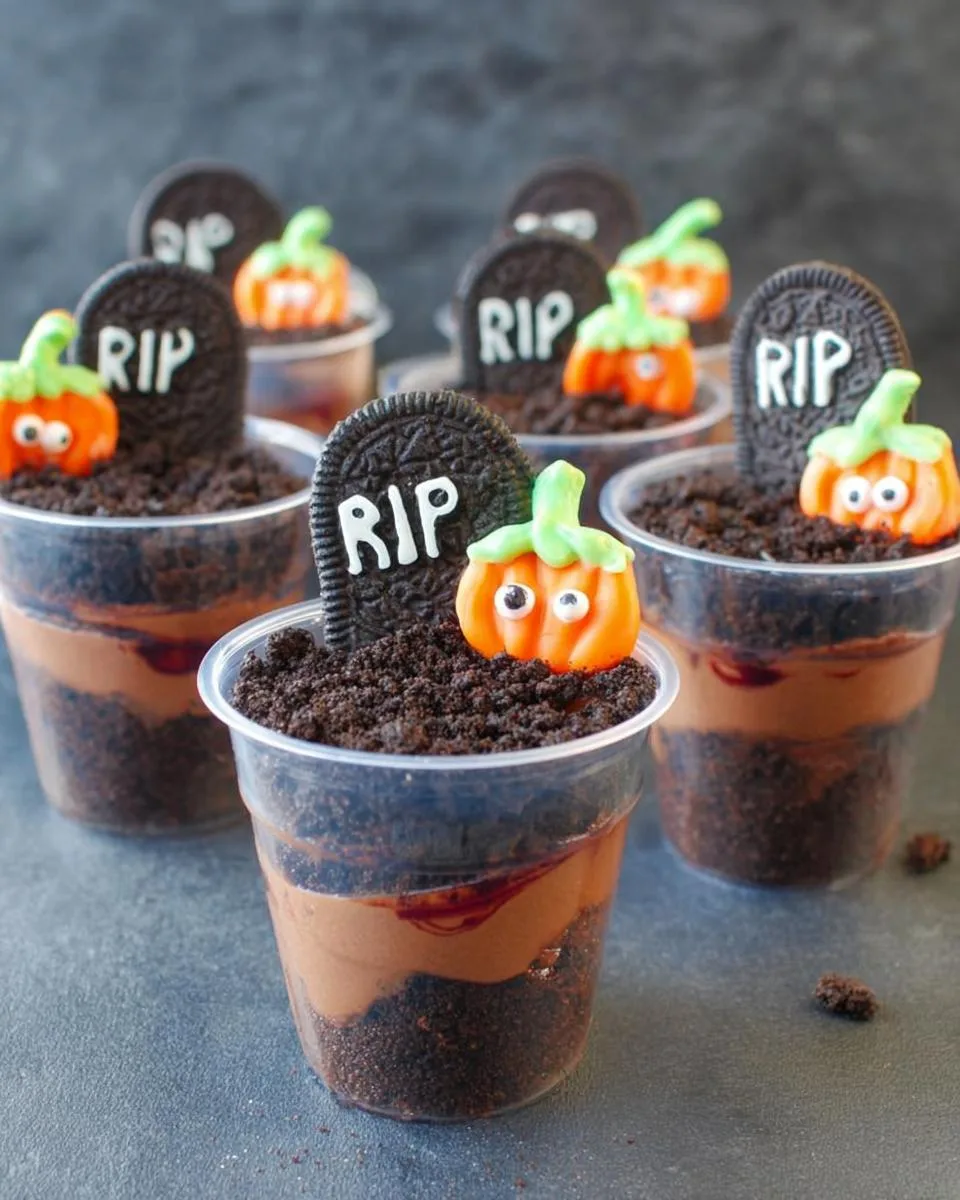
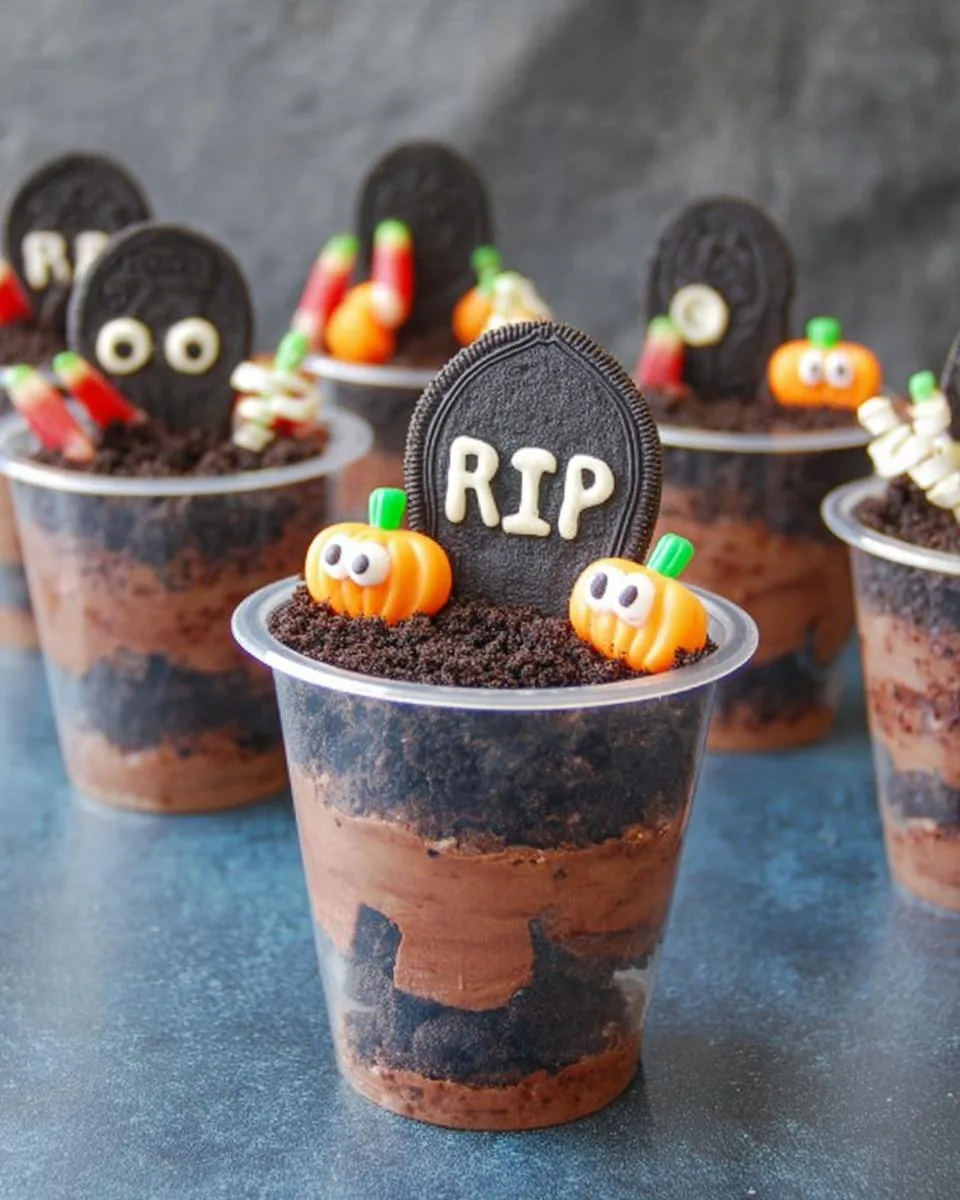
Oh my gosh, you HAVE to try these Graveyard Chocolate Pudding Cups – they’re the easiest, spookiest Halloween treat that always steals the show at our house! Picture this: layers of creamy chocolate pudding, crunchy Oreo “dirt,” and adorable edible tombstones peeking out. My kids go wild decorating them (and sneaking extra gummy worms when they think I’m not looking). As a busy mom who loves fuss-free recipes, I promise these come together in just 15 minutes flat – no baking required! Trust me, these little edible graveyards will have your Halloween party guests screaming…for seconds.
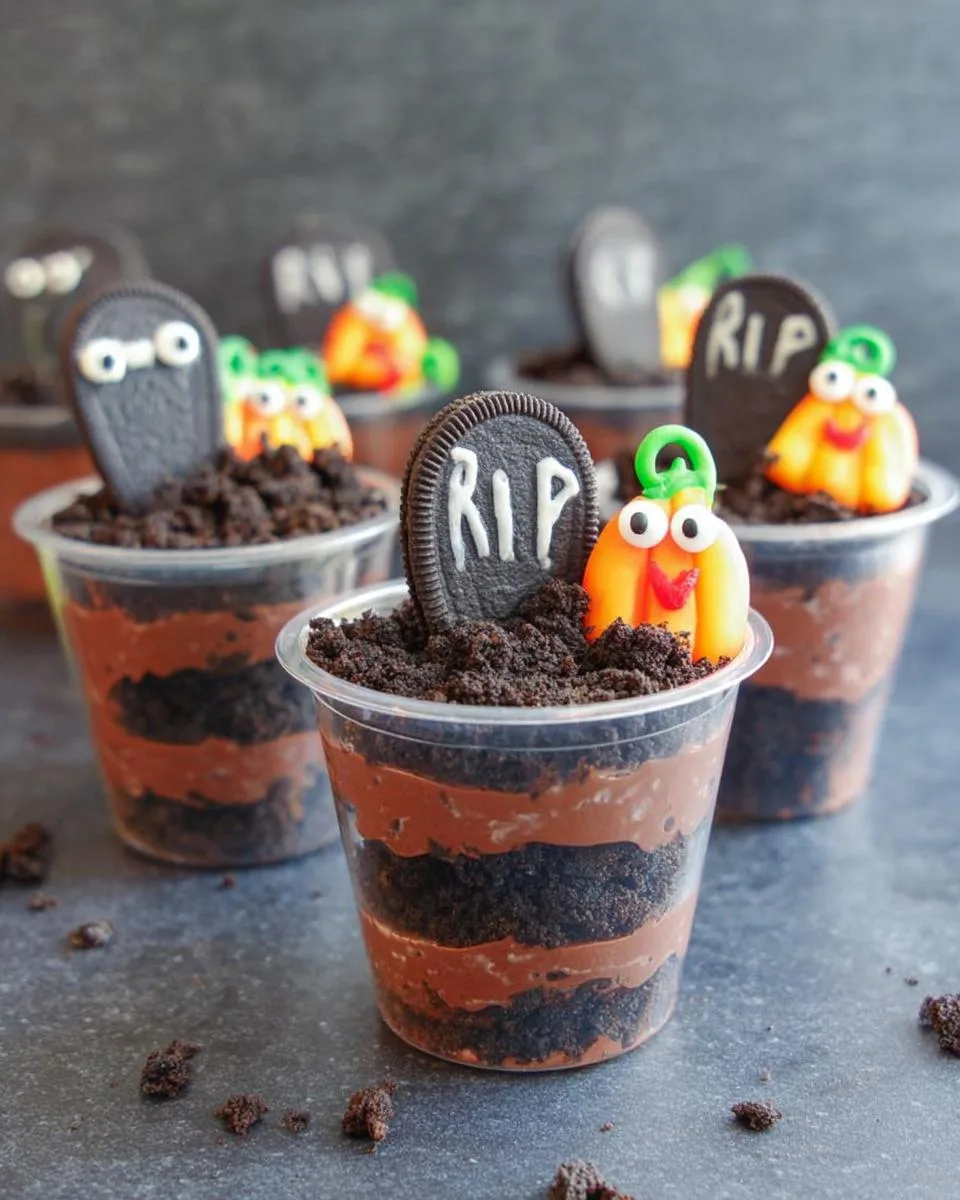
Table of Contents
Table of Contents
Why You’ll Love These Graveyard Chocolate Pudding Cups
These spooky little desserts are an absolute *must* for Halloween – here’s why they’re always a hit in our house:
- 15-minute magic – No baking, no waiting, just instant Halloween fun
- Kids go crazy for decorating (and taste-testing the Oreo “dirt”)
- Looks fancy but couldn’t be simpler – foolproof layers every time
- Customizable to your spook level – go wild with gummy worms or keep it cute
- The perfect party dessert – make them ahead and watch them disappear!
Honestly? The hardest part is keeping little hands away until serving time!
Ingredients for Graveyard Chocolate Pudding Cups
Okay, let’s gather our “grave” essentials – trust me, these are all super easy to find. I love that most ingredients are pantry staples (or in my case, emergency snack stash items that I pretend I didn’t raid). Here’s everything you’ll need for six gloriously spooky cups:
- 5.1 oz box chocolate instant pudding mix – the kind that sets quickly (I’ve learned the hard way that cook & serve takes forever)
- 3 cups cold milk – whole milk makes it extra creamy, but any kind works
- 8 oz tub Cool Whip, thawed – or homemade whipped cream if you’re feeling fancy
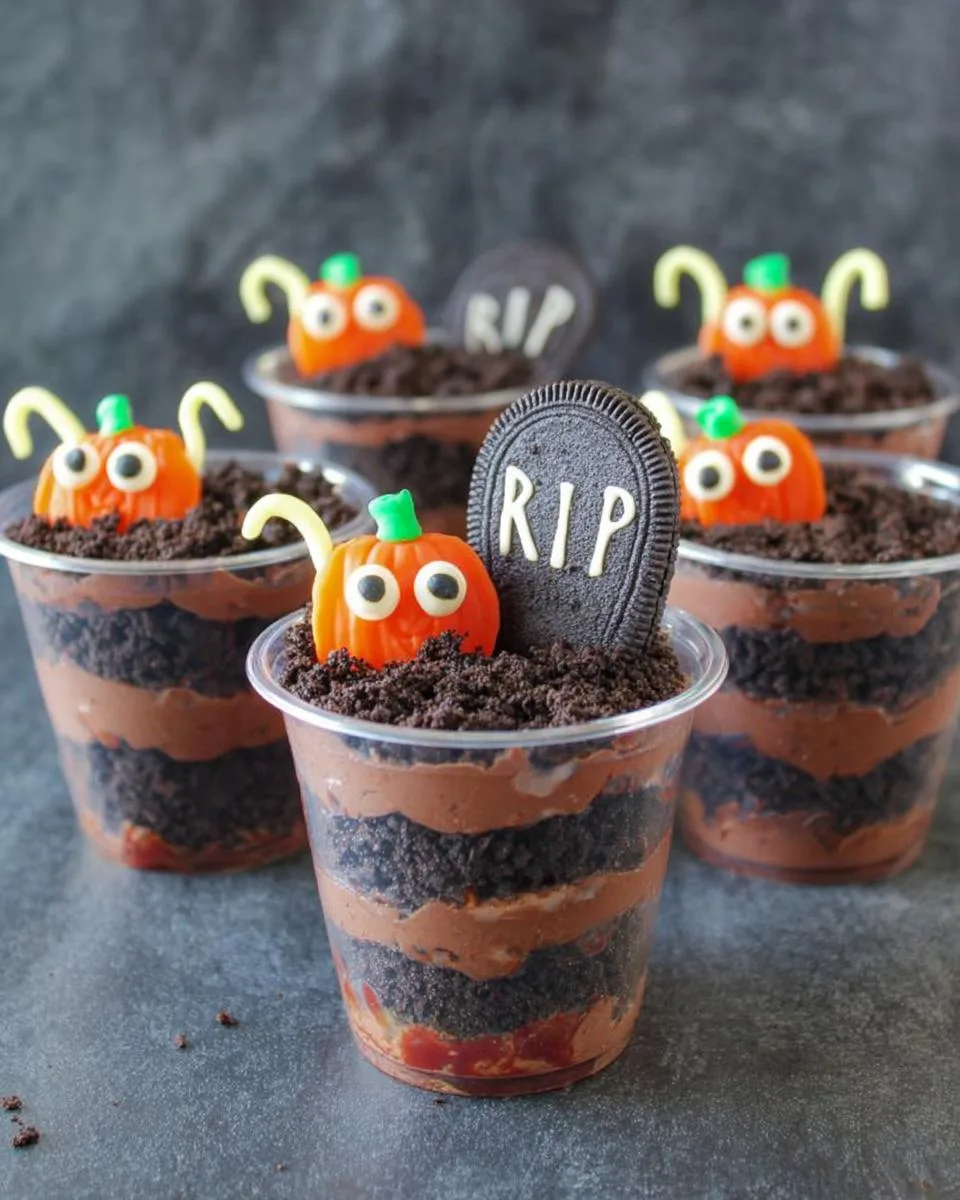
- 24 Oreo cookies – we’ll crush these into delicious “graveyard dirt” (double stuffed works great if you want extra richness)
- 6 Milano Double Chocolate cookies – these make perfect little tombstones
- Black frosting or edible black marker – for writing RIP on our tombstones (the gel kind in tubes is easiest)
- 6 candy pumpkins – the tiny ones you see in the baking aisle
- Googley eyes – because every good graveyard needs some peepers peeking out!
- Gummy worms (optional) – my kids insist they’re “graveyard residents”
Pro tip: If you’re making these for a party, grab extra Oreos – someone always “tests” the crumbs more than strictly necessary while prepping!
Equipment You’ll Need
Don’t worry – you won’t need any fancy gadgets for these! Just grab:
- A stand mixer or hand mixer (or strong arms and a whisk if you’re feeling ambitious)
- Food processor for crushing those Oreos into perfect “dirt” (a zip-top bag and rolling pin works too)
- 6 clear 9 oz plastic cups – trust me, seeing the layers is half the fun!
- A piping bag or ziplock with the corner snipped off for the RIP writing (or steady hands with a butter knife)
That’s it – now let’s make some magic!
How to Make Graveyard Chocolate Pudding Cups
Alright, let’s get our hands dirty (literally, with all that Oreo “dirt”)! I promise this is so easy you could do it half-asleep – though I don’t recommend it unless you want pudding on your pajamas. Here’s how we’ll bring these spooky cups to life:
Step 1: Prepare the Cookie Tombstones
First things first – let’s make our graveyard markers! Grab those Milano cookies and your black frosting or edible marker. I like to write “RIP” in big, dramatic letters (my eight-year-old insists on adding little skulls sometimes too). Pro tip: If you’re using frosting, pipe it on thick enough to stand out, but not so much that it slides off. Let these dry on a plate while we work on the rest – about 10 minutes should do it.
Step 2: Make the Pudding Layer
Now for the creamy goodness! In your stand mixer (or a big bowl if you’re going manual), whisk together the pudding mix and cold milk on medium speed for exactly 2 minutes – set a timer because under-whisked pudding is sad pudding. Then gently fold in the Cool Whip until it’s fully blended and dreamy. The mixture should be thick but still pourable – like a chocolate cloud! Pop this in the fridge for 5 minutes while we prep the cups.
Step 3: Assemble the Graveyard Cups
Time for the fun part! For each clear cup:
- Sprinkle 3-4 tablespoons of crushed Oreos to make your first “dirt” layer – press it down lightly with the back of a spoon so it’s nice and even.
- Press 3-4 googley eyes around the edges between the crumbs and cup – these will peek out creepily!
- Spoon in a generous layer of pudding, covering the crumbs completely.
- Repeat with another Oreo layer, more eyes, and more pudding.
- Top with a final sprinkle of Oreo crumbs – go right up to the lip of the cup for that freshly-dug grave look.
- Gently push one RIP cookie tombstone into the center of each cup.
- Add a candy pumpkin beside each tombstone (my kids say they’re “grave offerings”).
- Tuck in gummy worms if you’re using them – I like to let some hang over the edge for extra creep factor!
And voila! You’ve just created the cutest little edible graveyard. Now try not to eat them all before your Halloween party starts!
Per serving (1 cup):
- 350 calories – Consider it fuel for all that Halloween trick-or-treating
- 25g sugar – It’s basically a vegetable if you count the pumpkin candy, right?
- 5g protein – Milk and pudding mix to the rescue
- 12g fat (6g saturated) – All that creamy goodness has to come from somewhere
- 50g carbs – Mostly from those delicious Oreo layers
For lighter versions, try sugar-free pudding mix and light Cool Whip – but honestly? Halloween only comes once a year, so I say go for the real deal and enjoy every spooky bite!
Final Thoughts
Whew – who knew edible graveyards could bring this much joy? Every time I make these pudding cups, I’m reminded why they’ve become our family’s Halloween tradition. The way my kids’ eyes light up when they see their creepy creations? Priceless. And the best part? You don’t need to be a pastry chef to pull these off – just a little creativity and a love for chocolatey fun.
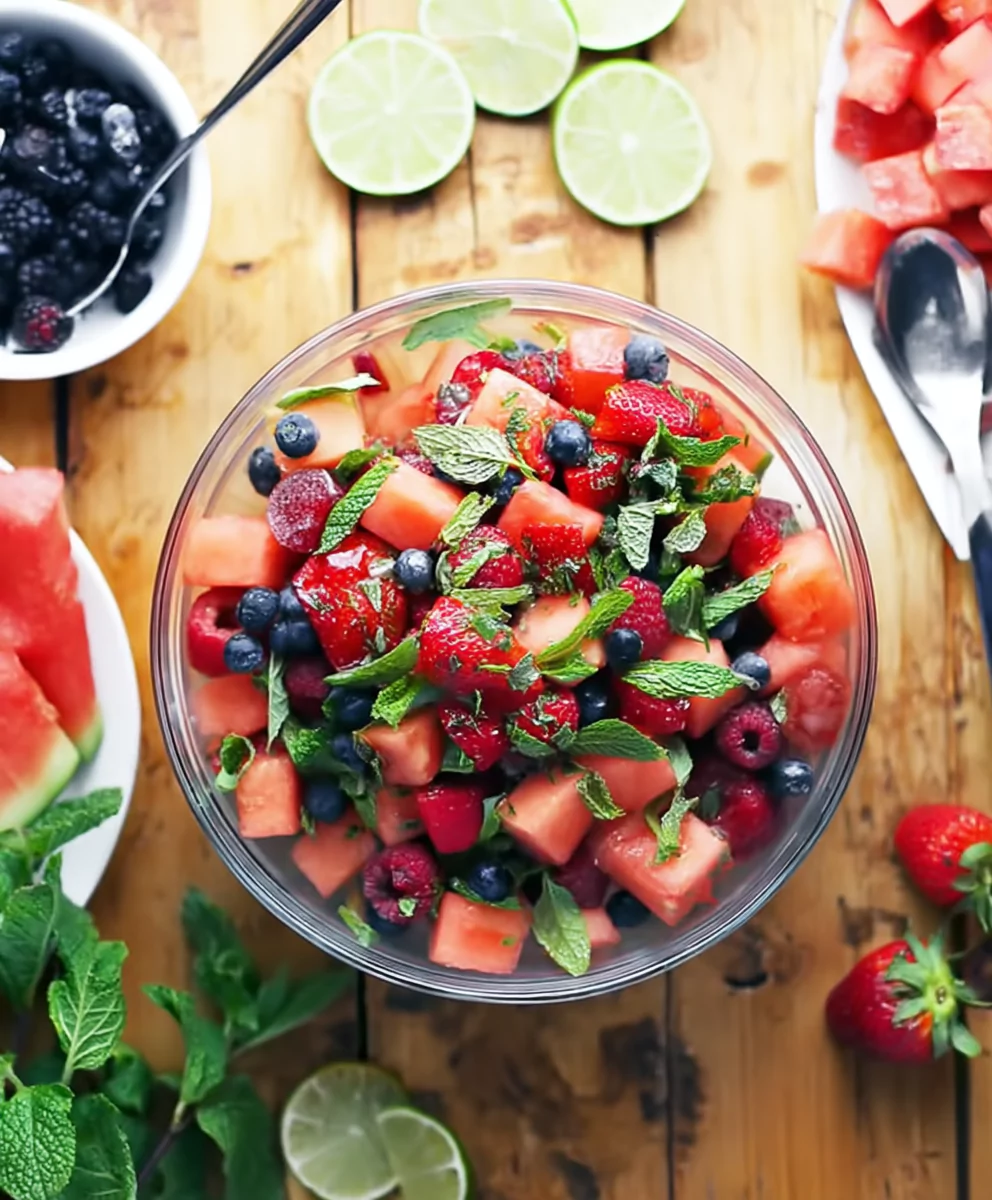
I’d absolutely love to see your graveyard masterpieces! Snap a pic of your spookiest (or silliest) creations and tag me @FrostyRecipes – nothing makes my day like seeing your kitchen adventures. Did you add zombie gummies? Swap in peppermint Oreos for a winter twist? Go wild with the decorations! After all, the best family traditions start with a little mess and a whole lot of laughter. Check out these Halloween Oreo Stuffed Brownies for another spooky treat!
Now if you’ll excuse me, I need to go “inspect” the remaining pudding cups…for quality control purposes, of course. Happy haunting, friends!
Print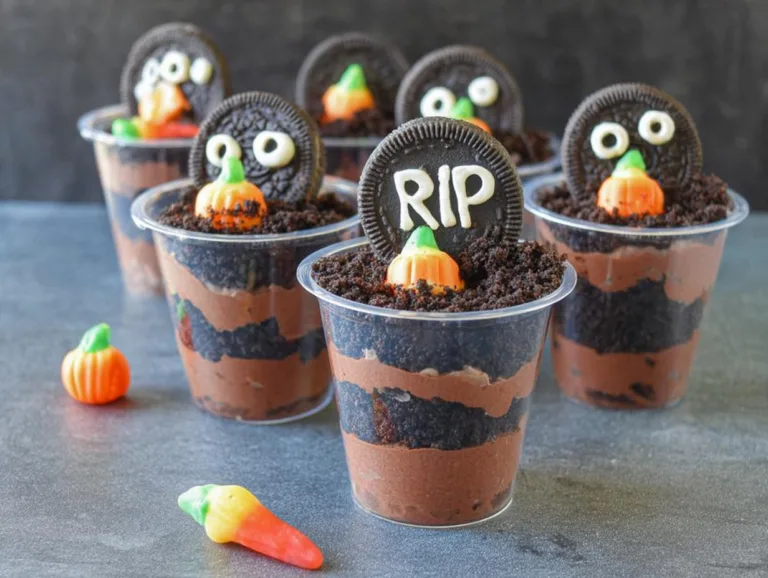
Spooky Graveyard Chocolate Pudding Cups in Just 15 Minutes
Graveyard Chocolate Pudding Cups are a fun and spooky dessert perfect for Halloween. Layers of chocolate pudding, Oreo crumbs, and edible decorations create a graveyard-themed treat.
- Total Time: 15 minutes
- Yield: 6 servings 1x
Ingredients
- 5.1 oz Chocolate Instant Pudding Mix
- 3 Cups Milk
- 8 oz Cool Whip
- 24 Oreo Cookies
- 6 Milano Double Chocolate Cookies
- Black Frosting or Black Edible Marker
- 6 Candy Pumpkins
- Googley Eyes
- Gummy Worms
Instructions
- With black frosting or an edible marker, write RIP on each Milano cookie to create tombstones. Set aside.
- In a stand mixer, whisk pudding mix and milk on medium speed for 2 minutes.
- Fold in Cool Whip until well blended.
- Crush Oreos into fine crumbs using a food processor.
- Sprinkle 3-4 TBSP of crumbs into the bottom of 6 clear 9 oz. plastic cups.
- Press googley eyes around the edges between the crumbs and the cup.
- Spoon a layer of pudding evenly on top.
- Repeat the last three steps once more.
- Sprinkle more crumbs on top until they almost reach the lip of the cup.
- Insert one cookie tombstone into the center of each pudding cup.
- Press a candy pumpkin beside each tombstone.
- Add gummy worms if desired.
Notes
- Use clear cups for the best visual effect.
- Adjust decorations to your preference.
- Prep Time: 15 minutes
- Cook Time: 0 minutes
- Category: Dessert
- Method: No-Bake
- Cuisine: American
- Diet: Vegetarian
Nutrition
- Serving Size: 1 cup
- Calories: 350
- Sugar: 25g
- Sodium: 300mg
- Fat: 12g
- Saturated Fat: 6g
- Unsaturated Fat: 4g
- Trans Fat: 0g
- Carbohydrates: 50g
- Fiber: 2g
- Protein: 5g
- Cholesterol: 10mg
Tips for Perfect Graveyard Chocolate Pudding Cups
After making these creepy-cute cups more times than I can count (and surviving my kids’ “help”), here are my hard-earned secrets for graveyard pudding perfection:
- Clear cups are non-negotiable – Those gorgeous layers are half the fun! I’ve tried opaque cups before and it’s just not the same spooky effect.
- Chill before serving – Let them set in the fridge for at least 30 minutes so the pudding firms up. The tombstones stay put better this way too.
- Crush Oreos to different sizes – A mix of fine powder and small chunks makes the “dirt” look more realistic (plus extra texture!).
- Anchor your tombstones – Push them in at a slight angle so they don’t topple over when transporting to your Halloween party.
- Get creative with decorations – Swap candy corn for pumpkins, add bone-shaped sprinkles, or use green frosting for “grave moss.”
- Double the batch – I’m serious! These disappear faster than ghosts at sunrise once kids spot them.
- Make ahead magic – Assemble everything except the tombstones up to a day in advance. Add those last-minute so they stay crisp.
Oh! And keep extra gummy worms on hand – somehow they always “mysteriously vanish” before serving time…
Variations & Substitutions
Listen, I know sometimes you gotta improvise – here are my favorite ways to tweak these graveyard cups when pantry emergencies strike (or for dietary needs):
- Pudding swap: Sugar-free pudding works great, or try butterscotch for a caramel “dirt” look
- Whipped cream: Swap Cool Whip for homemade whipped cream – just add a tablespoon of powdered sugar to stabilize it
- Vegan version: Use almond milk, vegan pudding mix, and Nabisco’s Original Oreos (yep, they’re accidentally vegan!)
- Cookie tombstones: No Milanos? Graham crackers or shortbread cookies work in a pinch
The beauty? However you adapt them, they’ll still disappear just as fast!
Serving & Storage Instructions
Okay, here’s the deal with these graveyard pudding cups – they’re basically perfect straight from the fridge! I always chill mine for at least 30 minutes before serving so the pudding sets up nice and firm. The cooler they are, the better those cookie tombstones stand up straight (though my kids think slightly crooked ones look “more haunted”).
For storage, just pop a little plastic wrap over the top of each cup (you can even stick the tombstones through the wrap to keep them in place). They’ll keep happily in the fridge for up to 2 days – though in our house, they never last that long! One important note: don’t try to freeze or microwave these – the pudding gets weirdly watery and the cookies turn into sad little mush piles (speaking from very sad experience).
Pro tip: If you’re bringing these to a party, transport them in a baking dish with a folded kitchen towel underneath to keep them from sliding around. And maybe bring extra napkins – things can get deliciously messy when kids start digging for “buried treasure” (aka gummy worms)!
Graveyard Chocolate Pudding Cups FAQs
I get asked these questions ALL the time when I bring these spooky cups to parties – so let’s dig up some answers (see what I did there?) before you start baking:
Q1: Can I make Graveyard Chocolate Pudding Cups ahead of time?
Absolutely! These are perfect for prepping ahead. You can assemble everything except the tombstones up to a day in advance – just keep them covered in the fridge. Add the RIP cookies right before serving so they stay crisp. The pudding actually gets even creamier after chilling overnight!
Q2: Are there nut-free options for school parties?
You bet! The basic recipe is naturally nut-free (though always check your specific pudding mix and cookie labels to be safe). For extra precaution, use Keebler’s Fudge Shoppe cookies instead of Milanos for the tombstones – they’re made in a nut-free facility.
Q3: Help! My pudding isn’t setting – what went wrong?
Oh no! First, make sure you’re using instant pudding mix (not cook-and-serve) and ice-cold milk. If it’s still runny after 10 minutes in the fridge, try adding an extra tablespoon of pudding powder and whisk again. Been there – it’s usually just a matter of patience and proper chilling time!
Q4: Can I use homemade chocolate pudding instead?
Of course! If you’ve got the time, homemade pudding takes these to gourmet ghost-town levels. Just make sure it’s thoroughly chilled and thickened before layering. Pro tip: Add a teaspoon of vanilla extract to your homemade pudding for extra depth.
Q5: The tombstones keep falling over – any tricks?
My favorite fix? Push them in at a slight angle rather than straight up and down. You can also “anchor” them by pressing a candy pumpkin right up against the base. If all else fails, a tiny dab of frosting on the back works like edible glue!
Got more questions? Spill them in the comments – I love hearing about your graveyard pudding adventures (and fails…we’ve all been there)! Share your spooky creations!
Nutritional Information
Okay, let’s be real – we’re not eating graveyard pudding cups for their health benefits (though the calcium in all that milk totally counts, right?). But since you asked, here’s the scoop on what’s in these spooky treats. Keep in mind these are estimates – your exact numbers will vary depending on brands and how generous you are with those Oreo crumbs!
For More recipes Follow me on Facebook!