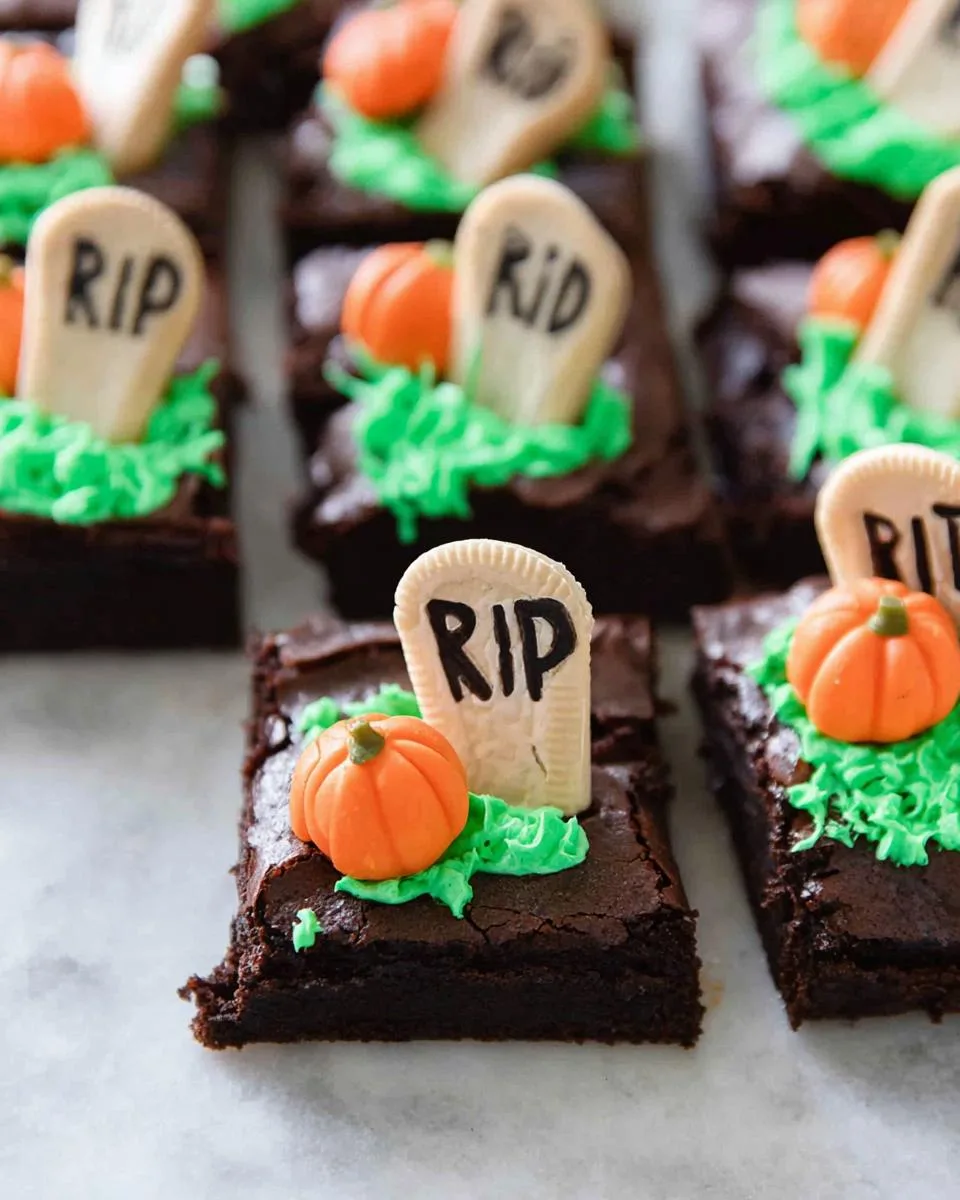
Picture this: It’s Halloween night, the air is crisp, and my kitchen is buzzing with excitement as my kids and I whip up our favorite spooky treat – Graveyard Halloween Brownies. These aren’t just any brownies, oh no. They’re edible tombstones rising from a patch of green frosting, with candy pumpkins scattered about like they’ve tumbled right out of a ghost story. I still remember the first time we made these – my daughter’s eyes lit up when she pressed the Milano cookie headstones into the fudgy brownie base, declaring them “the coolest dessert EVER.”
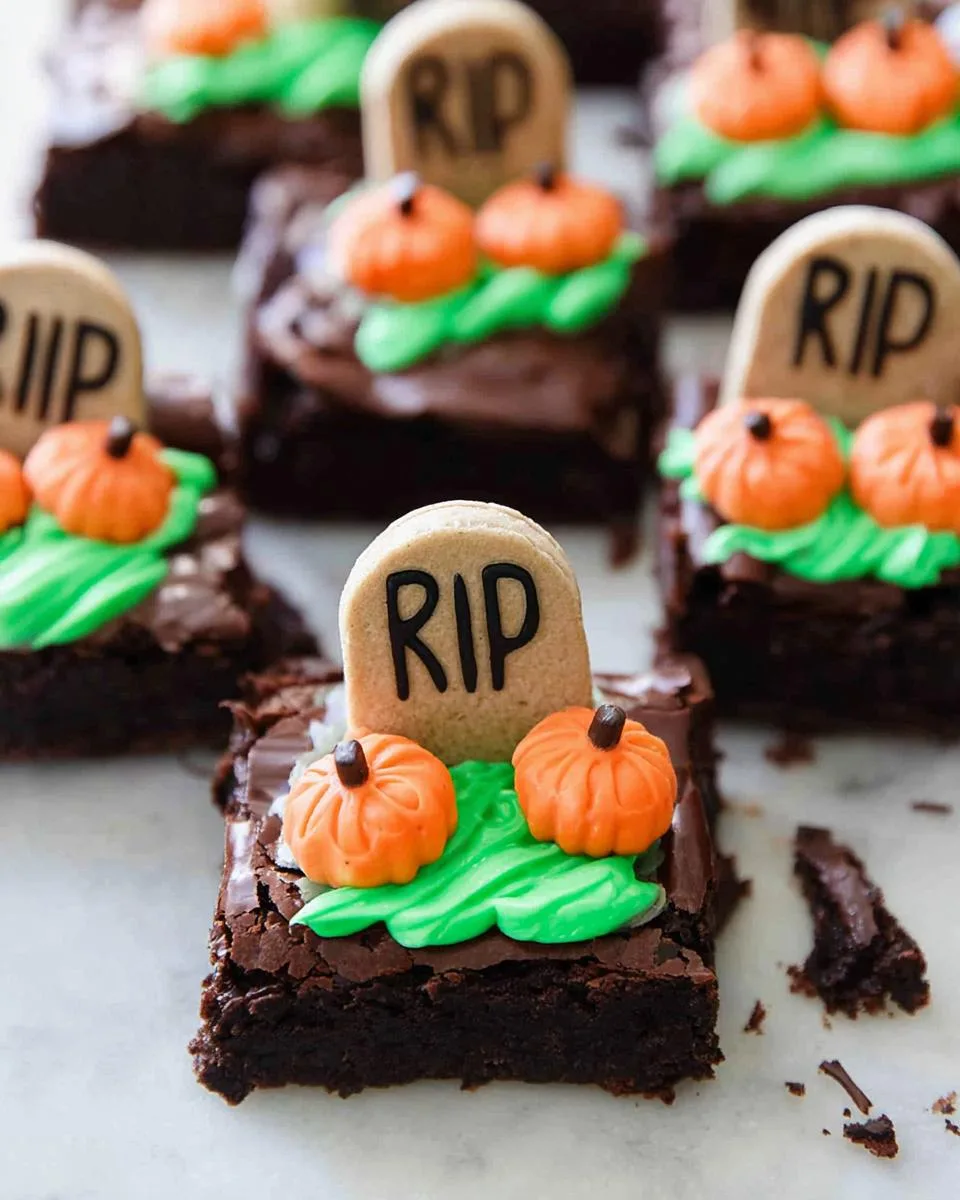
Table of Contents
Table of Contents
What I love most about these graveyard brownies is how they turn an ordinary dessert into pure Halloween magic. The best part? They’re ridiculously easy to make, even when you’re juggling costumes, trick-or-treat plans, and sugar-crazed kiddos. Whether you’re hosting a Halloween party or just want to surprise your family with something special, these brownies always steal the show. Trust me, when you bring these to your next gathering, you’ll be the hero of Halloween!
Why You’ll Love These Graveyard Halloween Brownies
Let me tell you why these brownies have become my go-to Halloween treat year after year. First off, they’re so easy – even when I’m drowning in costume prep and last-minute party craziness, I can throw these together in no time. Here’s what makes them extra special:
- Instant Halloween magic: With just a few simple decorations, ordinary brownies transform into a spooky graveyard scene that’ll wow everyone
- Kid-approved fun: My little monsters love helping decorate – writing “R.I.P.” on the cookies and placing the pumpkins is their favorite part
- Totally customizable: Use your favorite brownie recipe (or even a box mix when you’re short on time), swap candy corn for pumpkins, or add gummy worms crawling through the “dirt”
- Party perfect: They look fancy but take half the effort of cupcakes – plus they travel well for school parties or neighborhood gatherings
Seriously, once you see how these disappear at your next Halloween bash, you’ll understand why they’ve earned a permanent spot in my October rotation!
Ingredients for Graveyard Halloween Brownies
Okay, let’s gather our spooky supplies! The beauty of these graveyard brownies is how simple the ingredient list really is. Here’s what you’ll need to create your edible graveyard masterpiece:
- 1 batch of brownie batter – enough for an 8” pan (use your favorite homemade recipe or a trusty box mix – I won’t judge!)
- 12 Milano cookies – these will be our perfect little tombstones
- Black decorating gel – for writing those eerie “R.I.P.” messages
- 12 candy pumpkins – or however many you can resist eating while decorating!
- 1 cup powdered sugar, packed – this gives our “grass” frosting the right sweetness
- 1/4 cup butter, softened – leave it out for about 30 minutes first
- 2 teaspoons milk – any kind works, I usually use what’s in my fridge
- Green food coloring – just a few drops to get that perfect graveyard grass shade
Pro tip: If you’re like me and always forget to soften butter, you can microwave it for 5-second bursts until it’s soft but not melted. Just don’t tell my grandma I shared that shortcut!
Equipment You’ll Need
Don’t worry – you don’t need any fancy tools for these graveyard brownies! Here’s what I grab from my kitchen:
- 8″ baking pan – square or rectangular both work great
- Parchment paper – lifesaver for clean removal
- Mixing bowl – for that dreamy green frosting
- Whisk or hand mixer – elbow grease works too!
- Knife or cookie cutter – for portioning brownies
- Piping bag (optional) – or just use a ziplock with the corner snipped
That’s it! Now let’s get spooky.
How to Make Graveyard Halloween Brownies
Alright, let’s dive into the fun part – creating these spooky treats! I’ll walk you through each step just like I do with my kids when we make these together. Don’t worry if your first attempt isn’t perfect – mine certainly wasn’t! The “messy graveyard” look actually adds to the charm.
Baking the Brownies
First things first – we need a solid brownie foundation for our graveyard scene. Here’s how I do it:
- Prep your pan: Line that 8″ baking pan with parchment paper, leaving some overhang on the sides. This little trick saves so much frustration later – trust me!
- Pour and smooth: Spread your brownie batter evenly in the pan. I like to give it a little wiggle to settle everything nicely.
- Bake with love: Follow your recipe’s baking time (usually 20-25 minutes at 350°F). The brownies are done when a toothpick comes out with moist crumbs – not wet batter.
- The hardest part: Let them cool COMPLETELY. I know it’s tempting, but cutting warm brownies leads to crumbly disasters. Set them aside for at least an hour.
Pro tip: If you’re in a rush, pop them in the fridge for 30 minutes to speed up cooling. Just don’t tell the baking purists I suggested that!
Preparing the Frosting and Decorations
While those brownies cool, let’s create our graveyard magic:
- Whip up the frosting: Beat the softened butter until creamy, then gradually add powdered sugar and milk. Mix for 2 full minutes until light and fluffy. Add green food coloring drop by drop until you get that perfect eerie grass color.
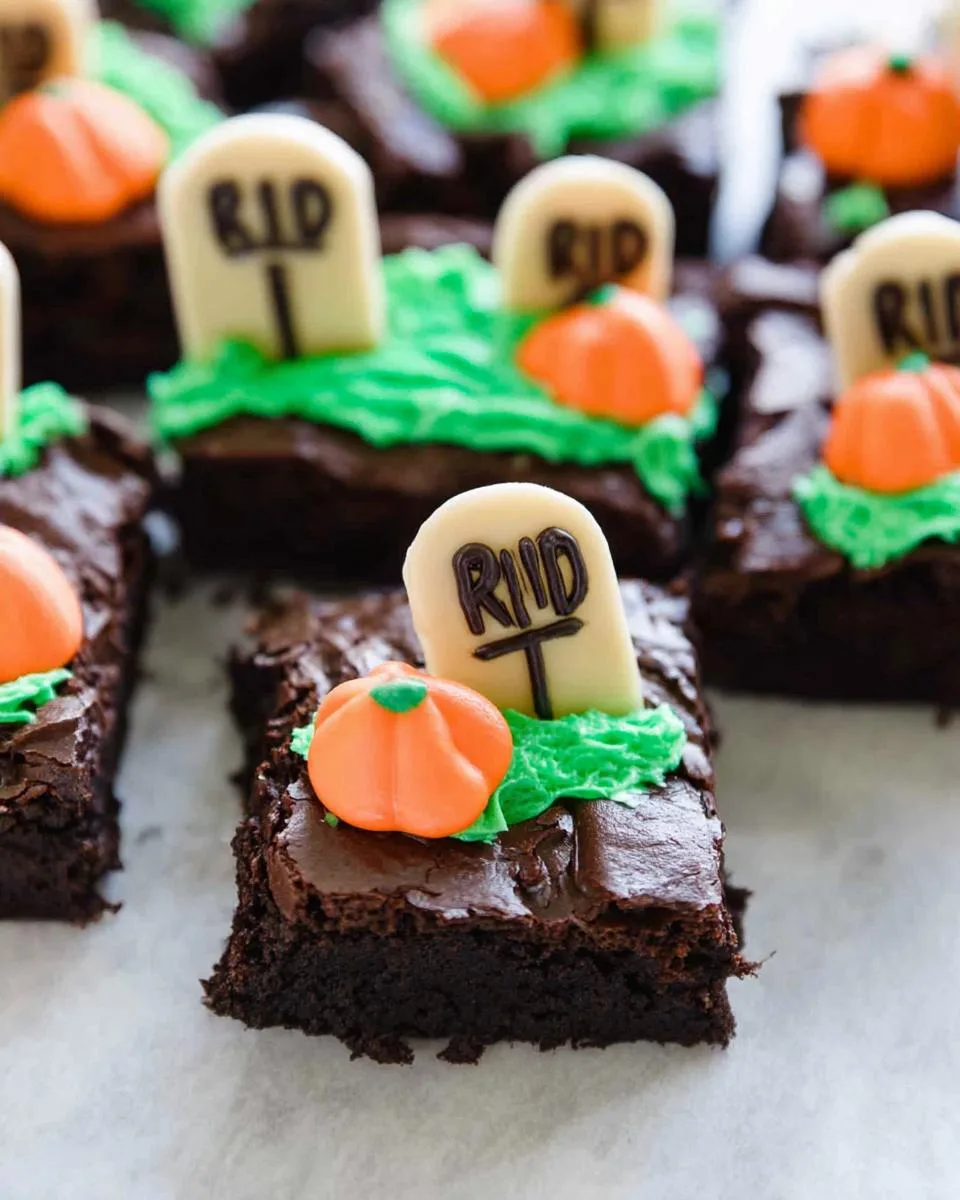
- Create tombstones: Use black gel to write “R.I.P.” on each Milano cookie. Feeling fancy? Trim the bottoms slightly for varied heights – graveyards aren’t perfectly uniform!
- Assemble your scene: Cut cooled brownies into rectangles. Press a cookie tombstone into each one. Spoon or pipe green frosting near the base (messy is good – it looks like overgrown grass!). Top with candy pumpkins.
My kids love arranging the pumpkins like they’ve rolled through the graveyard. Sometimes we add crushed Oreo “dirt” or gummy worms crawling out – get creative!
Tips for Perfect Graveyard Halloween Brownies
After making these spooky treats more times than I can count, I’ve picked up some tricks to ensure graveyard brownie success every time. First – if your frosting is too thin, add more powdered sugar a tablespoon at a time. Too thick? A teaspoon of milk will loosen it right up. When trimming Milano cookies, use kitchen scissors – they give you way more control than a knife. And here’s my secret storage tip: Keep them in an airtight container with wax paper between layers. The cookies stay crisp for days this way (if they last that long!).
Print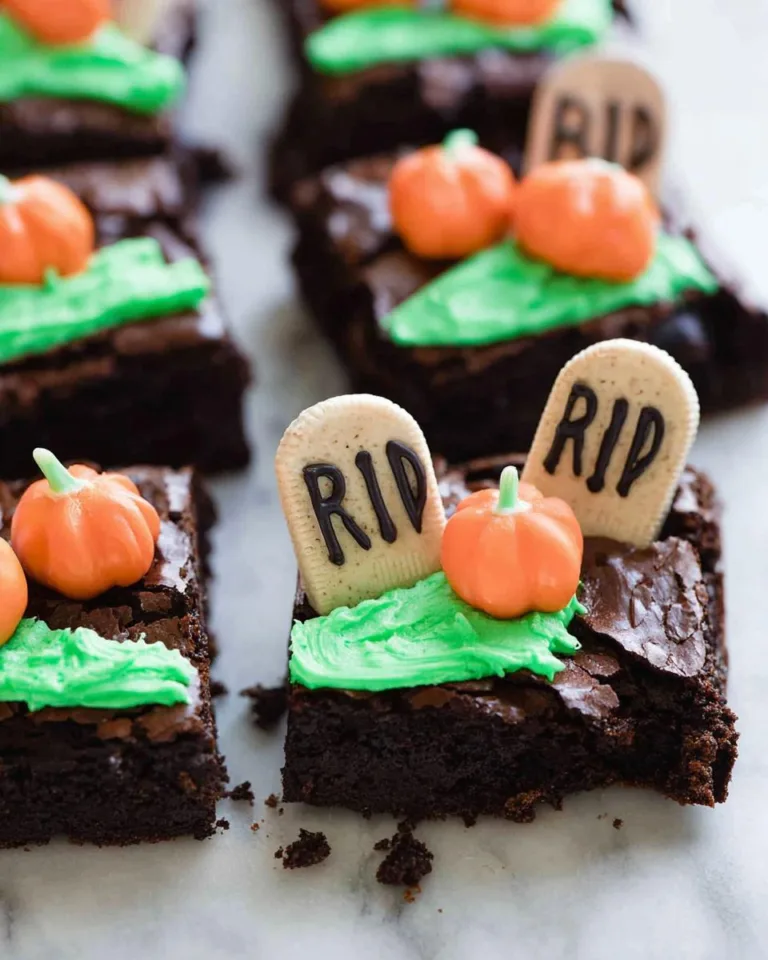
1 Spooky Graveyard Halloween Brownies Your Kids Will Devour
Spooky Graveyard Halloween Brownies are a fun and festive treat perfect for Halloween. These brownies are topped with Milano cookie headstones, green buttercream frosting, and candy pumpkins for a graveyard effect.
- Total Time: 40 minutes
- Yield: 12 brownies 1x
Ingredients
- Prepared brownie batter for an 8” pan
- 12 Milano cookies
- Black decorating gel
- 12 candy pumpkins
- 1 cup powdered sugar
- 1/4 cup butter (salted or unsalted), softened
- 2 teaspoons milk
- Green food coloring (a few drops, to reach desired color)
Instructions
- Line an 8” baking pan with parchment paper, leaving overhang for easy removal.
- Pour brownie batter into the pan and smooth into an even layer. Bake as per recipe instructions.
- Let brownies cool completely. Lift them out using parchment paper and cut into rectangles (4×3 for 12 pieces).
- Mix frosting ingredients in a bowl for 2 minutes until light and fluffy. Adjust thickness with powdered sugar or milk. Add green food coloring.
- Use black edible gel to write “R.I.P.” on Milano cookies. Optionally trim the bottom edge for shorter headstones.
- Press each cookie into a brownie as a headstone.
- Spoon green frosting near the headstone and place a candy pumpkin on top.
Notes
- Use store-bought brownie mix for convenience.
- Adjust frosting consistency as needed.
- Decorate with extra Halloween-themed candies if desired.
- Prep Time: 15 minutes
- Cook Time: 25 minutes
- Category: Dessert
- Method: Baking
- Cuisine: American
- Diet: Vegetarian
Nutrition
- Serving Size: 1 brownie
- Calories: 220
- Sugar: 18g
- Sodium: 120mg
- Fat: 10g
- Saturated Fat: 4g
- Unsaturated Fat: 5g
- Trans Fat: 0g
- Carbohydrates: 30g
- Fiber: 1g
- Protein: 2g
- Cholesterol: 20mg
Variations and Substitutions
One of my favorite things about these graveyard brownies is how easily you can mix things up! Need them gluten-free? Just swap in your favorite GF brownie mix – I’ve used Bob’s Red Mill with great results. For my vegan friends, coconut oil works beautifully in place of butter for the frosting (and there are amazing dairy-free brownie recipes out there). Out of candy pumpkins? Try candy corn, chocolate bones, or even spooky sprinkles. Last Halloween, my neighbor used Pepperidge Farm Pirouette cookies as extra-tall tombstones – genius! The point is, don’t stress about being exact. Some of my best creations came from happy accidents and pantry raids!
Serving and Storing Graveyard Halloween Brownies
When it comes to serving these spooky treats, I love arranging them on a black platter with extra candy pumpkins scattered around – it really makes the graveyard scene pop! For school parties, I’ll pack them in cupcake boxes so each kid gets their own little haunted plot. Storage is easy – just keep them in an airtight container at room temperature for up to 3 days. The cookies might soften slightly, but trust me, they’ll disappear long before that becomes an issue!
Nutritional Information
Here’s the scoop on what’s in these spooky treats – but remember, these are just estimates! Your exact numbers will depend on the specific ingredients you use. Each graveyard brownie comes in at about 220 calories, with 10g fat and 18g sugar. Perfect for fueling your little monsters’ trick-or-treat adventures!
Nutritional values are estimates and vary by ingredients used.
Frequently Asked Questions
Can I use homemade brownies instead of a mix?
Absolutely! My from-scratch brownie recipe works beautifully here – just make sure it’s sturdy enough to hold the decorations. The key is letting them cool completely so they don’t crumble when you press in the tombstones.
How far in advance can I decorate these?
I like to assemble them the day of serving for the freshest look, but you can bake the brownies up to 2 days ahead. Store them airtight at room temp, then decorate when you’re ready. The frosting and cookies stay crisp if you wait until the last minute!
What if my frosting turns out too runny?
Don’t panic! Just add more powdered sugar a tablespoon at a time until it thickens up. I’ve been there – sometimes humidity affects it. If it’s too thick, a splash of milk will loosen it right up.
Can I make these nut-free for school?
You bet! Just check your brownie ingredients. Many box mixes are nut-free, and the decorations are naturally safe. My kids’ school loves when I bring these – they disappear faster than ghosts at sunrise!
Follow us on Facebook for more spooky and delicious recipes!