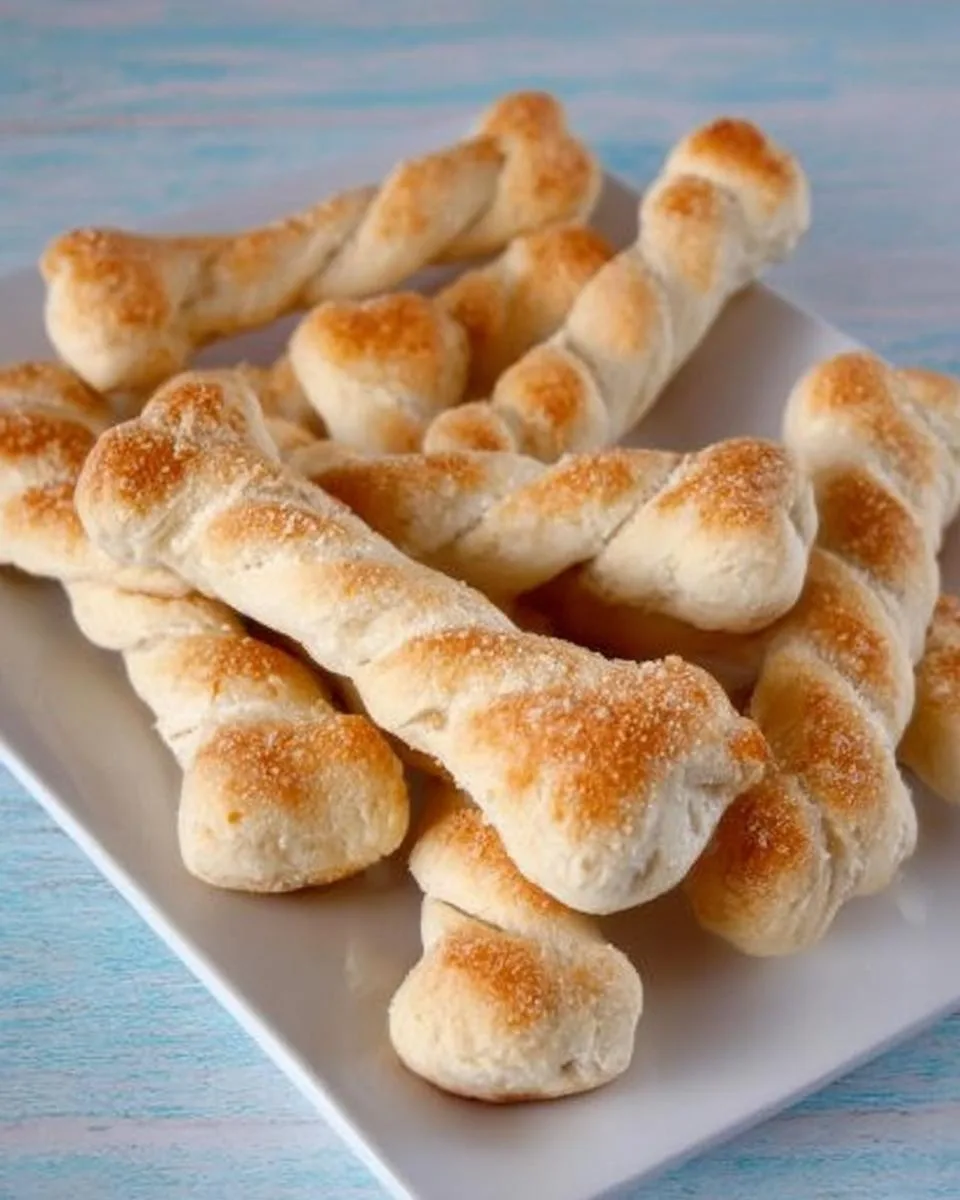
Oh my gosh, have you ever had one of those “why didn’t I think of that?” moments in the kitchen? That’s exactly what happened when I first tried making Halloween breadstick bones for my kids’ costume party last year. Picture this – five minutes before guests arrive, two sugared-up kids bouncing off the walls, and me realizing I forgot to make a savory snack. Cue the canned pizza dough in my fridge! These adorable bone-shaped breadsticks saved the day – they’re ridiculously easy, totally customizable, and disappeared faster than a ghost in the night (which, by the way, is exactly what my youngest dressed as).
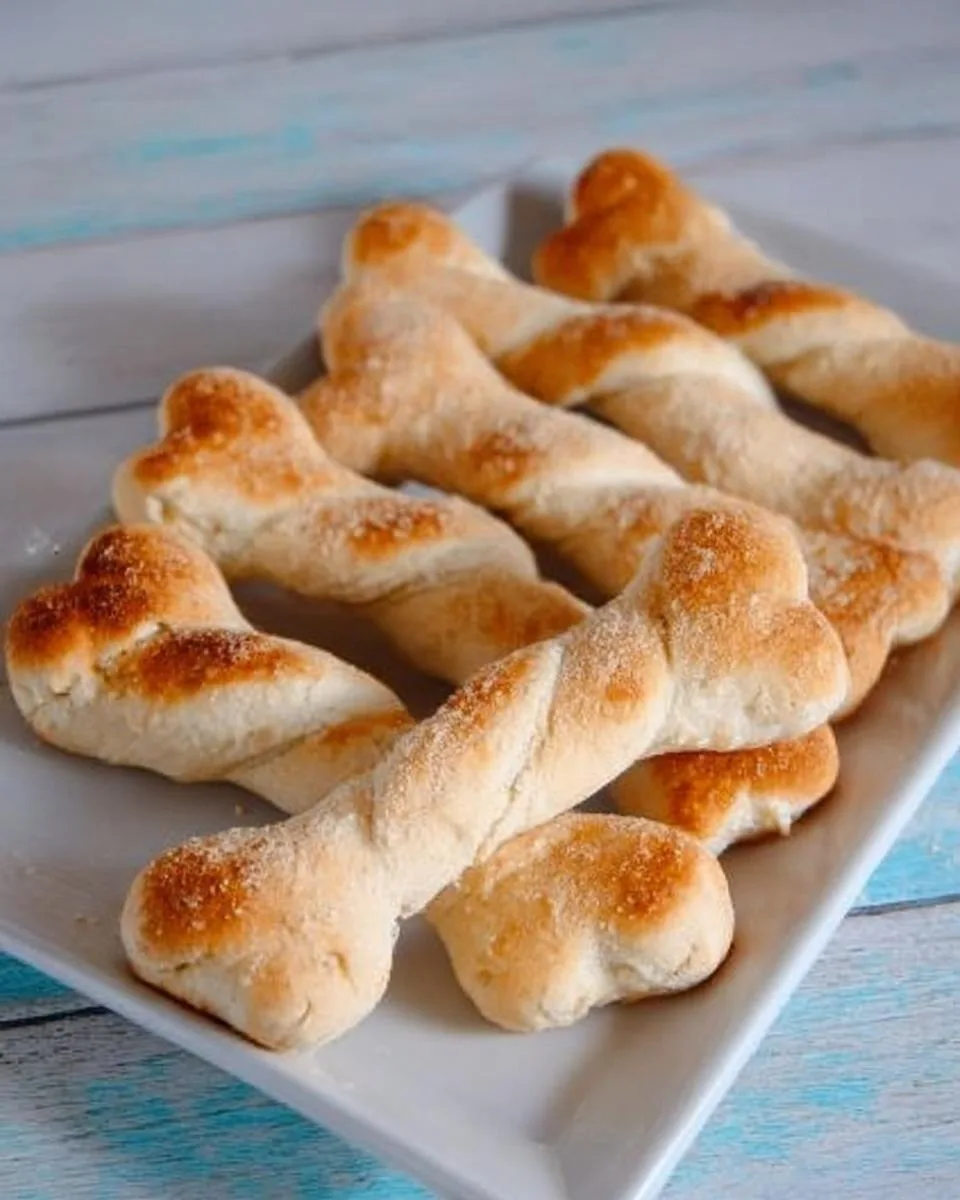
Table of Contents
Table of Contents
As a mom who’s survived more than a few chaotic Halloweens, I can tell you these Halloween breadstick bones have become our new must-have tradition. They’re the perfect mix of spooky and silly – just like the holiday should be. The best part? Even my kitchen-phobic husband can whip these up without burning down the house (though last year he did get a little too creative with the “bone” shapes). Whether you’re hosting a monster mash or just want a fun after-school snack, this recipe is about to become your new secret weapon.
Ingredients for Halloween Breadstick Bones
Here’s all you need for these ghoulishly good breadsticks:
- 1 can of refrigerated pizza dough (the kind that pops open – we all love that sound!)
- 2 tablespoons grated parmesan (the powdery kind works great here)
- Garlic powder to taste (I do about 1/4 teaspoon for my crew)
- Salt to taste (a couple pinches does the trick)
Ingredient Notes & Substitutions
No parmesan? No problem! Nutritional yeast gives a nice cheesy flavor if you’re going dairy-free. For gluten-free bones, your favorite gluten-free pizza dough works perfectly – just handle it gently as it can be more fragile.
When I say “to taste” for the garlic and salt – start with a light sprinkle, then add more after baking if needed. My kids like theirs barely seasoned, but my husband? That man would bathe in garlic powder if I let him. You do you!
How to Make Halloween Breadstick Bones
Okay, let’s get spooky! These Halloween breadstick bones come together faster than you can say “Boo!” Here’s exactly how I make them (usually while simultaneously refereeing a sibling argument about who gets to be the vampire this year):
- Preheat that oven! Crank it up to 400°F and lightly grease your baking sheet. I use a quick spray of olive oil – no fancy equipment needed.
- Unroll the dough directly onto your prepared sheet. Pro tip: If it sticks to your fingers, dust them with a tiny bit of flour first.
- Cut into strips – I aim for 12 even pieces using a pizza cutter or sharp knife. Don’t stress about perfection – crooked bones are extra creepy!
- Shape your bones (more on that below) – this is where the kids usually elbow their way in to “help.”
- Season generously with that parmesan, garlic powder, and salt. I like to do this before baking so the flavors really stick.
- Bake until golden – about 11-13 minutes. You’ll know they’re done when your kitchen smells like a pizzeria and the edges get that perfect light brown color.
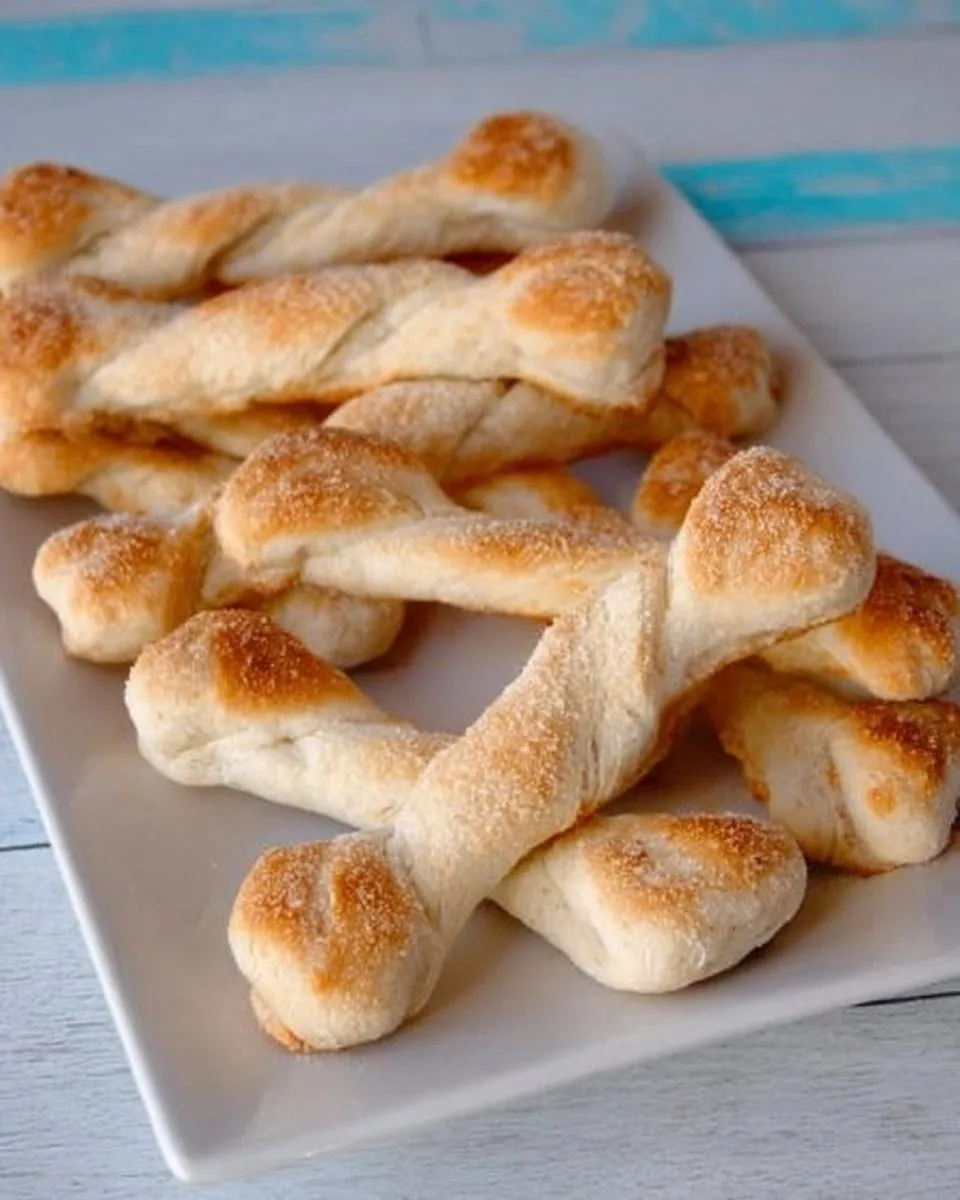
Shaping the Bones
The easiest way? Just tie a simple knot at each end of your dough strips – instant bone shapes! For extra spook points, pinch the centers slightly to make them skinnier. My kids love using clean scissors to snip little “cracks” in the bones too – totally optional but adds Halloween drama.
Baking Tips
Set your timer for 11 minutes and check – ovens vary! They should be lightly golden but still slightly soft when you press them. Overbaking makes them too crunchy (unless you’re going for skeleton teeth – then bake a minute longer). If some bake faster than others, just remove the done ones first – no ghostly perfectionism required!
Why You’ll Love This Recipe
These Halloween breadstick bones aren’t just adorable – they’re seriously addictive! Here’s why they’ve become my go-to October snack:
- 5-minute prep: From fridge to oven faster than a witch on a broomstick
- Kid-approved: My picky eaters actually fight over these (miraculous!)
- Endlessly customizable: Add Italian seasoning, everything bagel spice, or even a drizzle of honey for sweet bones
- Party perfection: Stack them in a cauldron or stick them in a foam skull for instant Halloween vibes
Trust me – once you see how these disappear at your next gathering, you’ll be making them every year like we do!
Print
Spooky 5-Minute Halloween Breadstick Bones Kids Crave
A simple and fun Halloween-themed snack that kids and adults will love. These breadstick bones are easy to make with pizza dough and basic seasonings.
- Total Time: 23 minutes
- Yield: 12 breadsticks 1x
Ingredients
- 1 can of pizza dough
- 2 tablespoons grated parmesan or nutritional yeast
- garlic powder, to taste
- salt, to taste
Instructions
- Preheat the oven to 400 degrees. Grease a baking sheet.
- Unroll the dough onto a baking sheet and cut 12 even strips.
- Tie knots on each of the ends of the strips.
- Sprinkle parmesan, garlic, and salt over breadsticks.
- Bake for 11-13 minutes or until golden brown.
Notes
- For a spookier look, you can shape the dough into bone shapes.
- Store leftovers in an airtight container for up to 2 days.
- Prep Time: 10 minutes
- Cook Time: 13 minutes
- Category: Appetizer
- Method: Baking
- Cuisine: American
- Diet: Vegetarian
Nutrition
- Serving Size: 1 breadstick
- Calories: 90
- Sugar: 1g
- Sodium: 180mg
- Fat: 2g
- Saturated Fat: 0.5g
- Unsaturated Fat: 1g
- Trans Fat: 0g
- Carbohydrates: 15g
- Fiber: 1g
- Protein: 3g
- Cholesterol: 1mg
Serving Suggestions for Halloween Breadstick Bones
These breadstick bones shine brightest when served with classic marinara for dipping – my kids call it “blood sauce” for extra Halloween fun! For parties, arrange them sticking out of a hollowed-out pumpkin with cheese dip. They also pair perfectly with eyeball meatballs or monster finger hot dogs for a full spooky spread.
Storage & Reheating
Pop any leftover Halloween breadstick bones in an airtight container – they’ll stay fresh for about 2 days. To revive that just-baked magic, give them a quick 5-minute warm-up in a 350°F oven. Microwaving works in a pinch, but the oven keeps them crispy!
Nutritional Information
Just a quick heads up – these numbers are estimates since brands and exact measurements can vary. But here’s the scoop on what you’re getting in each deliciously spooky Halloween breadstick bone:
- Calories: 90
- Carbs: 15g
- Protein: 3g
- Fat: 2g
- Sodium: 180mg
Not too scary, right? The parmesan adds a nice protein boost, and you can always adjust the salt if you’re watching sodium. Now go enjoy your ghoulish snack without the guilt!
FAQs About Halloween Breadstick Bones
Can I use homemade pizza dough instead of canned? Absolutely! My homemade dough recipe works beautifully – just roll it out to about 1/4 inch thickness before cutting. The only difference? You might need an extra minute or two in the oven since homemade dough tends to be thicker.
How can I make these Halloween breadstick bones vegan? Easy peasy! Swap the parmesan for nutritional yeast (about 1 tablespoon) and use your favorite vegan pizza dough. Most canned doughs are accidentally vegan – just check the label for dairy ingredients.
Can I prep these ahead for a party? You bet! Shape the bones and keep them covered in the fridge for up to 4 hours before baking. The garlic powder actually gets more flavorful as it sits – bonus!
Why are my breadstick bones too puffy? If they’re looking more like baguettes than bones, you probably overworked the dough. Next time, handle it more gently and don’t stretch the knots too tight – they’ll expand as they bake!
Did Your Little Monsters Love These Halloween Breadstick Bones?
I’d love to hear how your spooky snack session went! Leave a comment below telling me your family’s favorite way to decorate these bones – bonus points if you managed to snap a pic of your creepy creations. Happy haunting (and baking)! You can also follow us on Facebook for more fun recipes.