Halloween night at our house is pure chaos—costumes everywhere, sugar-fueled giggles, and my kitchen turned into a goblin-making factory! These Halloween walnut goblins saved me last year when my kids begged for a “spooky snack” 20 minutes before trick-or-treating. Just four simple ingredients transform into these adorably creepy faces that disappear faster than ghosts in the night. Trust me, even if you’re racing against the witching hour like I always am, these mini mummy muffins will make you look like the Halloween hero of the neighborhood party.
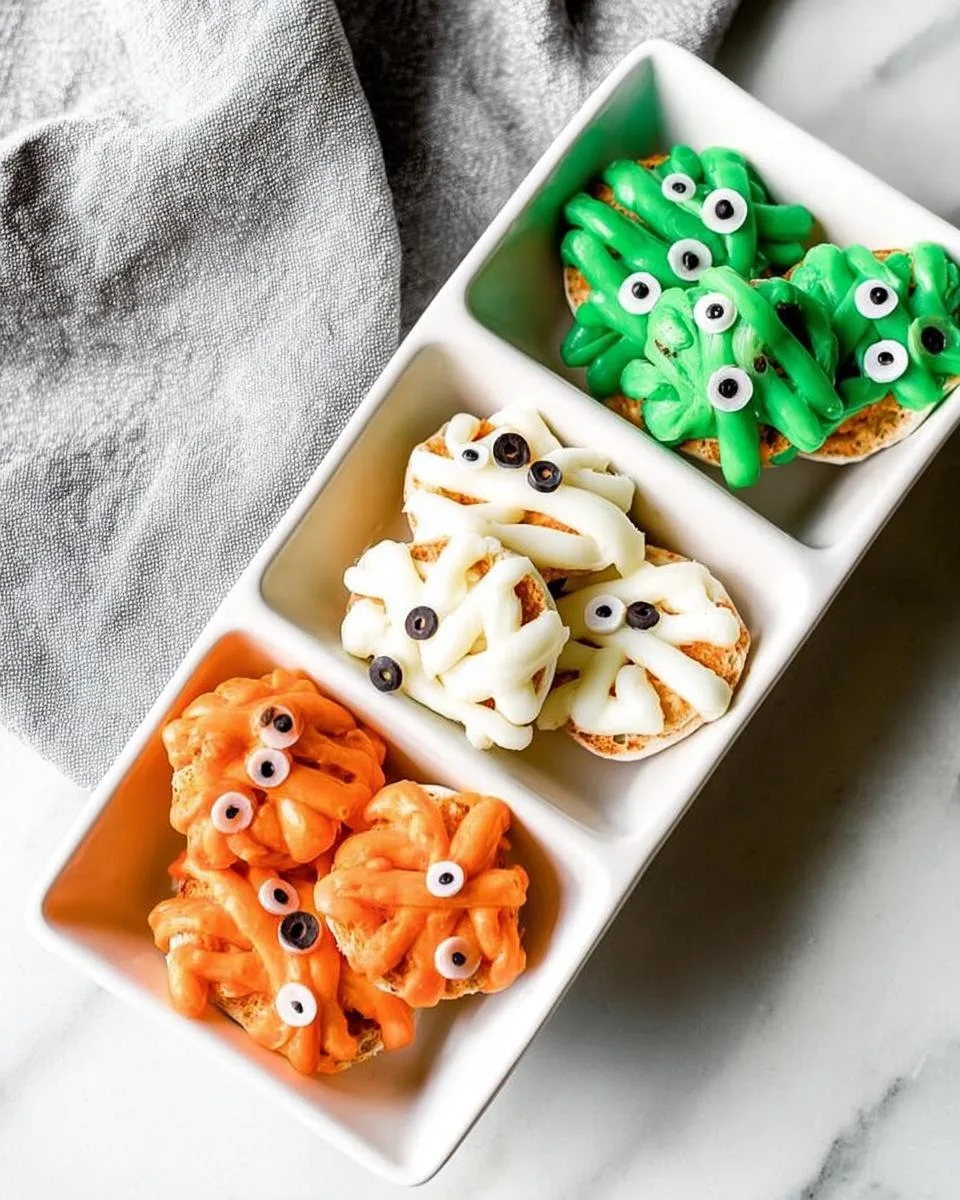
Table of Contents
Table of Contents
Why You’ll Love These Halloween Walnut Goblins
These little goblins aren’t just cute – they’re a total game-changer for busy Halloween nights! Here’s why they never leave my party spread:
- Whipped up in minutes – Seriously, from fridge to table in under 30 minutes (oven time included!)
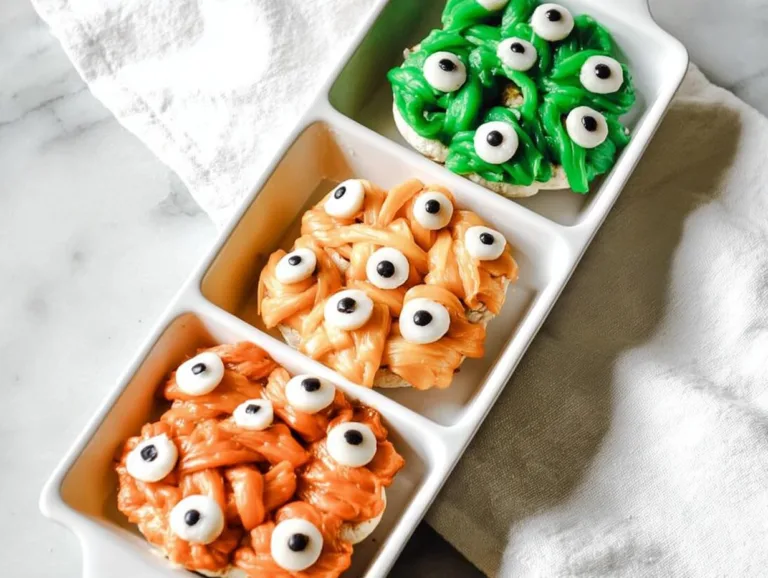
- Endless creativity – Let kids design silly or scary faces with olive features
- Secretly wholesome – Whole wheat muffin option means less sugar crash after the candy binge
- Crowd-pleasing – Vegetarian-friendly so everyone at the party can grab one
Ingredients for Halloween Walnut Goblins
Here’s the beautiful part – you probably have most of these ingredients sitting in your fridge right now! I’ve made these walnut goblins dozens of times (often in a panic right before school Halloween parties), and sticking to these exact measurements gives the perfect crispy-chewy-spooky ratio:

- 2 English muffins – Split horizontally (the nooks and crannies are perfect for holding toppings)
- 1/4 cup pizza sauce – Packed tightly in the measuring cup (I swear by Classico Traditional Pizza Sauce)
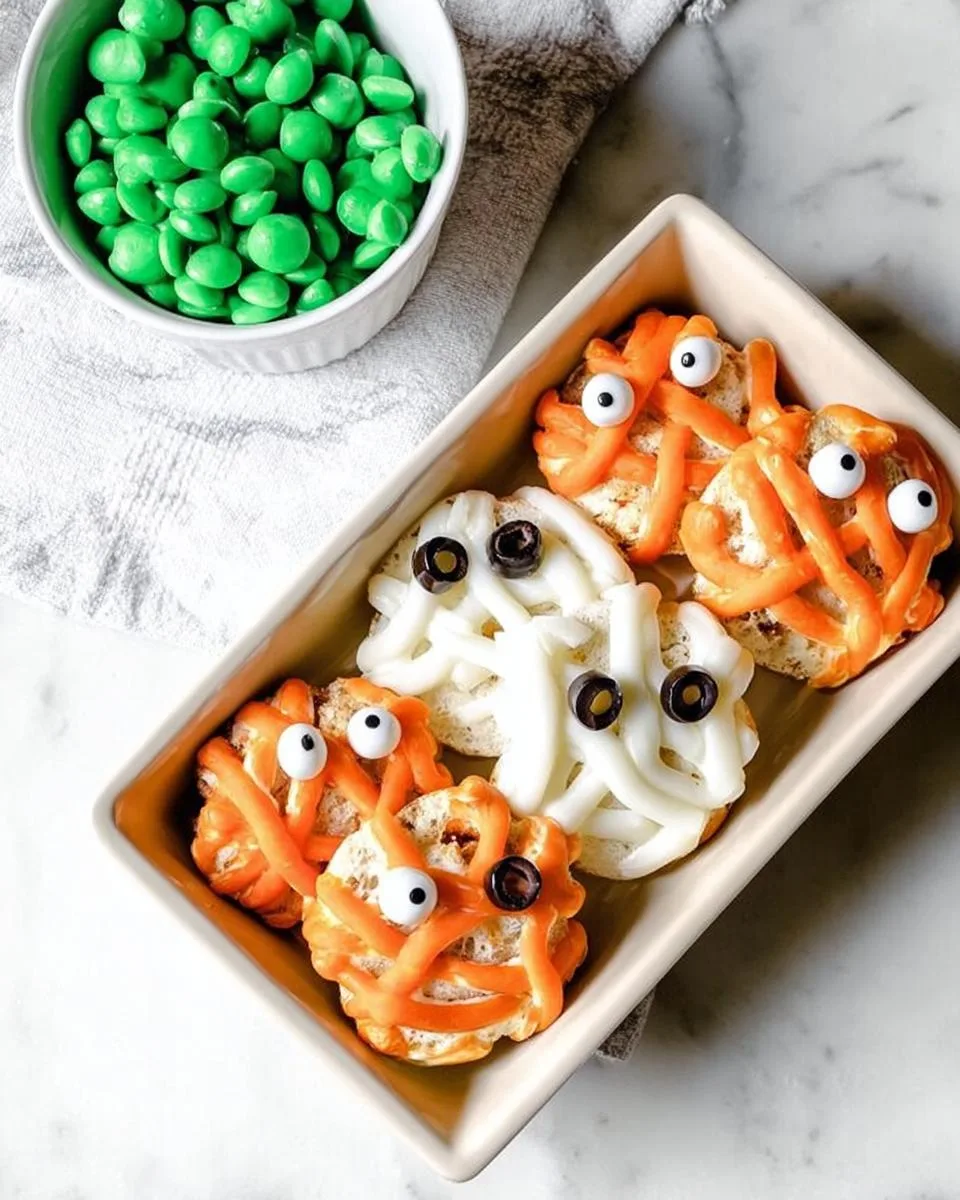
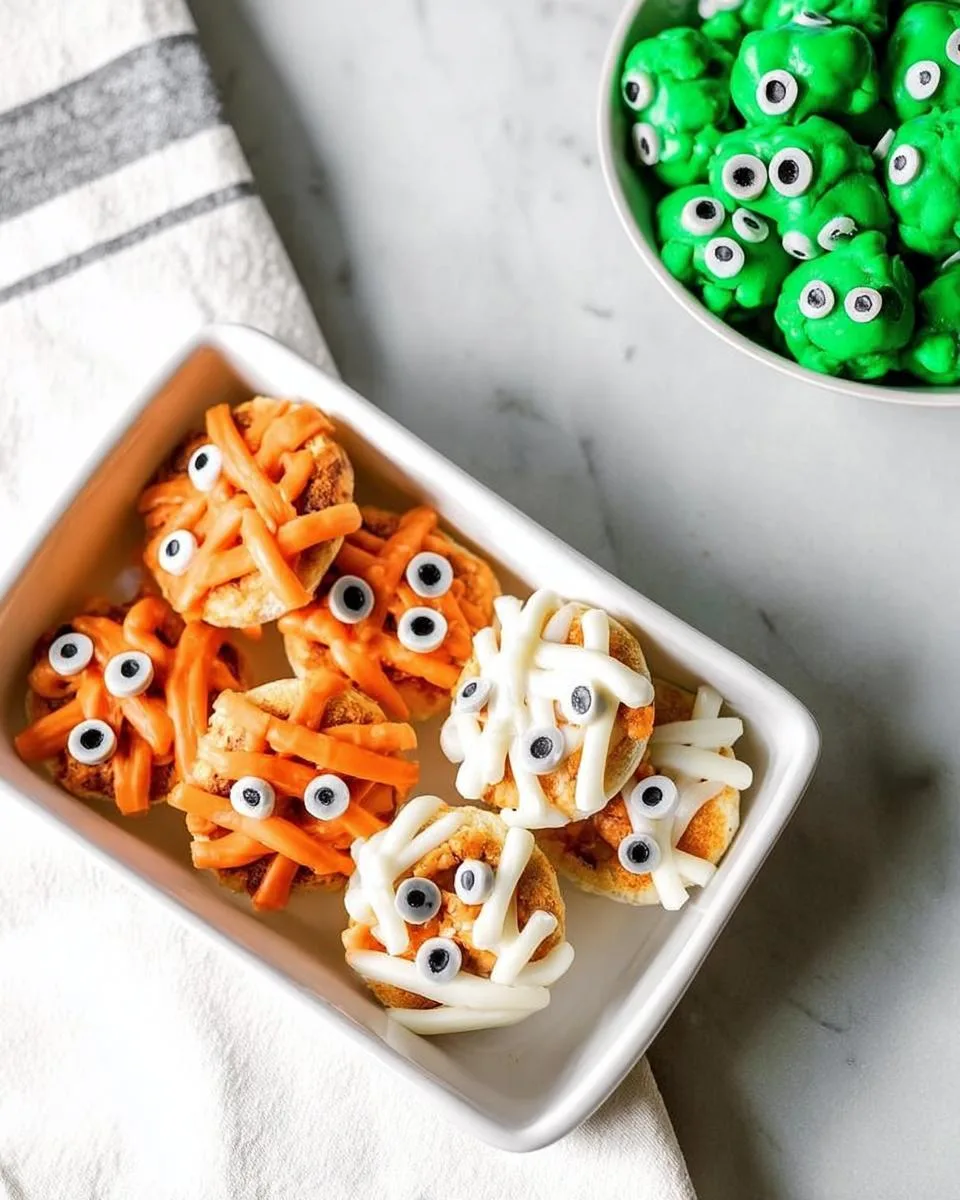
- 4 mozzarella string cheese sticks – Peeled into thin strips (freeze them for 10 minutes if they’re being stubborn)
- 1/4 cup sliced black olives – Drained and patted dry (perfect for those creepy little eyes and mouths)
Now I know what you’re thinking – “Can’t I just use shredded cheese?” Trust me, I tried that shortcut once and ended up with sad melted puddles instead of adorable mummy wraps. The string cheese magic is real!
How to Make Halloween Walnut Goblins
Ready to turn your kitchen into a goblin workshop? Let’s get spooky! These little guys are so easy to make, even my 5-year-old can help (most of the time). Just follow these simple steps, and you’ll have a plate full of creepy cuteness in no time.
Step 1: Prepare the Base
First things first – preheat that oven to 425°F (220°C). Trust me, you’ll want it nice and hot for those perfect crispy edges. While it’s heating up, grab your English muffins and split them in half horizontally. I like to use a serrated knife for clean cuts. Arrange them on a baking sheet lined with parchment paper – this is my secret weapon for easy cleanup and no sticking. (I’ve learned the hard way that skipping this step leads to goblin tragedy!)
Step 2: Add Sauce and Cheese
Now comes the fun part! Spread about 1 tablespoon of pizza sauce evenly on each muffin half. Don’t go too heavy here – you want just enough to stick the cheese. Next, take those mozzarella string cheese sticks and peel them into thin strips. Arrange the strips in a criss-cross pattern to create that classic mummy wrap look. Pro tip: If the cheese is being stubborn, pop it in the freezer for 10 minutes – it’ll peel like a dream!
Step 3: Create Goblin Faces
This is where your inner artist shines! Grab those sliced black olives and start designing. Use kitchen tweezers for precision if you’re feeling fancy (or if your kids are demanding perfect goblin faces). Place two olive slices for eyes, a half-circle for a mouth, or get creative with different expressions. My kids love making some goblins silly and others downright spooky. The more personality, the better!
Step 4: Bake to Perfection
Slide your goblin creations into the preheated oven and bake for about 12 minutes. You’re looking for golden edges and bubbly cheese – that’s your cue they’re done! If you prefer softer, less browned cheese, check them at 10 minutes. Let them cool for a minute or two (trust me, molten cheese burns are not a fun Halloween accessory), then serve them up to your little monsters!
Expert Tips for Halloween Walnut Goblins
After making dozens of these little monsters, here are my hard-earned secrets for goblin-making success:
- Chill that cheese! Pop string cheese in the freezer for 10 minutes before peeling – it won’t stick to itself.
- Shape your goblins Use Halloween cookie cutters on the muffins before toasting for bat or pumpkin-shaped bases.
- Kid-powered decorating Set up a “goblin bar” with toppings – kids go wild creating their own monster faces!
Variations for Halloween Walnut Goblins
Half the fun of these little goblins is how easily you can mix them up! Here are my favorite ways to get creative when I’m feeling extra spooky (or just cleaning out the fridge):
- Pepperoni screams – Swap olive mouths for tiny triangle pepperoni slices (bonus points if they’re curling up like creepy smiles!)
- Bell pepper horns – Add thin strips of red or yellow bell pepper sticking up like devil horns for some added Halloween drama
- Vegan monster mash – Use dairy-free cheese sticks and vegan pesto instead of pizza sauce for plant-based partygoers
- Glowing eyes – Place a tiny dollop of cream cheese with olive pupils for “glowing” white eyes that’ll wow the crowd
The best part? Let your kids go wild with the toppings – last year we made a whole goblin family with different “hairstyles” using shredded carrots and chives!
Serving and Storing Halloween Walnut Goblins
Here’s the best part – these adorable little monsters taste amazing fresh out of the oven when the cheese is all melty and gooey. I always serve them immediately if I can, perched on a spooky platter with some creepy cobweb decorations. The kids go wild when they see them!
Need to stash some away? No problem. Just pop any leftovers (if you’re lucky enough to have any!) into an airtight container in the fridge. They’ll keep for about 2 days – though the texture is best the first day. When you’re ready for round two, reheat them in a 350°F oven for about 5 minutes until the cheese gets all soft again. Microwaving works in a pinch, but it’ll make the muffin a bit chewier – still tasty, just not quite as perfect as that first bake.
Pro tip – I sometimes make an extra batch in the morning for school parties, let them cool completely, then wrap tightly in foil. They reheat beautifully in the classroom toaster oven when it’s party time!
Halloween Walnut Goblin Nutrition
Now let’s be real – these aren’t health food, but they’re way better than the candy avalanche coming later! Based on the ingredients I use, each muffin half comes out to about 150 calories. The mozzarella gives you a nice protein boost (8g!) to balance out all that sugar rush from trick-or-treating.
Keep in mind – nutrition can vary depending on your exact ingredients. Used whole wheat muffins? That’ll bump up the fiber. Went heavy on the olives? Watch that sodium. The numbers here are estimates per muffin half when made exactly as written. But hey – it’s Halloween! Let’s focus more on the fun than the numbers, okay?
Frequently Asked Questions
Over the years, I’ve gotten so many questions about these Halloween walnut goblins – here are the ones that pop up most often in my kitchen (and my DMs!):
Q: Can I use bagels instead of English muffins?
Oh absolutely! Mini bagels work fantastic for these walnut goblins – just split them in half like you would the muffins. The texture is slightly chewier, which some kids actually prefer. I’ve found the everything bagels make especially “monstrous” looking bases with all those speckles!
Q: How do I make these nut-free for school parties?
Good news – they’re naturally nut-free as written! The “walnut” in the name just refers to their cute little walnut-sized appearance, not actual nuts. For extra-safe classroom treats, just double-check your ingredients (some pizza sauces have trace nuts) and maybe skip the “walnut” part when describing them to anxious parents.
Q: Can I prep these ahead of time?
You sure can! Assemble them completely (minus baking) up to 4 hours ahead – just cover tightly with plastic wrap and refrigerate. The cheese might sweat a tiny bit, but they bake up perfectly. For longer prep, freeze the unbaked goblins on the tray, then transfer to a bag once solid. They’ll keep frozen for a month – just add 2-3 extra minutes to the bake time straight from the freezer!
Spooky Halloween Walnut Goblins in Just 30 Minutes
Fun and easy Halloween-themed snack that kids will love. These walnut goblins are made with simple ingredients and are perfect for parties.
- Total Time: 22 mins
- Yield: 4 servings 1x
Ingredients
- 2 English muffins
- 1/4 cup pizza sauce (Classico brand recommended)
- 4 mozzarella string cheese sticks
- 1/4 cup black olives, sliced
Instructions
- Preheat oven to 425°F (220°C).
- Cut each English muffin in half and place on a baking sheet.
- Spread pizza sauce evenly on each muffin half.
- Pull apart string cheese and arrange the pieces in a criss-cross pattern to look like mummy wraps.
- Use sliced black olives to create eyes, noses, and mouths as desired.
- Bake for 12 minutes for a crisp crust and bubbly cheese. Bake less if you prefer whiter cheese.
Notes
- You can use whole wheat English muffins for a healthier option.
- Customize the toppings to make different Halloween characters.
- Prep Time: 10 mins
- Cook Time: 12 mins
- Category: Appetizer
- Method: Baking
- Cuisine: American
- Diet: Vegetarian
Nutrition
- Serving Size: 1 muffin half
- Calories: 150
- Sugar: 2g
- Sodium: 320mg
- Fat: 6g
- Saturated Fat: 3g
- Unsaturated Fat: 2g
- Trans Fat: 0g
- Carbohydrates: 18g
- Fiber: 2g
- Protein: 8g
- Cholesterol: 15mg
You can also follow us on Facebook for more delicious recipes!