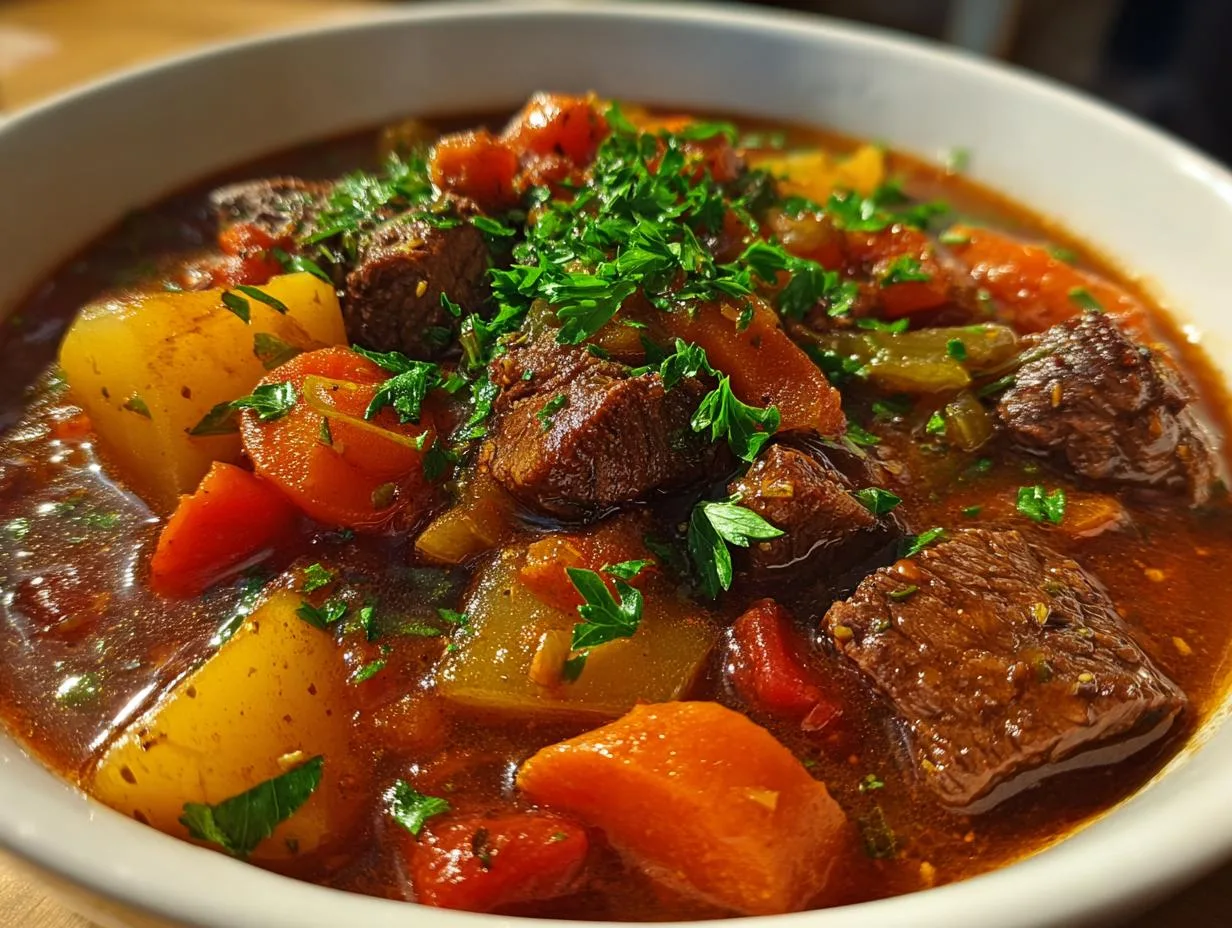
There’s something magical about a pot of homemade beef chili simmering on the stove that instantly makes any house feel like home. I still remember my mom’s giant yellow pot bubbling away on chilly Sunday afternoons – the rich aroma of spices and tomatoes filling our kitchen would have all of us kids racing to set the table. Now that I’ve got my own family, this homemade beef chili recipe has become our go-to comfort food, perfect for game days, busy weeknights, or whenever we need a big, cozy hug in a bowl.

What makes this chili so special? It’s that perfect balance of hearty ground beef, tender beans, and just the right blend of spices that somehow makes everyone at the table go back for seconds (and thirds!). The secret’s in simmering it low and slow – that’s when all the flavors really come together into something extraordinary. Trust me, once you try this version, you’ll understand why it’s been passed down in my family for generations.
Table of Contents
Table of Contents
Why You’ll Love This Homemade Beef Chili Recipe
This isn’t just any chili – it’s the kind that makes people hover around the stove, sneaking tastes with a spoon while you pretend not to notice. Here’s why it’s become my family’s favorite:
- Deep, rich flavor from simmering with beer and beef broth (don’t worry, the alcohol cooks off!)
- Perfect texture – thick enough to stand up a spoon but still wonderfully saucy
- Easy stovetop method that lets you walk away while it works its magic
- Totally customizable – dial up the heat or keep it mild, swap toppings, make it your own!
- Even better next day (if there’s any left – good luck with that!)
Homemade Beef Chili Recipe Ingredients
Gathering the right ingredients is half the battle when making amazing chili – and I promise every single one of these plays an important role. Here’s what you’ll need to make my family’s favorite pot of comfort:
- 2 pounds lean ground beef (85/15 works great – enough fat for flavor but not greasy)
- 1 onion, diced (yellow or white – whatever’s in your pantry!)
- 1 jalapeño, seeded and finely diced (leave some seeds if you like heat)
- 4 cloves garlic, minced (fresh is best, but 1 tsp garlic powder works in a pinch)
- 2 ½ tablespoons chili powder, divided (I use a blend but single-origin works too)
- 1 teaspoon cumin (that earthy backbone flavor we all love)
- 1 green bell pepper, seeded and diced (adds sweetness and texture)
- 14.5 ounces crushed tomatoes (1 can) – the base of our rich sauce
- 19 ounces canned red kidney beans, drained and rinsed (or pinto beans if you prefer)
- 14.5 ounces canned diced tomatoes with juices (fire-roasted add amazing depth)
- 1 ½ cups beef broth (homemade stock takes it next-level)
- 1 cup beer (a lager or ale – nothing too hoppy. See notes below!)
- 1 tablespoon tomato paste (that secret umami booster)
- 1 tablespoon brown sugar (optional) – my little trick to balance acidity
- Salt and black pepper to taste (always taste as you go!)
Ingredient Substitutions & Notes
Life happens, and sometimes you need to improvise – here’s how to adapt without losing that magic chili flavor:
- Ground beef alternatives: Ground turkey or chicken work (add 1 tbsp olive oil for moisture), or go half beef/half pork for extra richness
- Heat level: Skip the jalapeño entirely or swap in 1/4 tsp cayenne if you’re sensitive to spice
- Beer substitute: No beer? Use an extra 1 cup beef broth plus 1 tsp Worcestershire sauce for depth
- Tomato variations: All crushed tomatoes work if that’s what you have – the diced just add nice texture
- Brown sugar swap: Honey or maple syrup (1 tsp at a time) can sweeten if needed
- Pro tip: That beer isn’t just for flavor – the alcohol helps extract flavors from the spices! But don’t worry, it all cooks off.
The key is balancing your liquids (tomatoes + broth + beer) with your thickeners (tomato paste, simmering time). Once you nail that ratio, you’re golden!
How to Make Homemade Beef Chili

Now for the fun part – turning those beautiful ingredients into the most comforting pot of chili you’ve ever tasted! Don’t let the simmer time fool you – this recipe is actually super hands-off once you get it going. Just follow these simple steps and let the magic happen.
Step 1: Season and Brown the Beef
First things first – grab your biggest, heaviest pot (I use my trusty Dutch oven) and set it over medium-high heat. While that’s warming up, take your ground beef and sprinkle 1 ½ tablespoons of that chili powder right over it. Use your hands to gently mix it in – this coats every bit of meat with flavor from the get-go!
Now add the beef to your hot pot (hear that sizzle? That’s the sound of deliciousness starting!) and break it up with a wooden spoon. We’re looking for nice brown crumbles here, not gray mush – about 5-7 minutes should do it. Once it’s cooked through, carefully tilt the pot and spoon out any excess fat (I leave about 1 tablespoon for flavor).
Step 2: Sauté Vegetables
With the beef still in the pot, toss in your diced onions, jalapeño, and garlic. Oh, that aroma! This is when my kitchen starts smelling incredible. Cook them for about 3 minutes, stirring often, until the onions turn translucent and the garlic is fragrant (but not burnt – nobody wants bitter chili!).
This step builds so much flavor – the veggies soften just enough to melt into the chili later, and the jalapeño loses its raw edge while keeping that subtle heat. If things start sticking, just add a splash of beef broth to deglaze – those browned bits at the bottom are flavor gold!
Step 3: Simmer the Chili
Here’s where everything comes together beautifully. Add all your remaining ingredients – the crushed and diced tomatoes, kidney beans, beef broth, beer, tomato paste, remaining chili powder, cumin, and that optional brown sugar if you’re using it. Give it a good stir to combine, then bring it to a lively bubble.
Once it’s boiling, reduce the heat to low-medium – you want a gentle simmer where you see occasional bubbles breaking the surface. This is crucial: leave it uncovered! Let it bubble away for 45-60 minutes, stirring occasionally. The longer it simmers, the thicker and more flavorful it gets. I usually aim for about 50 minutes – the chili should coat the back of a spoon nicely when it’s ready.
Pro tip: About halfway through, taste and adjust your seasonings. Need more salt? More chili powder? Maybe a pinch more sugar? This is your chance to make it perfect for your family’s taste buds!
Tips for the Best Homemade Beef Chili
After making this chili more times than I can count (seriously, my family requests it weekly!), I’ve picked up some game-changing tricks that take it from good to “can I have the recipe?” amazing. Here are my absolute must-know tips:
- Spice control: That 2 ½ tbsp chili powder is just a starting point! I always taste midway and add more in ½ tsp increments if needed. Remember – you can add heat but can’t take it away!
- Thickening magic: If your chili’s too thin after simmering, mix 1 tbsp cornstarch with 2 tbsp cold water and stir it in. Simmer 5 more minutes and watch it transform!
- Sweetness balance: If your tomatoes taste too acidic, that brown sugar’s your friend. Start with 1 tsp and adjust – sometimes I sneak in a square of dark chocolate for depth!
- Bean tip: For creamier beans, add them during the last 20 minutes. Want them firmer? Toss them in at the beginning.
- Leftover love: The flavors meld beautifully overnight. If serving next day, thin with a splash of broth when reheating.
- Secret weapon: A splash of apple cider vinegar (1 tsp) at the end brightens all the flavors – try it!
Oh! And don’t skip letting the chili rest 10 minutes off heat before serving – it thickens up perfectly and lets all those flavors get cozy together.
Print
Hearty Homemade Beef Chili Recipe for Cozy Nights
A hearty homemade beef chili recipe packed with flavor and perfect for family dinners.
- Total Time: 75 minutes
- Yield: 6 servings 1x
Ingredients
- 2 pounds lean ground beef
- 1 onion diced
- 1 jalapeño seeded and finely diced
- 4 cloves garlic minced
- 2 ½ tablespoons chili powder divided, or to taste
- 1 teaspoon cumin
- 1 green bell pepper seeded and diced
- 14.5 ounces crushed tomatoes (1 can)
- 19 ounces canned red kidney beans drained and rinsed
- 14.5 ounces canned diced tomatoes with juices
- 1 ½ cups beef broth
- 1 cup beer
- 1 tablespoon tomato paste
- 1 tablespoon brown sugar (optional)
- salt and black pepper to taste
Instructions
- Combine ground beef and 1 ½ tablespoons chili powder.
- In a large pot, brown ground beef, onion, jalapeno, and garlic. Drain any fat.
- Add in remaining ingredients and bring to a boil.
- Reduce heat and simmer uncovered 45-60 minutes or until chili has reached desired thickness.
- Top with cheddar cheese, green onions, cilantro or other favorite toppings.
Notes
- Adjust chili powder to taste for more or less heat.
- Brown sugar is optional but adds a slight sweetness.
- For a thicker chili, simmer longer.
- Prep Time: 15 minutes
- Cook Time: 60 minutes
- Category: Main Dish
- Method: Stovetop
- Cuisine: American
- Diet: Low Lactose
Nutrition
- Serving Size: 1 bowl
- Calories: 350
- Sugar: 8g
- Sodium: 600mg
- Fat: 12g
- Saturated Fat: 4g
- Unsaturated Fat: 6g
- Trans Fat: 0g
- Carbohydrates: 30g
- Fiber: 8g
- Protein: 28g
- Cholesterol: 70mg
Serving Suggestions for Homemade Beef Chili
Oh, the fun part – dressing up that gorgeous pot of chili! I always set up a little “toppings bar” when I serve mine because half the joy is customizing each bowl. Here’s how we do it in our house:
Must-Have Toppings
- Shredded cheddar cheese (the sharper the better – it melts into the hot chili like a dream)
- Sour cream or Greek yogurt (that cool creaminess cuts through the spice perfectly)
- Diced green onions (for fresh crunch and color – I use the green parts mostly)
- Fresh cilantro (if you’re not one of those people who think it tastes like soap!)
- Pickled jalapeños (for those who want extra heat – my husband adds these by the spoonful)
- Crumbled tortilla chips or Fritos (that salty crunch is everything)
What to Serve With Chili
Now, let’s talk sides – because chili deserves the perfect partners:
- Homemade cornbread (my kids fight over the crispy edges – recipe coming soon!)
- Fluffy white rice (makes it stretch further and soaks up all that saucy goodness)
- Warm flour tortillas (perfect for scooping – we call them “chili spoons”)
- Baked potatoes (split open and loaded with chili for the ultimate comfort meal)
- Simple green salad (something fresh to balance the richness)

Pro tip: For game day, I serve the chili in individual bread bowls – just hollow out small round loaves and watch everyone’s faces light up! And if you’ve got picky eaters, try the “chili bar” approach – let everyone build their perfect bowl. My daughter loves hers with extra cheese and chips, while my son piles on the jalapeños until we can barely see the chili underneath!
Storing and Reheating Homemade Beef Chili
One of the best things about this homemade beef chili? It actually gets better as it sits! But you’ve got to store it right to keep all that amazing flavor and texture. Here’s how I handle leftovers (if we’re lucky enough to have any!):
Fridge Storage
Let the chili cool to room temperature first – I usually give it about 30 minutes. Then transfer it to an airtight container (I love my glass ones with the locking lids). It’ll keep beautifully in the fridge for up to 4 days. Pro tip: Press plastic wrap directly onto the surface before sealing to prevent that weird “fridge skin” from forming.
Freezing Like a Pro
This chili freezes like a dream! I often double the batch just to stock my freezer. Here’s my method:
- Cool completely (overnight in the fridge works best)
- Portion into freezer-safe containers or heavy-duty ziplock bags
- Leave about 1 inch of headspace for expansion
- Label with date and contents (trust me, you’ll forget!)
- Lay bags flat to freeze – they’ll stack like books when solid
Frozen chili stays good for up to 3 months. When you’re ready to eat, thaw overnight in the fridge or use the defrost setting on your microwave. My favorite trick? Drop a frozen chili block straight into a pot on low heat – it’ll thaw and heat at the same time with a little extra broth stirred in.
Reheating for Maximum Deliciousness
Stovetop is always best for reheating – it brings back that fresh-cooked texture. Just warm it over medium-low heat, stirring occasionally and adding a splash of beef broth if it’s too thick. Takes about 10-15 minutes.
For microwave reheating (hey, we’ve all got busy days!), transfer a portion to a microwave-safe bowl, cover loosely, and heat in 1-minute bursts, stirring in between. Usually takes 2-3 minutes total.
Pro tip: Always give reheated chili a quick taste and adjust seasonings – sometimes it needs a pinch more salt or a dash of chili powder to wake up the flavors after storage.
Homemade Beef Chili Recipe FAQs
I’ve gotten so many questions about this chili over the years – here are the ones that pop up most often with my tried-and-true answers:
Can I make this chili ahead of time?
Absolutely! In fact, I think it tastes even better the next day. Just let it cool completely, then store it in the fridge for up to 4 days. When you’re ready to serve, gently reheat it on the stovetop with a splash of beef broth to loosen it up. The flavors have more time to mingle and deepen overnight – it’s like chili magic!
How can I make it less spicy?
No problem at all! First, skip the jalapeño or remove all its seeds and ribs (that’s where most of the heat lives). You can also reduce the chili powder to 1 ½ tablespoons and add more to taste later. If you’ve already made it too spicy, stir in a dollop of sour cream or a teaspoon of sugar to balance the heat. My kids prefer it mild, so I often make a separate little pot just for them with extra beans and cheese stirred in.
Can I freeze homemade beef chili?
You bet! This chili freezes beautifully – it’s my secret for easy meals later. Just portion it into freezer bags (I do 2-cup servings), press out the air, and lay them flat to freeze. They’ll keep for 3 months. To reheat, either thaw overnight in the fridge or drop the frozen block straight into a pot with a little extra broth. It’ll taste just as good as the day you made it!
What’s the best beer to use in chili?
I usually grab whatever lager or ale I have on hand – nothing too hoppy or bitter though. A Mexican lager like Corona works great, or even a basic amber ale. The alcohol cooks off, leaving behind this amazing depth of flavor. No beer? No worries! Just swap in an extra cup of beef broth with a teaspoon of Worcestershire sauce – it won’t be exactly the same, but still delicious.
Why is my chili too watery?
First, make sure you’re simmering it uncovered – that steam needs to escape! If it’s still too thin after the full cooking time, mix 1 tablespoon cornstarch with 2 tablespoons cold water and stir it in. Let it bubble for 5 more minutes and watch it thicken up beautifully. Or, if you’ve got time, just let it simmer longer – patience makes perfect chili!
Nutritional Information
Now, I’m no nutritionist, but I know many of you (like me!) like to keep an eye on what’s going into your family’s meals. Here’s the scoop on our homemade beef chili – just remember these are estimates since brands and ingredient sizes can vary:
- Serving Size: About 1 ½ cups (a nice hearty bowlful)
- Calories: Around 350 per serving
- Protein: 28g (thanks to all that beef and beans!)
- Carbohydrates: 30g (mostly from the beans and tomatoes)
- Fiber: 8g (beans for the win!)
- Sugar: 8g (mostly natural from the tomatoes and that optional brown sugar)
- Fat: 12g (we use lean beef to keep it reasonable)
- Saturated Fat: 4g
- Sodium: About 600mg (you can reduce this with low-sodium broth and beans)
Remember, these numbers can change based on your specific ingredients and toppings (I’m looking at you, extra cheese lovers!). But overall, it’s a pretty balanced meal packed with protein and fiber to keep everyone satisfied.
Now I want to hear from you – give this homemade beef chili recipe a try and tell me what you think in the comments below! Did your family go back for seconds? What toppings did you love? Any clever twists you added? Can’t wait to hear your chili stories! You can also follow along for more great recipes over on Facebook!