Oh my goodness, have you ever seen those magical, cloud-like jiggly Japanese pancakes that look almost too good to eat? I first fell in love with them during a trip to Tokyo years ago, and let me tell you – when I finally cracked the code to making them at home, my kids went absolutely wild! These aren’t your average flapjacks – they’re light as air, sweet without being heavy, and yes, they really do jiggle when you shake the plate (which we do constantly because it never gets old).
The best part? They’re surprisingly simple to make with just a few basic ingredients you probably already have in your kitchen. No fancy equipment needed – just a little patience and the willingness to embrace the jiggle. Trust me, once you master these fluffy wonders, you’ll be making them every weekend!
Table of Contents
Table of Contents
Why You’ll Love These Jiggly Japanese Pancakes
Let me count the ways these pancakes will steal your heart:
- That insane fluffiness – they’re like edible clouds that bounce back when you poke them (yes, I test every batch this way!)
- So much easier than they look – just eggs, flour, and a little magic folding technique
- Perfectly versatile – dress them up with berries for brunch or keep it simple with powdered sugar
- The pure joy factor – watching them jiggle never gets old, whether you’re 5 or 50
- They make any morning feel special – no trip to Japan required!
Seriously, once you see that first pancake wobble on your plate, you’ll understand why I’m obsessed. If you are looking for other fun breakfast ideas, check out my fluffy breakfast pancake poppers!
Ingredients for Jiggly Japanese Pancakes
Here’s the beautiful simplicity of these pancakes – just a handful of basic ingredients transform into something magical. But listen closely, because the quality and prep make all the difference:
- 2 large eggs – cold from the fridge separates easier (trust me on this!)
- 2 tablespoons milk – whole milk gives the richest flavor
- ½ teaspoon vanilla extract – the good stuff, not imitation
- 1 teaspoon lemon zest (optional) – brightens everything up
- ¼ cup all-purpose flour – fluffed, spooned, and leveled (no packing!)
- ¼ teaspoon baking powder – just a pinch for lift
- ½ teaspoon white vinegar – or lemon juice to stabilize the meringue
- 2 tablespoons granulated sugar – divided between yolk mix and meringue
See? Nothing fancy – just pantry staples prepped with care. The magic happens in the mixing!
Essential Equipment for Jiggly Japanese Pancakes
You don’t need fancy gadgets, but these tools make all the difference:
- Nonstick pan – my trusty 8-inch works perfectly
- Electric mixer – hand or stand, just something to whip those egg whites
- Piping bag (or zip-top bag) – for tall, fluffy pancake mounds
- Spatula – thin and flexible for gentle flipping
- Lid – any pan lid to trap steam while cooking
That’s it! No special pancake rings needed – just good old kitchen basics.
How to Make Jiggly Japanese Pancakes
Okay, here’s where the magic happens! Don’t let the steps intimidate you – I’ll walk you through each stage like I’m right there in your kitchen with you. The key is patience and gentle hands – think of yourself as a pancake whisperer.
Step 1: Preparing the Egg Yolk Mixture
First, separate those eggs carefully – no yolk in the whites! In a medium bowl, whisk the yolks with milk and vanilla until smooth and pale yellow. If you’re using lemon zest, toss it in now for that bright little kick. Here’s my secret: sift the flour and baking powder directly into the yolk mixture – no separate bowl needed! Gently whisk until just combined. A few tiny lumps are fine – we’re avoiding overmixing here.
Step 2: Making the Meringue
Now for the showstopper! In a clean bowl (any grease will sabotage your meringue), beat the egg whites with vinegar until frothy. Gradually add sugar while beating – I do about 1 tablespoon at a time. Keep going until you get stiff, glossy peaks that hold their shape when you lift the beaters. Pro tip: tilt the bowl upside down (carefully!) – if the meringue doesn’t budge, it’s ready!
Step 3: Folding and Cooking the Jiggly Japanese Pancakes
Here’s where most people rush – don’t! Scoop about 1/3 of the meringue into the yolk mixture and fold gently with a spatula, turning the bowl as you go. Once incorporated, add the rest in two batches. The batter should be light and airy – like fluffy pancake clouds! Heat your pan on low (seriously, LOW) and lightly grease it. Pipe or spoon tall mounds of batter (about 3 inches high), cover with a lid, and let them cook undisturbed for 7-8 minutes. When golden underneath, flip carefully (they’re delicate!) and cook another 5-6 minutes covered. The wait is torture, but SO worth it!
Tips for Perfect Jiggly Japanese Pancakes
After countless batches (and a few pancake casualties), I’ve learned these secrets for foolproof jiggly perfection:
- Keep it gentle! Overmixing deflates the batter – fold just until no white streaks remain.
- Low and slow heat is non-negotiable. If your pan smokes, it’s too hot!
- Cold eggs separate easier – I always pull mine straight from the fridge first.
- No peeking! That steam under the lid creates the signature fluffiness.
- Grease lightly – too much oil makes the pancakes spread instead of rise.
- Eat immediately – they’re at their jiggly best straight from the pan.
Remember – even lopsided pancakes taste amazing. The wobble is what counts! If you want to see more of my favorite breakfast creations, check out my banana french toast casserole.
Print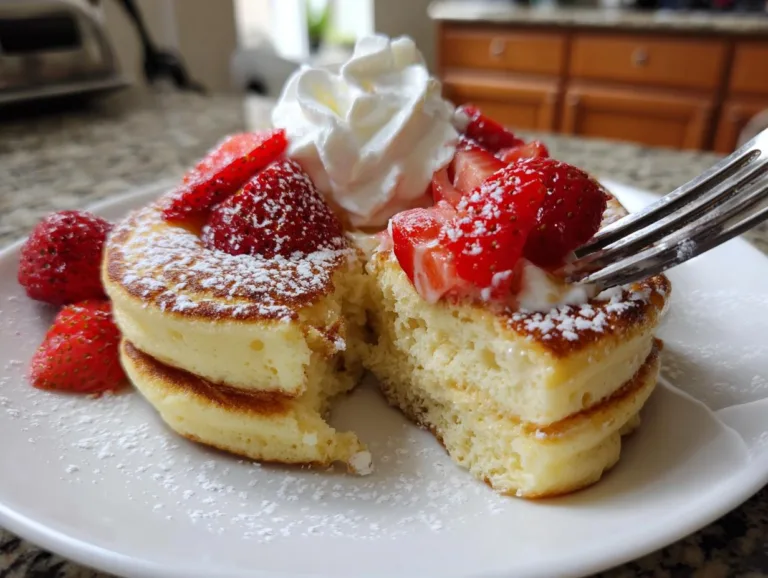
Magical Jiggly Japanese Pancakes in Just 7 Steps
Fluffy and jiggly Japanese soufflé pancakes that are light, airy, and perfect for a sweet breakfast or brunch.
- Total Time: 25 minutes
- Yield: 2–3 pancakes 1x
Ingredients
- 2 large eggs
- 2 tablespoons milk
- ½ teaspoon vanilla extract
- 1 teaspoon lemon zest (optional)
- ¼ cup all-purpose flour (fluffed, spooned, and leveled)
- ¼ teaspoon baking powder
- ½ teaspoon white vinegar (or lemon juice)
- 2 tablespoons granulated sugar
- Oil (any neutral oil for cooking)
- Sweetened whipped cream (optional)
- Assorted berries (optional)
- Powdered sugar (optional)
- Maple syrup (optional)
- ½ cup heavy cream (cold, for whipped cream)
- 1 tablespoon granulated sugar (for whipped cream)
- ½ teaspoon vanilla (for whipped cream)
Instructions
- Separate the egg whites and yolks into separate bowls.
- Whisk egg yolks with milk, vanilla, and lemon zest. Sift in flour and baking powder, then mix until smooth.
- Beat egg whites with vinegar or lemon juice until frothy. Gradually add sugar and beat until stiff peaks form.
- Fold ⅓ of the meringue into the yolk mixture gently. Repeat with remaining meringue.
- Heat a nonstick pan on low heat and lightly grease with oil.
- Scoop or pipe batter into tall mounds in the pan.
- Cover and cook for 7-8 minutes until golden brown on the bottom.
- Flip carefully, cover, and cook for another 5-6 minutes.
- Serve immediately with whipped cream, berries, powdered sugar, or maple syrup.
Notes
- Electric stovetops work best for even cooking.
- Keep batter tall for fluffy pancakes.
- Do not overmix the batter to avoid deflating the meringue.
- Prep Time: 10 minutes
- Cook Time: 15 minutes
- Category: Breakfast
- Method: Stovetop
- Cuisine: Japanese
- Diet: Vegetarian
Nutrition
- Serving Size: 1 pancake
- Calories: 180
- Sugar: 10g
- Sodium: 50mg
- Fat: 8g
- Saturated Fat: 3g
- Unsaturated Fat: 4g
- Trans Fat: 0g
- Carbohydrates: 22g
- Fiber: 1g
- Protein: 5g
- Cholesterol: 95mg
Serving Suggestions for Jiggly Japanese Pancakes
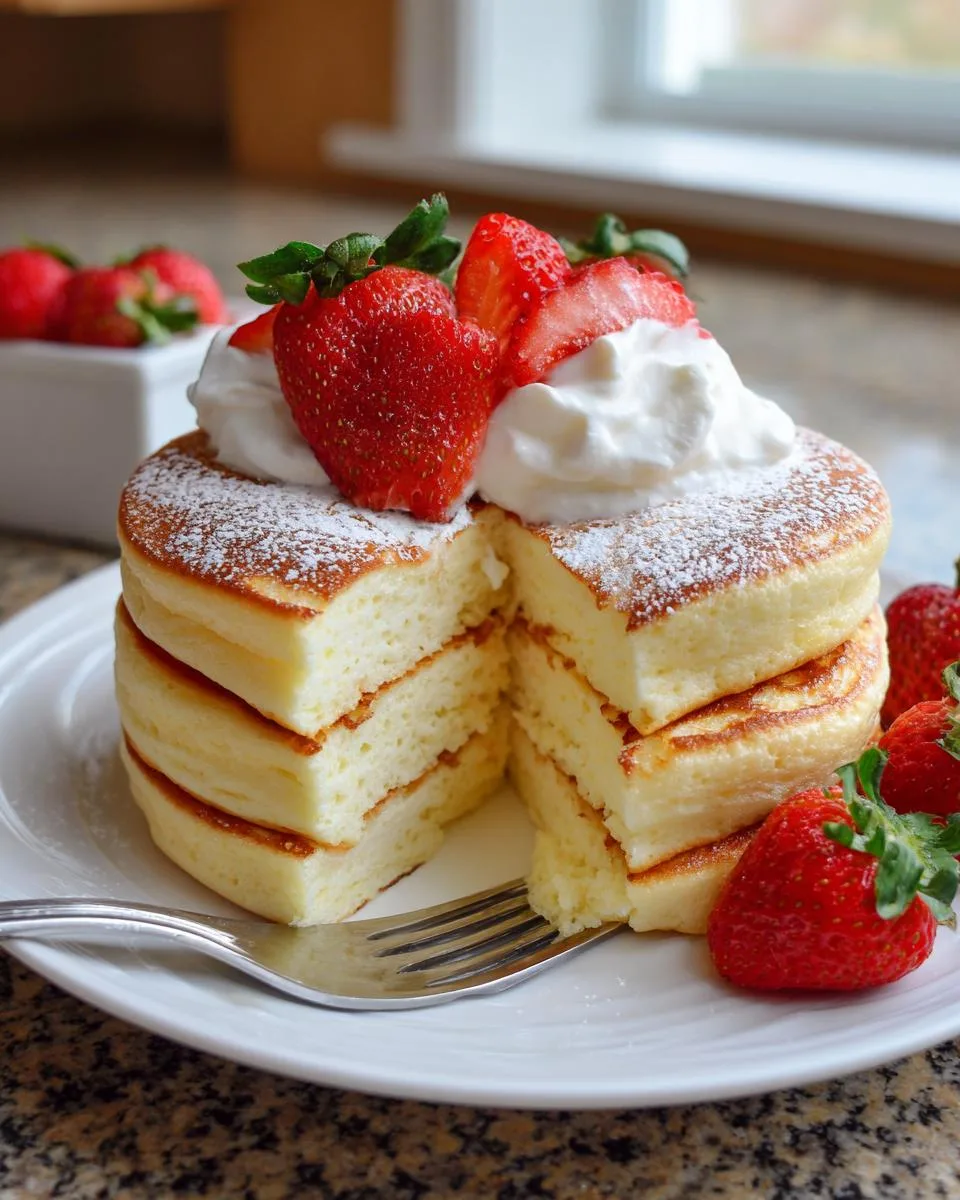
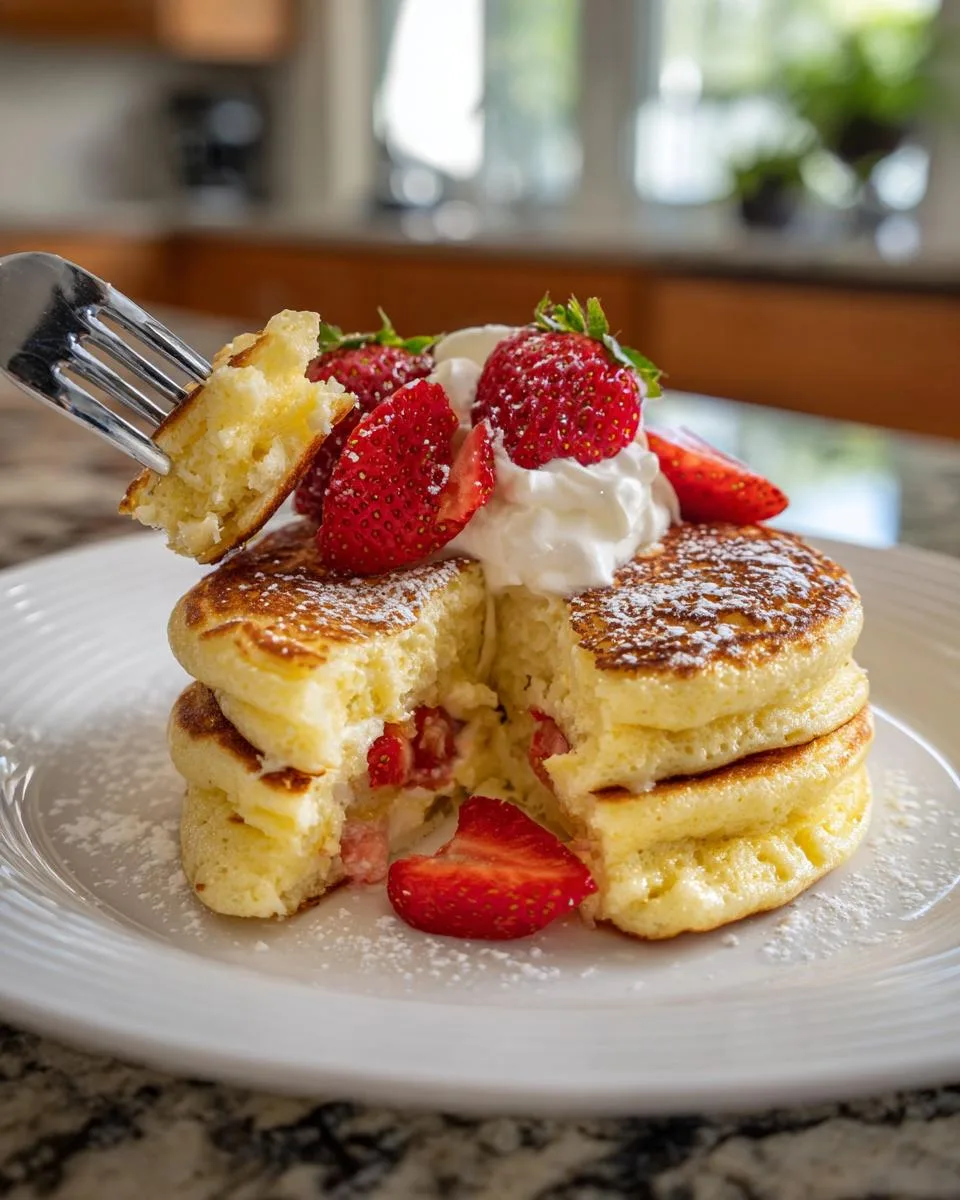
Now for the best part – dressing up those glorious jiggly towers! My kids love watching me decorate these like edible art pieces. Keep it simple or go all out – either way, you can’t go wrong:
- Sweetened whipped cream – a fluffy cloud on top of a cloud! I add a splash of vanilla to mine.
- Fresh berries – strawberries, blueberries, or raspberries add color and tartness.
- Powdered sugar snow – dust lightly through a fine sieve for that café-worthy look.
- Warm maple syrup – drizzle just before serving for that classic pancake feel.
- Melted butter – because everything’s better with butter, right?
Pro tip: serve with both forks and spoons – these pancakes deserve proper utensils for maximum enjoyment! For more sweet treats, take a look at my cherry cinnamon rolls.
Nutritional Information for Jiggly Japanese Pancakes
Here’s the scoop on what’s in these fluffy wonders (per pancake): about 180 calories, with 5g protein to keep you satisfied. Now, here’s my kitchen truth – these numbers can wiggle just like the pancakes depending on your exact ingredients and toppings! Brands vary, and whether you go heavy on the whipped cream or light with berries makes a difference. Consider this your general guide, not a rigid rule – the joy factor definitely counts as extra nutrition in my book!
FAQs About Jiggly Japanese Pancakes
Can I make these without a mixer?
Absolutely! While an electric mixer makes quick work of the meringue, you can whisk by hand – just be prepared for an arm workout! Use a large balloon whisk and whip vigorously in circular motions. It’ll take about 8-10 minutes of constant whisking to reach stiff peaks. Pro tip: chill your bowl first – cold helps the whites whip faster!
Why do my pancakes collapse?
Oh honey, I’ve been there! Usually it means the meringue wasn’t stiff enough before folding, or the heat was too high. Next time, test your meringue by turning the bowl upside down (carefully!) – if it stays put, you’re golden. And remember – low heat is key! These aren’t regular pancakes that cook fast.
Can I make these ahead for a Japanese breakfast spread?
Honestly, they’re best fresh, but here’s my hack: cook them 90% done, let cool completely, then refrigerate. When ready to serve, pop them back in the pan on low heat for 1-2 minutes per side to rewarm. They won’t be quite as jiggly, but still delicious with your favorite Japanese breakfast sides!
What can I substitute if I don’t have piping bags?
No worries! A zip-top bag with the corner snipped off works perfectly. Or just use two spoons to carefully mound the batter high in the pan. The shape might be less perfect, but the flavor and fluffiness will still be there!
Are these the same as Japanese sweet pancake dessert recipes?
Similar concept, but these are more breakfast-friendly! Sweet pancake desserts (like dorayaki) often use honey or red bean paste. Our version keeps it simple with vanilla and lemon for a lighter morning treat that still satisfies that Japanese pancake craving.
Share Your Jiggly Japanese Pancakes
I’d love to see your pancake masterpieces! If you snap a photo of those glorious jiggly towers, tag me @FrostyRecipes – nothing makes me happier than seeing your kitchen adventures. You can also follow along for more recipe inspiration on Facebook!