Nothing gets my kids more excited for Halloween than whipping up a batch of these Marshmallow Rice Krispies brains! Last year, my youngest nearly lost his mind (pun intended) when I surprised his class with these creepy-cute treats. Honestly, they’re so simple to make – just butter, marshmallows, and Rice Krispies transformed into the perfect ghoulish dessert. The best part? You don’t need fancy baking skills, just some food coloring and a little imagination to create snacks that’ll have everyone screaming for seconds!
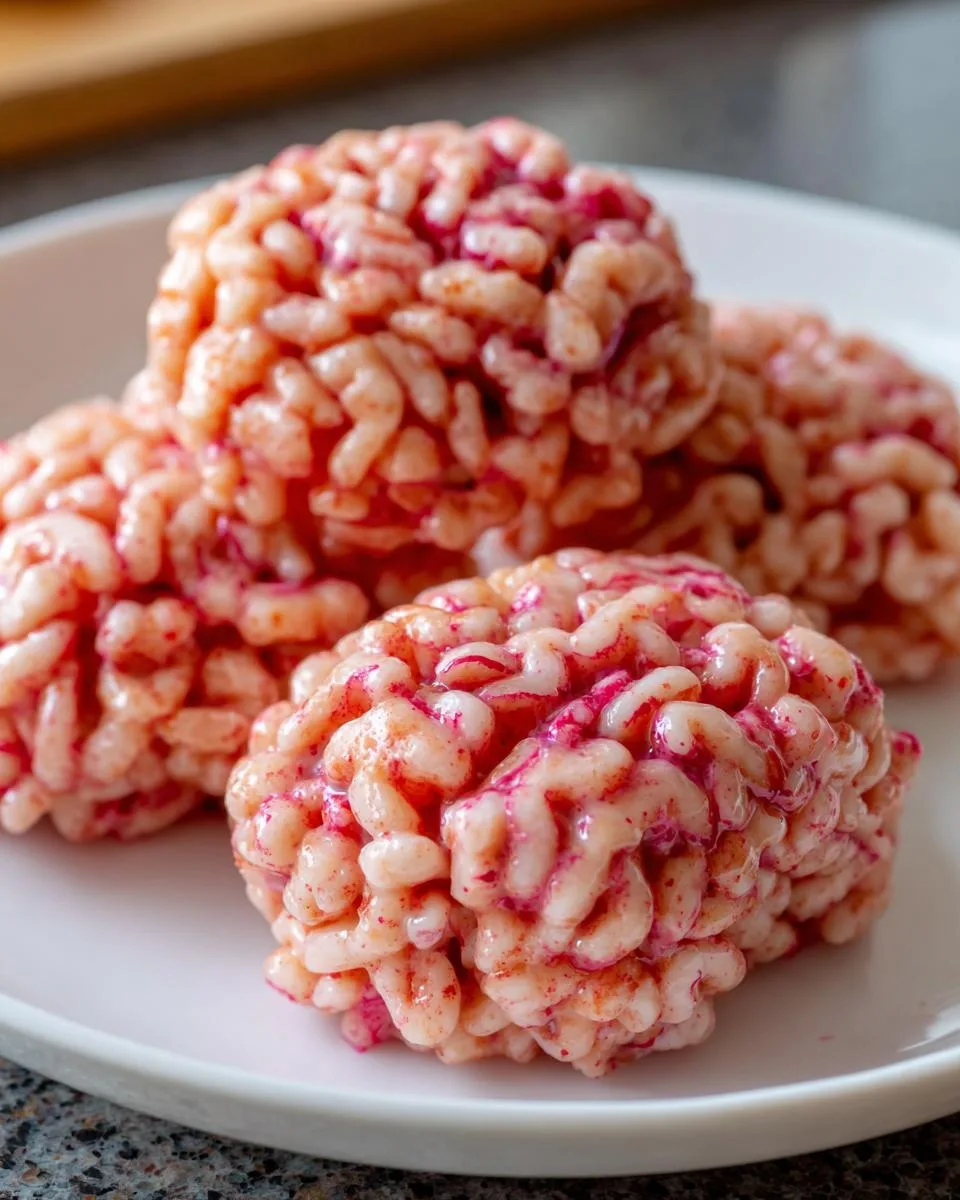
Table of Contents
Table of Contents
Why You’ll Love These Marshmallow Rice Krispies Brains
Trust me, these aren’t your average Rice Krispies treats – they’re a total game-changer for spooky season! Here’s why they’ll become your new Halloween staple:
- So easy a zombie could make them – Just 5 ingredients and 15 minutes from start to finish
- Kid-approved fun – My little monsters go wild shaping the “brains” and painting veins
- Party perfect – They look impressively creepy but take zero baking skills
- Customizable colors – Go bright red for gory or pink for a more “scientific” look
- No-bake magic – No oven means more time for costume-making (or taste-testing!)
The best part? Watching everyone’s reactions when you unveil these edible brains – the screams are half horror, half delight!
Ingredients for Marshmallow Rice Krispies Brains
Gather these simple ingredients – you probably have most in your pantry already! The magic happens when these basics come together to create something wonderfully weird. Here’s what you’ll need:
- 85 g unsalted butter – diced into small cubes to melt evenly (trust me, this prevents scorching!)
- 6 cups regular marshmallows – mini ones melt faster, but standard work just fine too
- 4 cups Rice Bubbles (that’s Rice Krispies for my US friends) – the star of the show!
- ½ tsp salt – just a pinch to balance all that sweetness
- Red food colouring – I like gel for vibrant color, but liquid works too (start with just a drop!)
Pro tip: Measure everything before starting – once those marshmallows start melting, you’ll want to move quickly!
Equipment You’ll Need
Don’t worry – you won’t need any fancy gadgets for these Marshmallow Rice Krispies brains! Just grab these basic kitchen tools:
- Small pot – for the Bain-Marie setup
- Large heatproof bowl – that fits snugly over the pot
- Whisk – or sturdy spoon for stirring
- Mixing bowl – big enough for combining everything
- Toothpicks – our secret weapon for drawing creepy veins
- Butter knife – for shaping the brain grooves
That’s it! Now let’s get to the fun part – making some edible brains!
How to Make Marshmallow Rice Krispies Brains
Okay, let’s get messy and make some deliciously creepy brains! I promise it’s easier than it looks – just follow these simple steps and you’ll have ghoulish treats in no time.
Step 1: Melt the Marshmallow Mixture
First, set up your Bain-Marie (that’s just a fancy term for a double boiler). Fill a small pot with about 1/2 cup of water and bring it to a gentle boil. Place your large heatproof bowl on top – make sure it fits snugly but doesn’t touch the water! This indirect heat prevents the marshmallows from burning, which happens SO easily (learned that the hard way last Halloween!).
Add your diced butter and marshmallows to the bowl. Now comes the arm workout – keep whisking constantly for 2-4 minutes until you get a smooth, glossy mixture. Don’t walk away – those marshmallows can go from perfect to burnt in seconds!
Step 2: Combine with Rice Krispies
Carefully remove the bowl from heat (use oven mitts – that bowl gets HOT!). Stir in your salt and a drop of red food coloring – start small, you can always add more for a gorier look. Now pour this sticky pink goodness over your Rice Krispies in a large mixing bowl.
Here’s my secret: fold gently but thoroughly with a rubber spatula until every single crispy piece is coated. You want zero dry spots – those uncoated bits will ruin your brain texture! The mixture should look evenly pink and slightly glossy.
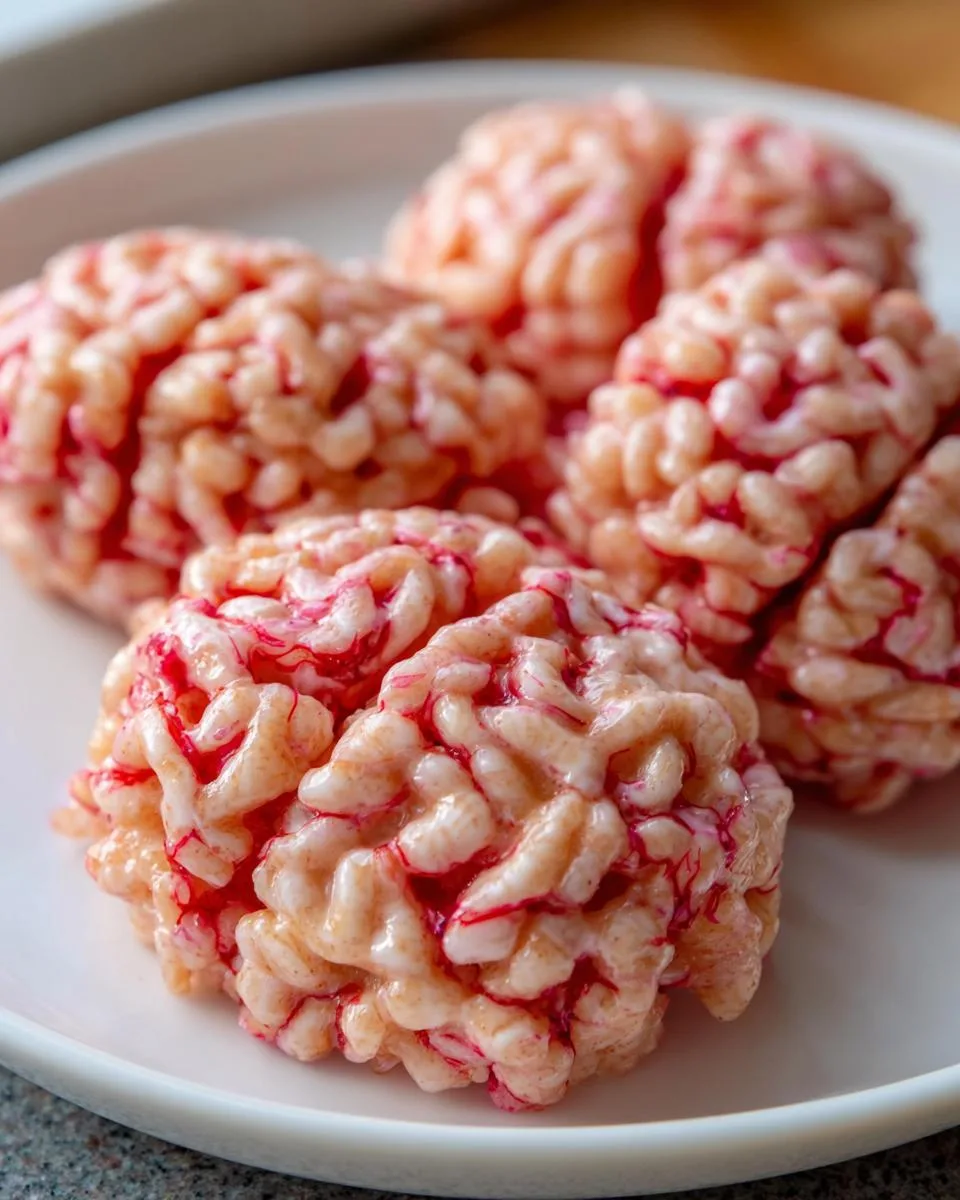
Step 3: Shape and Decorate the Brains
Time for the fun part! Rub some vegetable oil on your hands (trust me, you’ll thank me later) and grab small handfuls of the mixture. Shape them into oval “brain” lumps – imperfect is perfect here! Use a butter knife to make a wavy groove down the center.
Now for the creepy details: dip a toothpick in extra food coloring and draw squiggly veins across the surface. Let your inner artist shine – no two brains should look alike! Pro tip: work quickly before the mixture cools, and don’t stress about perfection. The messier, the more realistic!
Tips for Perfect Marshmallow Rice Krispies
After making these brainy treats more times than I can count, I’ve picked up some tricks that’ll save you from sticky disasters! Here are my can’t-live-without tips:
- Gloves are your best friend – Slip on some disposable gloves when shaping to avoid the marshmallow hand situation (you know the one!)
- Color gradually – Add food coloring one drop at a time until you hit that perfect gory pink
- Work fast while warm – The mixture becomes harder to shape as it cools, so have your tools ready
- Keep it loose – Don’t pack the Rice Krispies too tight – you want those brainy crevices!
- Extra veins hack – Use the back of a spoon to gently press more grooves after the initial shaping
Remember – the “mistakes” often look the most realistic, so embrace the messy fun!
Variations and Substitutions

Want to switch things up? No problem! These Marshmallow Rice Krispies brains are super flexible. For a vegan version, swap in plant-based butter and vegan marshmallows – they work just as well! If allergies are a concern, try puffed rice cereal instead of Rice Krispies. Feeling adventurous? Add a teaspoon of vanilla extract for extra flavor, or mix in some crushed freeze-dried strawberries for a naturally pink hue. The possibilities are endless!
Storing Your Marshmallow Rice Krispies
Here’s the good news – these brainy treats stay fresh for days! Just pop them in an airtight container at room temperature (no fridge needed!) and they’ll keep their creepy texture for up to a week. Word of warning though – humidity is their worst enemy. If your kitchen feels sticky, toss in a slice of bread to absorb extra moisture. I learned this trick after my first batch turned into mushy zombie brains overnight!
Nutritional Information
Just so you know what you’re biting into – each of these Marshmallow Rice Krispies brains clocks in at about 150 calories (but who’s counting on Halloween, right?). Here’s the breakdown per piece:
- Calories: 150
- Sugar: 12g
- Fat: 4g
Keep in mind – these are estimates and can vary based on your specific ingredients. Now go enjoy that sweet, creepy goodness!
FAQs About Marshmallow Rice Krispies
Got questions about these brainy treats? I’ve answered all the common ones that pop up when I make these for parties:
Can I use marshmallow fluff instead? Absolutely! Substitute equal amounts of fluff for the marshmallows – just skip the melting step. The texture will be slightly softer, so chill the mixture for 10 minutes before shaping.
How do I make them less sticky? If your hands keep getting glued, try coating them with powdered sugar instead of oil. Works like a charm! Also, letting the mixture cool slightly before shaping helps.
Can kids help with these? Oh yes – my kids love helping! Just supervise the hot marshmallow step. Their “messy” brains often turn out the most realistic-looking!
Why Bain-Marie? Can’t I microwave? You can microwave in 30-second bursts, but I find the stove method gives more control. Microwaved marshmallows tend to seize up faster.
How far ahead can I make these? They’re best within 3 days, but will last up to a week stored properly. The veins might fade slightly – just touch them up with fresh food coloring if needed!
Share Your Creations!
I’d love to see your creepy creations! Tag me @FrostyRecipes on Instagram with your brainy masterpieces – nothing makes me happier than seeing your spooky treats come to life!
Print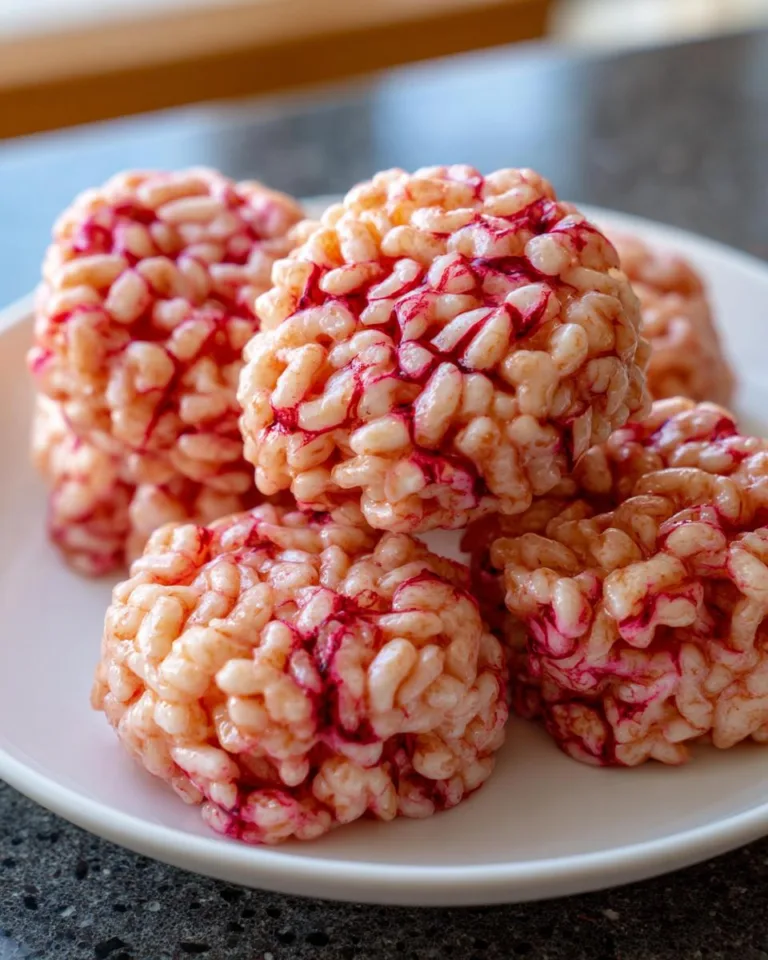
Spooky Marshmallow Rice Krispies Brains in Just 15 Minutes
A fun and easy recipe for Marshmallow Rice Krispies treats shaped like brains, perfect for Halloween or themed parties.
- Total Time: 15 mins
- Yield: 12 servings 1x
Ingredients
- 85 g unsalted butter
- 6 cups regular marshmallows
- 4 cups Rice Bubbles (Krispies)
- ½ tsp salt
- Red food colouring
Instructions
- Prepare a Bain-Marie by putting 1/2 cup of water into a small pot and letting it come to boil. Place a large heatproof bowl over the pot of boiling water.
- Place the butter and marshmallows into the large heatproof bowl. Continually whisk the ingredients until it becomes a smooth paste. This may take around 2-4 minutes.
- Using oven mitts or a tea towel, take the heatproof bowl out of the pot. Add the salt and a drop or more of food colouring, then whisk together.
- In a large mixing bowl, place the Rice Bubbles inside. Pour the marshmallow mixture over the Rice Bubbles and mix thoroughly to coat all the Rice Bubbles.
- Oil your hands and shape the Rice Bubbles into ovals. Use a butter knife to make a dent in the middle. Dip a toothpick into the food colouring and draw veins on the brains. Store in an airtight container for up to a week.
Notes
- Use gloves when shaping to avoid sticky hands.
- Adjust food colouring for darker or lighter shades.
- Store in an airtight container to maintain freshness.
- Prep Time: 10 mins
- Cook Time: 5 mins
- Category: Dessert
- Method: Stovetop
- Cuisine: American
- Diet: Vegetarian
Nutrition
- Serving Size: 1 piece
- Calories: 150
- Sugar: 12g
- Sodium: 100mg
- Fat: 4g
- Saturated Fat: 2.5g
- Unsaturated Fat: 1g
- Trans Fat: 0g
- Carbohydrates: 28g
- Fiber: 0.5g
- Protein: 1g
- Cholesterol: 10mg
For More recipes Follow me on Facebook!