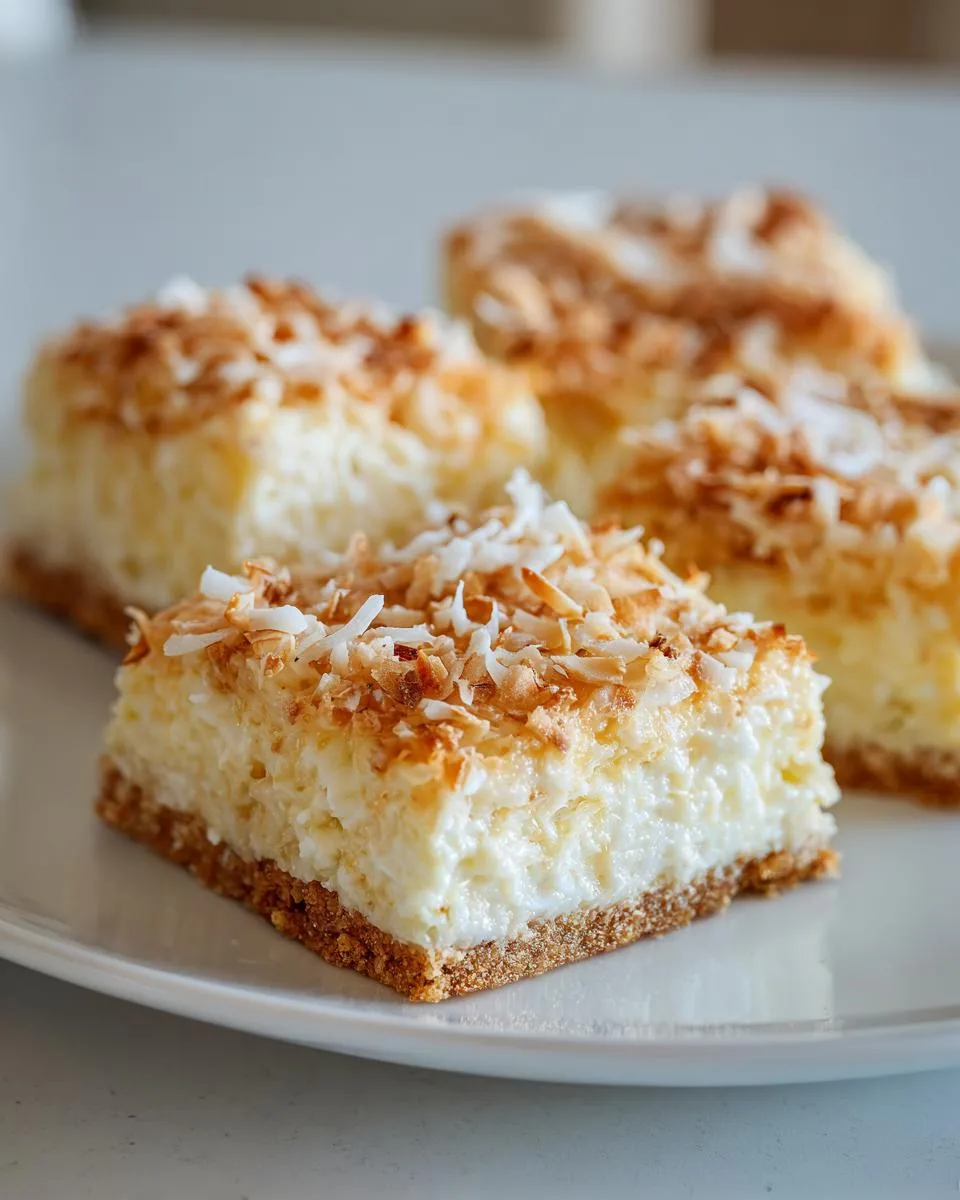
Oh my gosh, you have to try these No-Bake Coconut Dream Bars! They’re my secret weapon when I need a quick, dreamy dessert that tastes like I spent hours in the kitchen. Picture this: buttery graham cracker crumbs hugging a sweet, chewy coconut filling – all without turning on the oven (unless you want that golden top!). These little squares have saved me more times than I can count when last-minute guests arrive or when my kids beg for “something sweet, Mom!” after dinner. Best part? They come together in about 10 minutes of hands-on time, then the fridge does all the hard work. Pure magic!
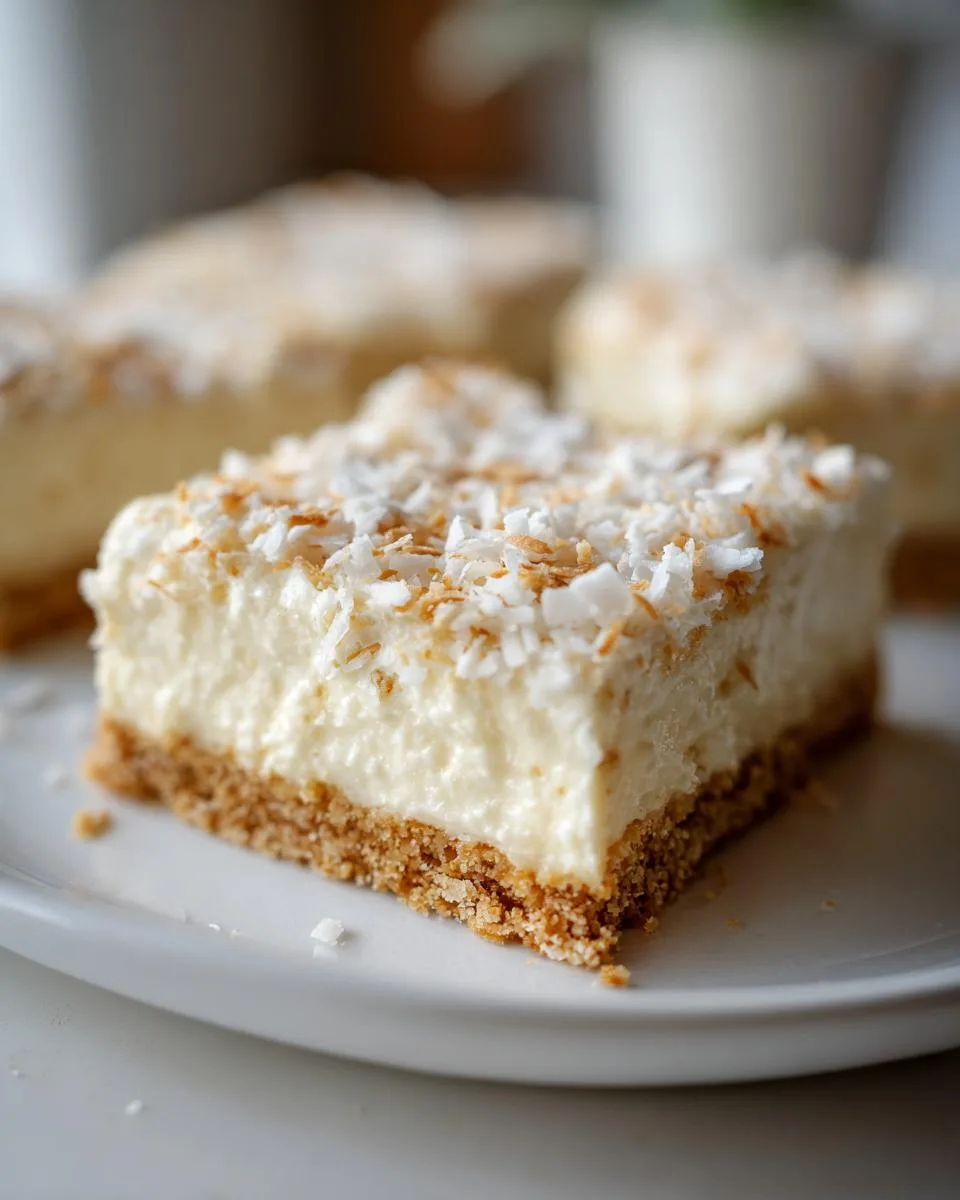
Table of Contents
Table of Contents
Ingredients for No-Bake Coconut Dream Bars
Gather these simple ingredients – you probably have most in your pantry already! I love how this recipe comes together with just a handful of things. Here’s what you’ll need:
- 1 cup graham cracker crumbs (that’s about 7-8 full graham crackers crushed up – I just toss them in a zip-top bag and roll with a rolling pin!)
- 1/4 cup unsalted butter, melted (go ahead and lick that buttery spoon after – I always do)
- 1 tablespoon granulated sugar (optional, but I like the extra little crunch it gives the crust)
- 1 cup sweetened shredded coconut (the fluffy, moist kind – not the dry flakes)
- 1/2 cup sweetened condensed milk (that magical stuff in the can – don’t confuse it with evaporated milk!)
- 1 teaspoon pure vanilla extract (the good stuff makes all the difference here)
- A pinch of salt (trust me, it balances all that sweetness perfectly)
See? Nothing fancy – just simple, comforting ingredients that come together like a dream. Now let’s make some magic!
How to Make No-Bake Coconut Dream Bars
Alright, let’s dive into making these dreamy bars – I promise it’s so easy you’ll wonder why you haven’t been making them weekly! Here’s my foolproof method that never fails me.
Prepare the Crust
First, grab that buttery graham cracker mixture you just made. Dump it into your lined 8×8 pan (parchment paper is your best friend here – no sticking!). Now here’s my secret: use the bottom of a measuring cup to really press that crumb mixture down firmly. You want it packed tight like a cozy little bed for your coconut filling. I go in circles, pressing as I go, until it’s even all across the bottom. Pop this in the fridge for about 10 minutes while you make the filling – it helps the crust set up nice and firm.
Make the Coconut Filling
This part smells amazing! In a medium bowl, toss together your shredded coconut, sweetened condensed milk, vanilla, and that pinch of salt. Stir it until every last coconut flake is coated in that creamy goodness. The mixture should hold together when you press it between your fingers – sticky but not runny. If it seems too dry (this sometimes happens with different coconut brands), add just a teaspoon more condensed milk. Now spread this evenly over your chilled crust using a rubber spatula. Pro tip: wet your fingers slightly to pat down any stubborn spots without sticking!
Chill or Bake
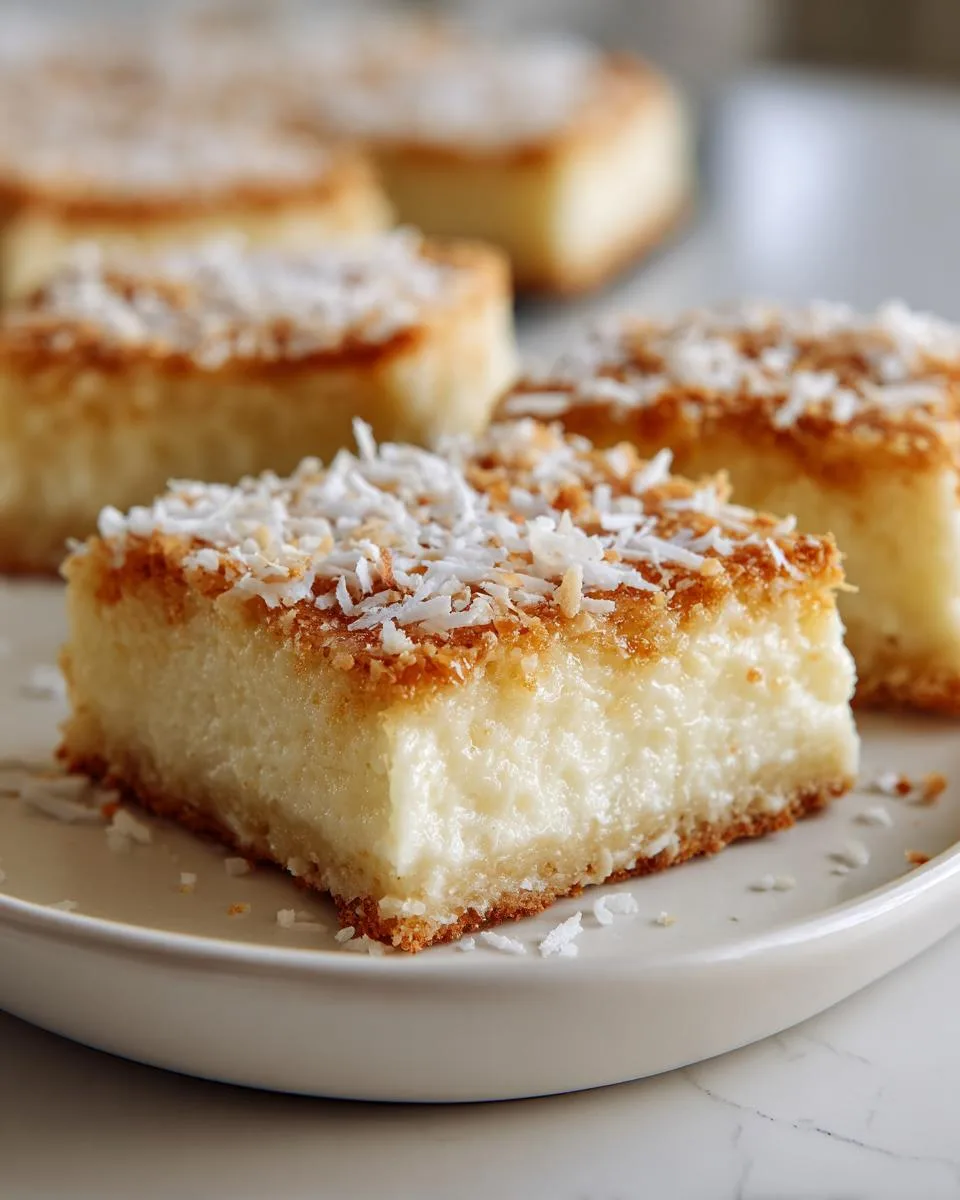
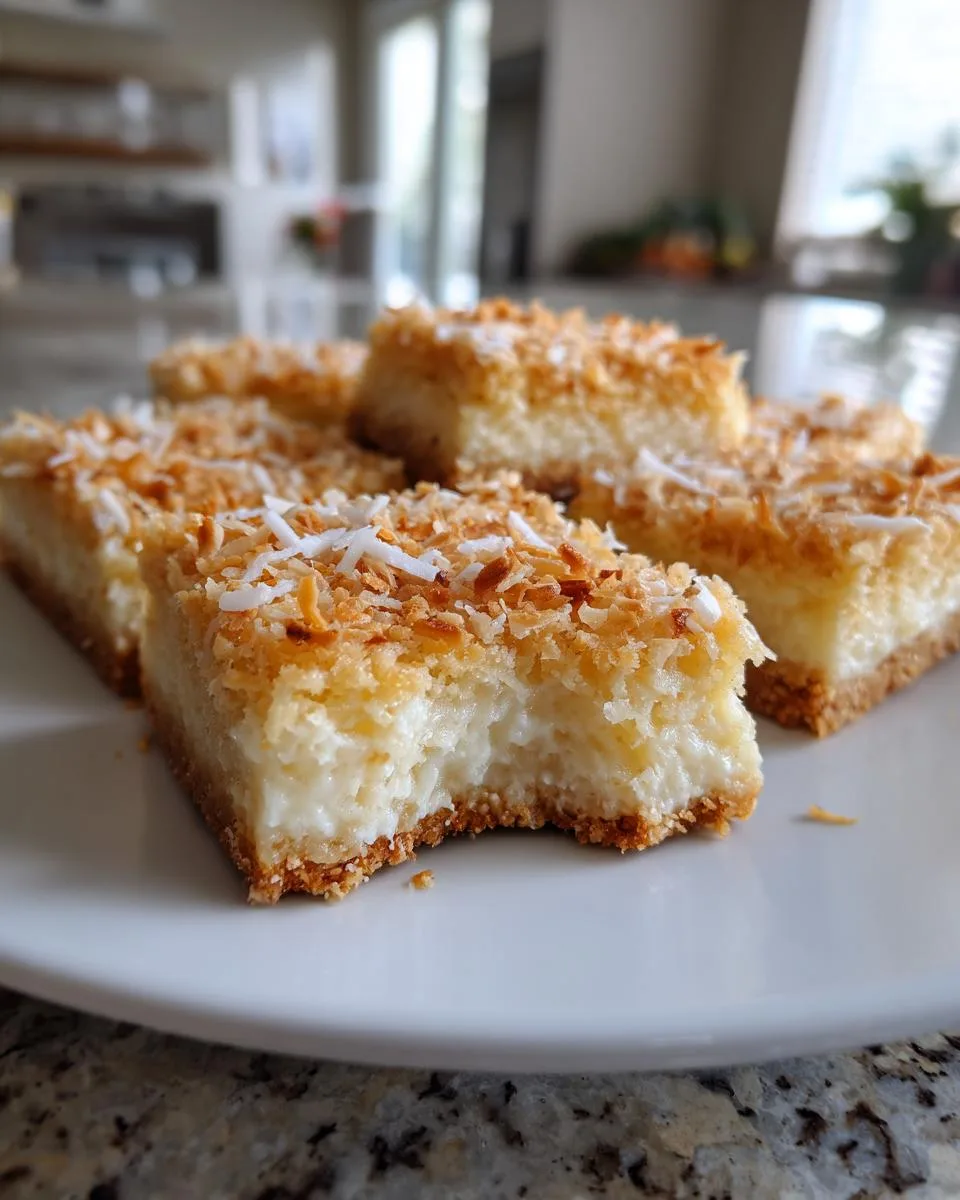
Here’s where you decide – lazy no-bake or golden-baked beauty? For the classic no-bake version, just cover and refrigerate for at least 2 hours (I know, the waiting is hard!). But if you’re feeling fancy, bake at 350°F for 15-20 minutes until the top gets golden brown spots. Either way, let it cool completely before cutting – I run a knife under hot water and wipe it dry between cuts for perfect squares. The no-bake version keeps that wonderful chewiness, while baked gets a bit toastier flavor. Honestly? I can never decide which I like better!
Why You’ll Love These No-Bake Coconut Dream Bars
Okay, let me count the ways these dreamy little bars will become your new favorite dessert – trust me, once you try them, you’ll be hooked!
- 5-minute prep magic: Seriously, from pantry to pan in less time than it takes to find your shoes! No mixer, no fancy equipment – just stir, press, and chill.
- Potluck superstar: These travel like a dream (pun intended) and always disappear first at parties. I’ve lost count of how many recipe requests I’ve gotten!
- Kid-approved sweetness: My two picky eaters go crazy for these – they think they’re getting a special treat, and I love that it’s not loaded with artificial stuff.
- Two-desserts-in-one: Can’t decide between chewy and crunchy? The graham cracker base gives that perfect contrast to the soft coconut filling.
Honestly, I could go on – but you’ll understand once you taste that first bite of coconutty heaven!
Print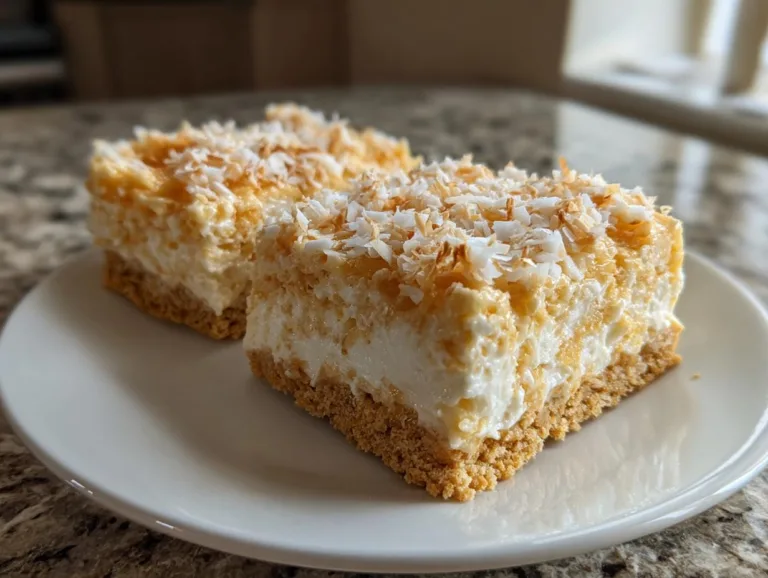
Irresistible 5-Minute No-Bake Coconut Dream Bars Recipe
No-Bake Coconut Dream Bars are a quick and easy dessert with a buttery graham cracker crust and a sweet coconut filling. Perfect for a chilled treat on a warm day.
- Total Time: 2 hours 10 minutes
- Yield: 8 bars 1x
Ingredients
- 1 cup graham cracker crumbs (about 7–8 full graham crackers, crushed)
- 1/4 cup unsalted butter, melted
- 1 tablespoon granulated sugar (optional, for sweetness)
- 1 cup sweetened shredded coconut
- 1/2 cup sweetened condensed milk
- 1 teaspoon pure vanilla extract
- A pinch of salt
Instructions
- Preheat your oven to 350°F (175°C) if toasting the crust. Line an 8×8 inch pan with parchment paper.
- Mix graham cracker crumbs, melted butter, and sugar (if using). Press firmly into the pan.
- Combine shredded coconut, sweetened condensed milk, vanilla extract, and salt. Spread over the crust.
- Chill for 2 hours or bake for 15–20 minutes for a golden top. Cool before slicing.
- Cut into 8 squares and serve.
Notes
- For best results, chill until fully set.
- Store leftovers in the fridge.
- Prep Time: 10 minutes
- Cook Time: 0 minutes (or 20 minutes if baking)
- Category: Dessert
- Method: No-Bake (or optional baking)
- Cuisine: American
- Diet: Vegetarian
Nutrition
- Serving Size: 1 bar
- Calories: 180
- Sugar: 12g
- Sodium: 80mg
- Fat: 9g
- Saturated Fat: 6g
- Unsaturated Fat: 2g
- Trans Fat: 0g
- Carbohydrates: 22g
- Fiber: 1g
- Protein: 2g
- Cholesterol: 15mg
Tips for Perfect No-Bake Coconut Dream Bars
After making these bars more times than I can count (my neighbors might be getting suspicious of how often I show up with them!), I’ve picked up some tricks to make them foolproof every single time. Here are my best tips straight from my kitchen to yours:
Parchment paper is non-negotiable: I learned this the hard way after scraping crust out of pan corners with a butter knife. Leave an overhang on two sides – it creates handles to lift the whole slab out for easy cutting. Bonus? No messy pan to scrub!
Toast your coconut first for next-level flavor: Just spread it on a baking sheet and pop it in a 350°F oven for 5-7 minutes, stirring once. Watch closely – it goes from golden to burnt in seconds! The toasty aroma will have your whole family hovering in the kitchen.
Press, press, press that crust: Really pack it down hard with the back of a measuring cup or glass. If your crust is too loose, the filling will make it soggy. I press until my arm gets tired – then press some more!
Chill time matters: I know it’s tempting to cut into them early, but give them the full 2 hours in the fridge. The condensed milk needs time to set up properly. Pro tip: Make them the night before – they’re even better the next day!
Warm your knife for clean cuts: Run your knife under hot water, dry it quickly, and make one smooth cut. Wipe and reheat between slices. No more ragged edges (and you get to lick the knife after – shh, our secret).
Variations for No-Bake Coconut Dream Bars
One of my favorite things about this recipe is how easily you can mix it up! Here are some fun twists I’ve tried when I’m feeling adventurous (or when my pantry’s looking a little bare):
Chocolate lover’s dream: Sprinkle a handful of mini chocolate chips over the coconut filling before chilling – the contrast between sweet coconut and rich chocolate is heavenly. Sometimes I’ll even melt chocolate and drizzle it over the top after they set for a fancy finish!
Nutty crunch: Try mixing in 1/4 cup of chopped pecans or almonds with the coconut filling. The extra texture takes these bars to another level. My husband goes nuts (pun intended) for this version!
Cookie swap: Out of graham crackers? Digestive biscuits make an amazing crust too – just crush them same as the grahams. They give a slightly more sophisticated, buttery flavor that’s perfect for adult gatherings.
The best part? These variations still keep that magical no-bake ease. Just don’t tell anyone how simple they are – let them think you slaved away!
Storing No-Bake Coconut Dream Bars
Here’s the beautiful thing about these dreamy bars – they actually get better after a day in the fridge! The flavors meld together, and the texture becomes even more perfect. But you’ll need to store them right to keep that magic going.
I always use an airtight container with a piece of parchment between layers if I’m stacking them. They’ll stay fresh in the fridge for up to 5 days (if they last that long in your house!). The sweetened condensed milk acts like a natural preservative, keeping them deliciously moist.
Now, a word about freezing – if you went the no-bake route, you can freeze them for up to a month (thaw in the fridge overnight). But if you baked yours to get that golden top, I don’t recommend freezing. The texture changes and they can get a bit crumbly when thawed. Trust me, I learned this the hard way after a batch turned into coconut crumbles!
Pro tip: If your kitchen runs warm, these bars might get a little sticky at room temperature. Just pop them back in the fridge for 15 minutes to firm up again. That’s why I always serve them chilled – they hold their shape perfectly and stay dreamy!
Nutritional Information for No-Bake Coconut Dream Bars
Now, I’m not a nutritionist (just a coconut-loving home cook!), but here’s the breakdown per bar based on my recipe. Remember, these are estimates – your exact numbers might vary depending on your specific ingredients. I always say life’s too short to stress over every calorie when you’re enjoying something this delicious!
| Serving Size: | 1 bar (1/8 of recipe) |
| Calories: | 180 |
| Fat: | 9g |
| Saturated Fat: | 6g |
| Carbohydrates: | 22g |
| Sugar: | 12g |
| Protein: | 2g |
There you have it! Not exactly a health food (though doesn’t coconut count as a superfood?), but totally worth every sweet, coconutty bite in my book. Everything in moderation, right? Though moderation gets tricky when these bars are staring at you from the fridge…
FAQs About No-Bake Coconut Dream Bars
Can I use unsweetened coconut instead?
You can, but you’ll want to add an extra tablespoon or two of sweetened condensed milk – the texture changes with unsweetened coconut, and they won’t be quite as dreamy!
How long do they really need to chill?
At least 2 hours for clean cuts, but overnight is magic. I’ve snuck bites after just 30 minutes – still delicious, just messier!
Can I make these gluten-free?
Absolutely! Just swap the graham crackers for gluten-free ones. My friend does this and nobody can tell the difference.
Why is my filling oozing everywhere?
You probably didn’t press the crust firmly enough – it needs to be packed tight. Also, don’t skip the pre-chill before adding the coconut layer!
Can I double this recipe?
Yes! Use a 9×13 pan and increase chill time by an hour. They disappear twice as fast too – trust me!
Ready to Make Your Own Coconut Dream Bars?
Now that you’ve got all my secrets, it’s time to create your own batch of dreamy coconut goodness! I can’t wait for you to experience that first bite – the buttery crust crumbling just right as the sweet coconut filling melts in your mouth. Take a photo when you make them (before they disappear, because trust me, they will!) and tag me @FrostyRecipes so I can see your masterpiece. Nothing makes me happier than seeing your kitchen adventures!
Oh, and a little warning – these bars have a funny way of creating “just one more piece” situations. Don’t say I didn’t warn you when you find yourself sneaking back to the fridge at midnight… not that I’d know anything about that, of course! Happy baking (or should I say happy no-baking)!