Halloween in our house means two things – costumes that never quite fit right and pumpkin-shaped Rice Krispie treats piled high on every surface! I swear, these adorable little orange pumpkins disappear faster than the candy stash. Last year, my kids and I whipped up a batch while debating whether Frankenstein or zombies were scarier (jury’s still out). The best part? These festive treats come together in about 20 minutes flat – no baking, no fancy skills needed. Just marshmallows, cereal, and a whole lot of orange food coloring magic. They’re the perfect project for little hands that want to help (and sneak tastes).
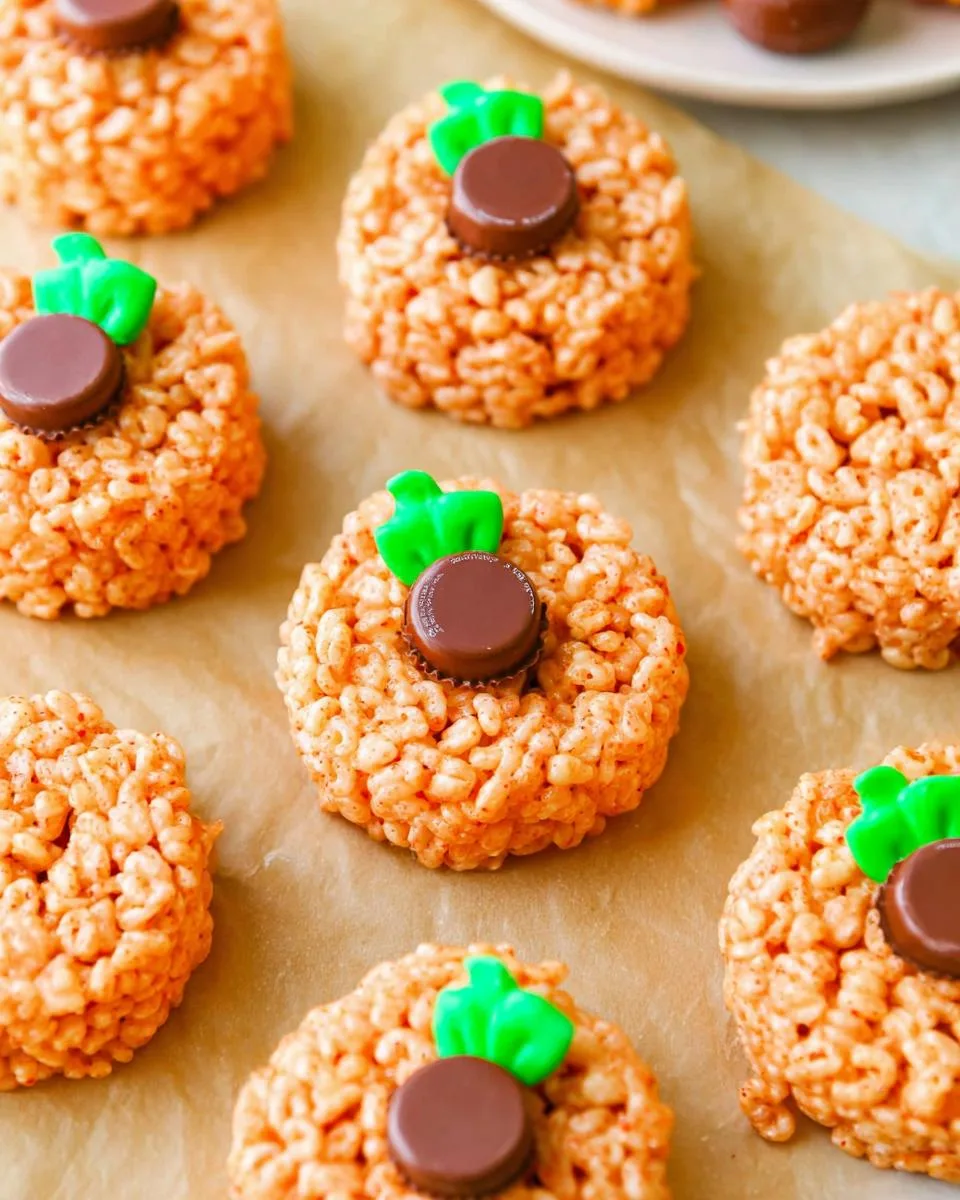
Table of Contents
Table of Contents
Why You’ll Love These Pumpkin-Shaped Rice Krispie Treats
Oh, where do I even start? These little pumpkin cuties are basically Halloween magic in edible form. Here’s why they’ve become our go-to treat every October:
- No-bake bliss – Skip the oven and avoid that “did I burn it?” panic. Just melt, mix, and shape!
- Kid-approved fun – My littles go wild for the decorating part (and let’s be honest, sneaking Rolos).
- Instant festive vibes – One bite and suddenly your kitchen smells like Halloween happiness.
- Impossible to mess up – Even if your pumpkins look more like lumpkins (been there), they’ll still taste amazing.
Seriously – if you can stir cereal, you can make these. The hardest part? Not eating all the decorations first!
Ingredients for Pumpkin-Shaped Rice Krispie Treats
Here’s the beauty of this recipe – you probably have most of this stuff in your pantry already! Just grab:
- 1/4 cup salted butter – Trust me, salted makes all the difference against the sweetness.
- 1 (16-ounce) bag mini marshmallows – The tiny ones melt way faster than the big guys.
- 6 cups Rice Krispie cereal – Generic works fine, but the name brand has that perfect crisp.
- Orange food gel – About 1/2 teaspoon will give you that vibrant pumpkin glow.
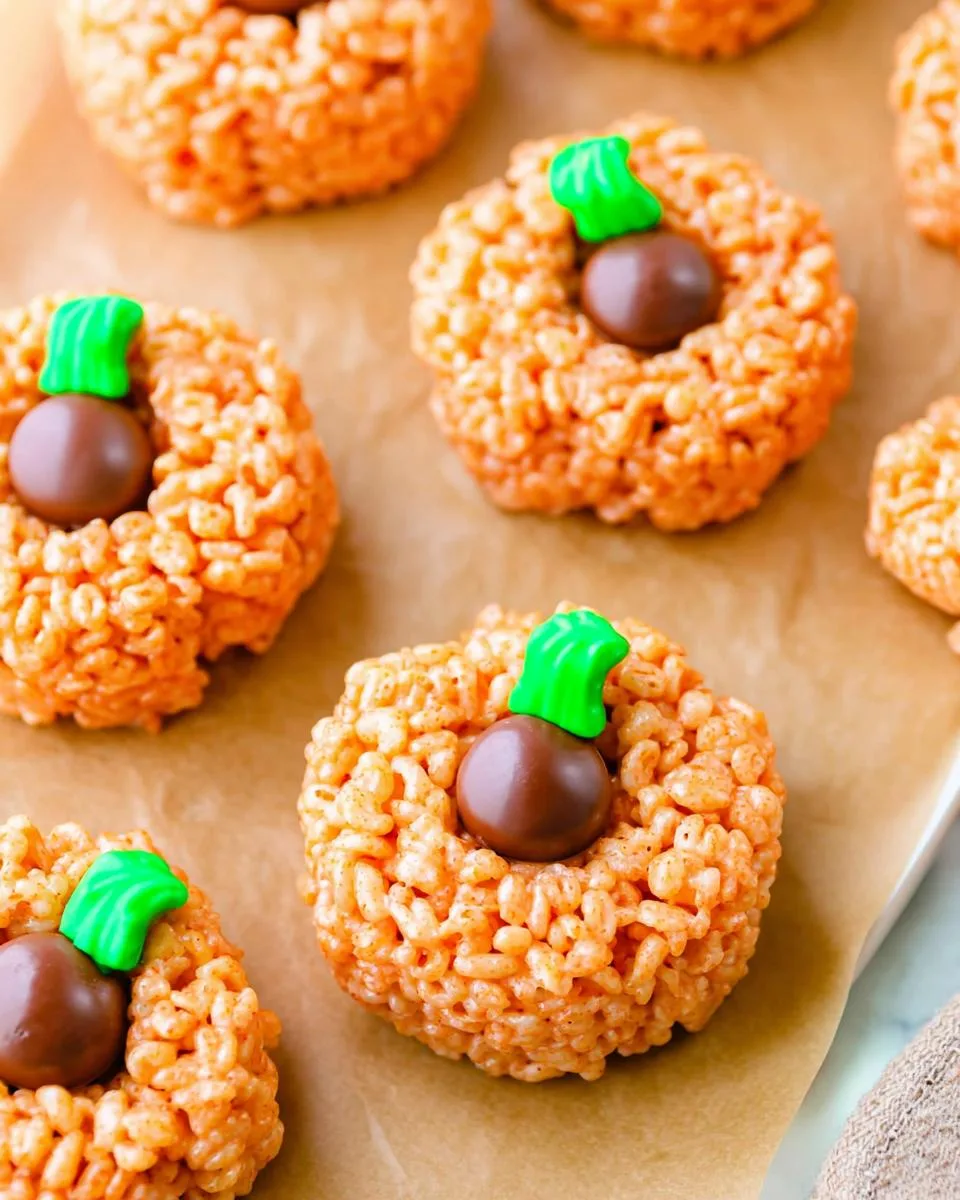
- 12 Rolo candies – These make the perfect little pumpkin “stems.”
- 12 green Mike N Ike’s – Chopped in half for cute leafy tops.
That’s it – six simple ingredients standing between you and Halloween deliciousness!
Equipment You’ll Need
Don’t worry – no fancy gadgets required here! Just grab:
- A large pot – Big enough to stir everything without making a mess (learned that the hard way).
- An ice cream scoop – Makes shaping those pumpkin balls a breeze.
- Parchment paper – Unless you want sticky pumpkins glued to your counter.
That’s seriously all you need – well, besides eager little helpers ready to decorate!
How to Make Pumpkin-Shaped Rice Krispie Treats
Okay, let’s get to the fun part – turning these simple ingredients into adorable pumpkin treats! The key here is working quickly (marshmallow waits for no one) and keeping everything lightly greased. Here’s exactly how we do it in my chaotic-but-happy kitchen:
Step 1: Melt Butter and Marshmallows
First, melt that glorious butter in your largest pot over medium heat – you want it just bubbling, not sizzling. Then dump in all those mini marshmallows and immediately reduce heat to low. Stir constantly with a wooden spoon (or silicone spatula if you’re fancy) until you’ve got a smooth, lava-like goo. This takes about 3-4 minutes – don’t rush it or you’ll scorch the bottom! Pro tip: If your arm gets tired, recruit a kid to take over stirring duties.
Step 2: Add Color and Cereal
Now for the magic! Remove from heat and stir in about 1/2 teaspoon orange food gel (more if you want neon pumpkins). Once the color looks evenly distributed (no white streaks!), dump in all 6 cups of cereal. Fold gently but thoroughly – you want every crispy piece coated in that orange marshmallow goodness. The mixture should be sticky but not soupy. If it seems too wet, add another handful of cereal.
Step 3: Shape and Decorate
Here’s where things get messy (in the best way)! Lightly grease your hands with cooking spray or butter, then grab an ice cream scoop of mixture. Roll between your palms to form baseball-sized balls – don’t worry about perfection, pumpkins come in all shapes! Place on parchment paper and immediately press a Rolo into the top as the stem. Add half a green Mike N Ike next to it for the leaf. Repeat until all your pumpkin pals are assembled, respraying your hands as needed. Let them set for about 20 minutes before the inevitable taste-testing begins!
Tips for Perfect Pumpkin-Shaped Rice Krispie Treats
After making approximately 327 batches of these (okay, maybe 20), I’ve picked up some tricks that’ll save you from my early pumpkin-shaped disasters:
- Food gel beats liquid coloring – That little squeeze bottle gives you vibrant orange without watering down your mixture.
- Grease like your life depends on it – Hands, scoop, counter – anything that touches that sticky marshmallow needs a slick of nonstick spray.
- Press Rolos in warm – If your pumpkins cool too much before decorating, the candy won’t stick. Ask me how I know!
- Work in teams – One person shapes while another decorates keeps the marshmallow from setting up too fast.
Bonus tip: Keep wet paper towels handy – you’ll thank me when you’re not picking cereal off the ceiling!
Variations for Pumpkin-Shaped Rice Krispie Treats
Once you’ve mastered the basic recipe, the fun really begins! Here are my favorite ways to mix things up:
- Candy swaps – Use green M&Ms instead of Mike N Ike’s, or try chocolate chips for the stems.
- Spiced-up version – Add a pinch of cinnamon or pumpkin pie spice to the melted marshmallows for extra warmth.
- Chocolate drizzle – Melt some white chocolate and pipe on jack-o’-lantern faces for extra spookiness!
The best part? No matter how you customize them, they’ll still disappear just as fast!
Serving and Storing Pumpkin-Shaped Rice Krispie Treats
Here’s the best part – these little guys stay fresh for days (if they last that long)! Pop them in an airtight container at room temperature – no refrigeration needed. They’re perfect piled high on a cake stand for Halloween parties or tucked into lunchboxes as a surprise treat. Just try not to eat them all while “testing for freshness” like I do!
Nutritional Information for Pumpkin-Shaped Rice Krispie Treats
Okay, let’s be real – these are treats, not health food! Each pumpkin-shaped delight runs about 180 calories with 20g sugar (nutrition varies by brands). Perfect for when you’re craving something sweet but want to keep it festive – just maybe don’t eat all twelve at once!
Frequently Asked Questions
Q1. Can I use regular marshmallows instead of mini ones?
Absolutely! Regular marshmallows work fine – just chop them into smaller pieces first so they melt evenly. You’ll need about 40 regular marshmallows to equal one 16-ounce bag of minis. The melting might take a tiny bit longer, but the results will be just as delicious!
Q2. How long do these pumpkin Rice Krispie treats last?
These stay fresh at room temperature for about 3-4 days in an airtight container. After that, they start losing their crispness (though my kids have never let them last that long!). If you need to store them longer, you can freeze them for up to 2 months – just thaw at room temperature before serving.
Q3. My mixture is too sticky – what did I do wrong?
Don’t panic! This usually means either your marshmallows weren’t quite hot enough when you added the cereal, or you might have added too much butter. Try sprinkling in a bit more cereal (about 1/4 cup at a time) until the texture improves. And remember – greased hands are your best friend!
Q4. Can I make these ahead for a party?
Yes! These are perfect for making 1-2 days in advance. Just wait to decorate them until the day of your event if possible – the candies can get a bit soft if stored too long. I often make the pumpkin shapes ahead, then add the Rolos and Mike N Ike’s right before guests arrive.
Final Thoughts
There you have it – the easiest way to turn ordinary ingredients into Halloween magic! I’d love to see your pumpkin-shaped creations – tag me @FrostyRecipes so I can cheer on your edible masterpieces. Now go make some memories (and sticky fingers) with this fun recipe!
Print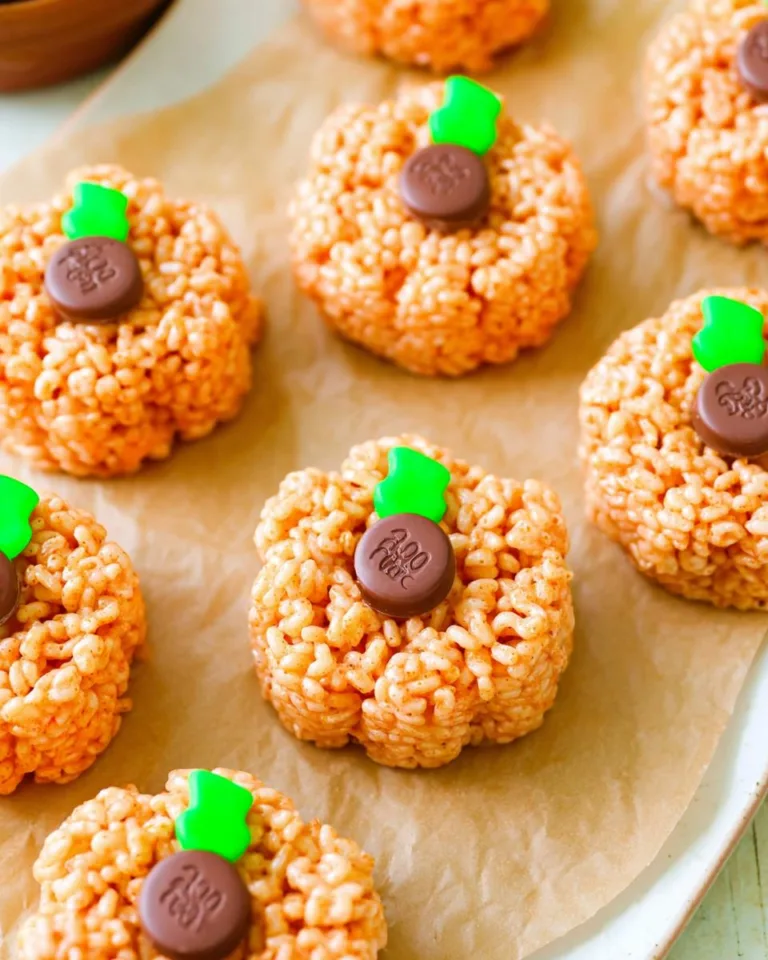
20-Minute Pumpkin-Shaped Rice Krispie Treats Kids Adore
Fun and easy pumpkin-shaped Rice Krispie treats, perfect for Halloween or fall-themed parties. These treats are made with orange-colored marshmallow cereal and decorated with chocolate and green candy.
- Total Time: 20 mins
- Yield: 12 pumpkins 1x
Ingredients
- 1/4 cup salted butter
- 1 (16-ounce) bag mini marshmallows
- 6 cups Rice Krispie cereal (or any rice cereal)
- Orange food gel
- 12 Rolo candies
- 12 green Mike N Ike’s
Instructions
- Melt butter in a large pot over medium heat.
- Reduce heat to low and add marshmallows, stirring until fully melted.
- Remove from heat and mix in orange food gel until desired color is reached.
- Stir in cereal until evenly coated.
- Let mixture cool slightly before shaping.
- Spray hands and an ice cream scoop with nonstick spray.
- Scoop mixture and shape into balls (about baseball-sized).
- Place on a serving platter or parchment-lined tray.
- Press a Rolo candy on top and a green Mike N Ike next to it.
- Let set before serving.
Notes
- Use food gel for vibrant orange color.
- Work quickly before the mixture hardens.
- Keep hands lightly greased to prevent sticking.
- Prep Time: 10 mins
- Cook Time: 10 mins
- Category: Dessert
- Method: No-Bake
- Cuisine: American
- Diet: Vegetarian
Nutrition
- Serving Size: 1 pumpkin
- Calories: 180
- Sugar: 20g
- Sodium: 120mg
- Fat: 6g
- Saturated Fat: 4g
- Unsaturated Fat: 2g
- Trans Fat: 0g
- Carbohydrates: 32g
- Fiber: 0g
- Protein: 1g
- Cholesterol: 10mg
For More recipes Follow me on Facebook!