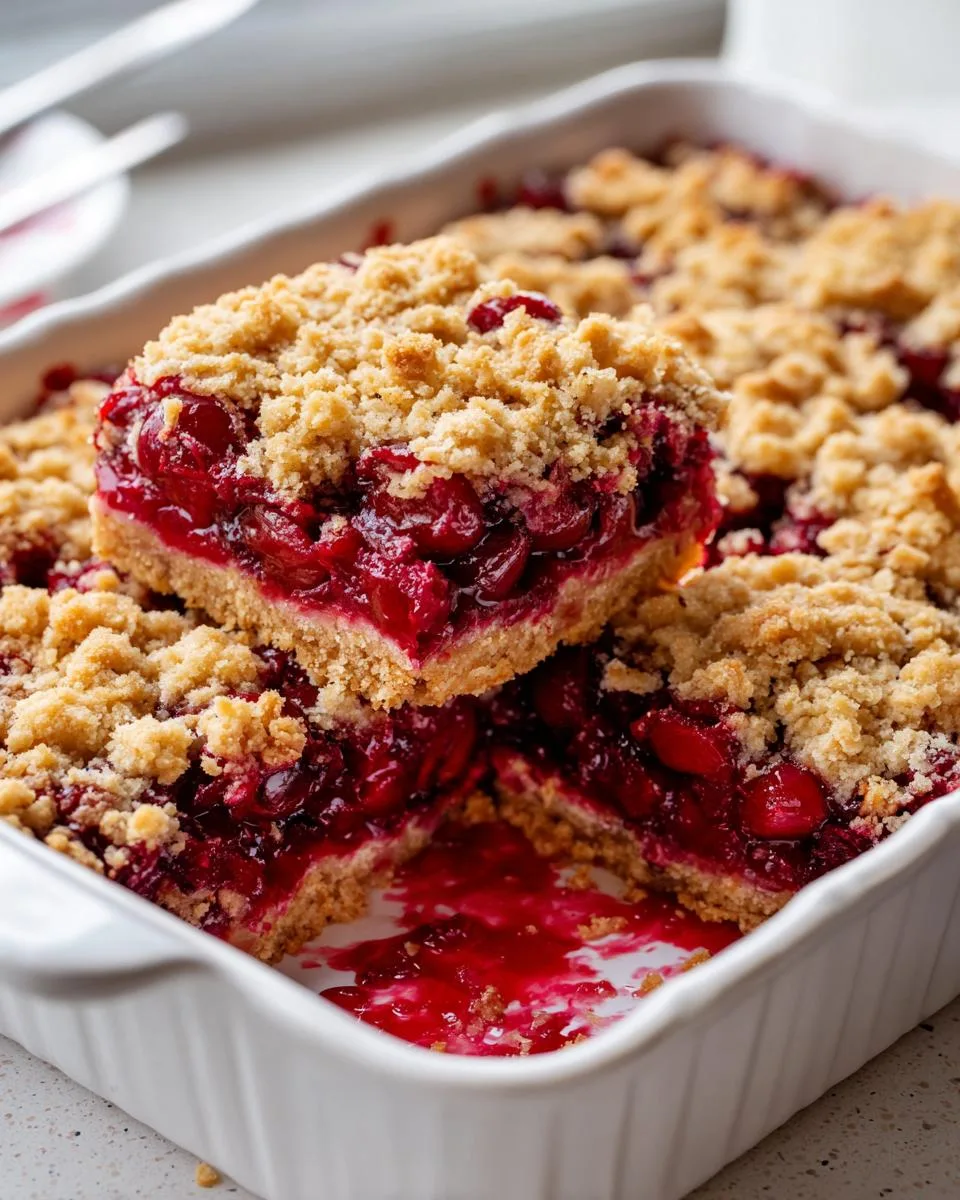
Oh my goodness, let me tell you about the first time I made these Quick Cherry Crumble Bars for our family reunion last summer! My aunt had brought buckets of fresh cherries from her orchard, and I needed something fast that could feed a crowd. These bars saved the day – buttery, fruity, and ready in under an hour. Now they’re my go-to dessert whenever cherries are in season.

As a busy mom who’s been baking for over 15 years, I love recipes that deliver big flavor without fuss. That’s exactly what you get with these Quick Cherry Crumble Bars – they’ve got that perfect balance of sweet-tart cherry filling sandwiched between a tender crust and crumbly topping. The best part? You probably have most ingredients in your pantry already!
Table of Contents
Table of Contents
Why You’ll Love Quick Cherry Crumble Bars
Let me count the ways these bars will become your new favorite dessert:
- Weeknight easy – From bowl to oven in just 15 minutes flat! No fancy techniques or equipment needed.
- Summer’s sweetest shortcut – Uses fresh cherries at their peak (though we’ll talk about frozen options later!).
- That perfect texture – Buttery crust, jammy cherry center, and that irresistible crumble topping that crisps up beautifully.
- Always a hit – I’ve served these at everything from book club to backyard BBQs – plates are always empty.
- Better than pie (don’t tell grandma) – All the cherry pie flavor with half the work and way more portable!
Honestly, the hardest part is waiting for them to cool enough to slice – but trust me, they’re worth it!
Ingredients for Quick Cherry Crumble Bars
Here’s everything you’ll need to make these irresistible bars – I’ve grouped them by component so you can see how simple this really is! Pro tip: measure everything before you start – it makes the process fly by.
For the crust & crumble topping:
-
- 1 3/4 cups all-purpose flour (spooned & leveled)
- 3/4 cup granulated sugar
- 1/2 tsp baking powder
- 1/4 tsp salt
- 1/2 cup chilled unsalted butter (cut into 1/2-inch cubes – cold is key!)
- 1 large egg (room temperature helps it blend smoothly)
2 tbsp milk (any kind works, I usually use whole)
For the cherry filling:
- 2 1/4 cups fresh pitted cherries (about 1 lb unpitted – see my pitting hack below!)
- 3 tbsp granulated sugar
- 2 tbsp cornstarch (this thickens the juices perfectly)
That’s it! Just 8 simple ingredients for bars that taste like you spent hours in the kitchen. Now let me show you my favorite cherry pitting trick – a plastic straw works wonders if you don’t have a pitter!
How to Make Quick Cherry Crumble Bars
Okay, let’s get baking! I promise this comes together faster than you’d think. Just follow these simple steps and you’ll have perfect cherry crumble bars every single time.
Prepare the Crust
First, preheat your oven to 375°F – this gives it time to get nice and toasty while we work. Grab that 8-inch square baking pan and line it with parchment paper, leaving some overhang on two sides. This little trick is my secret weapon for easy removal later – no stuck-on bits!
In a large bowl, whisk together the flour, sugar, baking powder, and salt. Now for the fun part – toss in those cold butter cubes. Use your fingers to work the butter into the flour until it looks like coarse crumbs with some larger pea-sized pieces. This creates that perfect flaky texture.
Crack in the egg and drizzle in the milk, then stir just until a soft dough forms. It’ll seem crumbly at first but keep mixing gently – it’ll come together! Reserve about 1/3 of the dough for the topping, then press the rest firmly into your prepared pan. I like to use the bottom of a measuring cup to get it nice and even.
Make the Cherry Filling
Now for the star of the show! Take those beautiful pitted cherries and give them a rough mash with a potato masher or fork – just enough to release some juices but leave plenty of chunks. Here’s the important part: strain out about half the liquid (I usually get 2-3 tablespoons). Too much juice makes soggy bars, and nobody wants that!
Mix the mashed cherries with sugar and cornstarch until well combined. The cornstarch works magic to thicken everything up in the oven. Let this sit for 5 minutes while the flavors mingle – you’ll see it start to get glossy.
Assemble and Bake
Spread your cherry filling evenly over the crust. Now take that reserved dough and crumble it over the top in small pieces – no need to be perfect here, irregular clumps give the best texture!
Pop it in the oven and bake for 32-36 minutes until the topping is golden brown and the cherry filling is bubbly around the edges. Your kitchen will smell amazing! Resist cutting right away (I know, it’s hard) – let them cool completely in the pan for clean slices. About an hour should do it, but if you’re impatient like me, 30 minutes gets you warm, gooey bars that are totally worth the messy slices!
Expert Tips for Perfect Quick Cherry Crumble Bars
After making these bars more times than I can count, I’ve picked up some tricks that guarantee perfect results every time. First things first – that room temperature egg really matters! Cold eggs can make your dough separate, while a room temp one blends in beautifully. Just pop it in warm water for 5 minutes if you forgot to take it out earlier.
Here’s my golden rule: let them cool completely before slicing. I know it’s tempting, but cutting warm bars leads to crumbly messes. Wait until the pan feels cool to the touch – about an hour – for those clean, Instagram-worthy slices. If you want to see more of my baking tips, follow along on Facebook!
A few more pro tips:
- Use chilled butter straight from the fridge – warm butter makes greasy dough
- Press the crust firmly into the pan – no air pockets means no sinking filling
- Strain those cherry juices well – I usually save them for cocktails or smoothies!
- For extra crunch, add 1/4 cup chopped almonds to the topping
Oh, and if your cherries aren’t super sweet? No worries! Just bump up the sugar in the filling by another tablespoon. Baking should be fun, not fussy! If you are looking for other fruit-based desserts, check out my recipe for Apple Crumb Cake.
Print
Quick Cherry Crumble Bars: 15-Minute Magic for Cherry Lovers
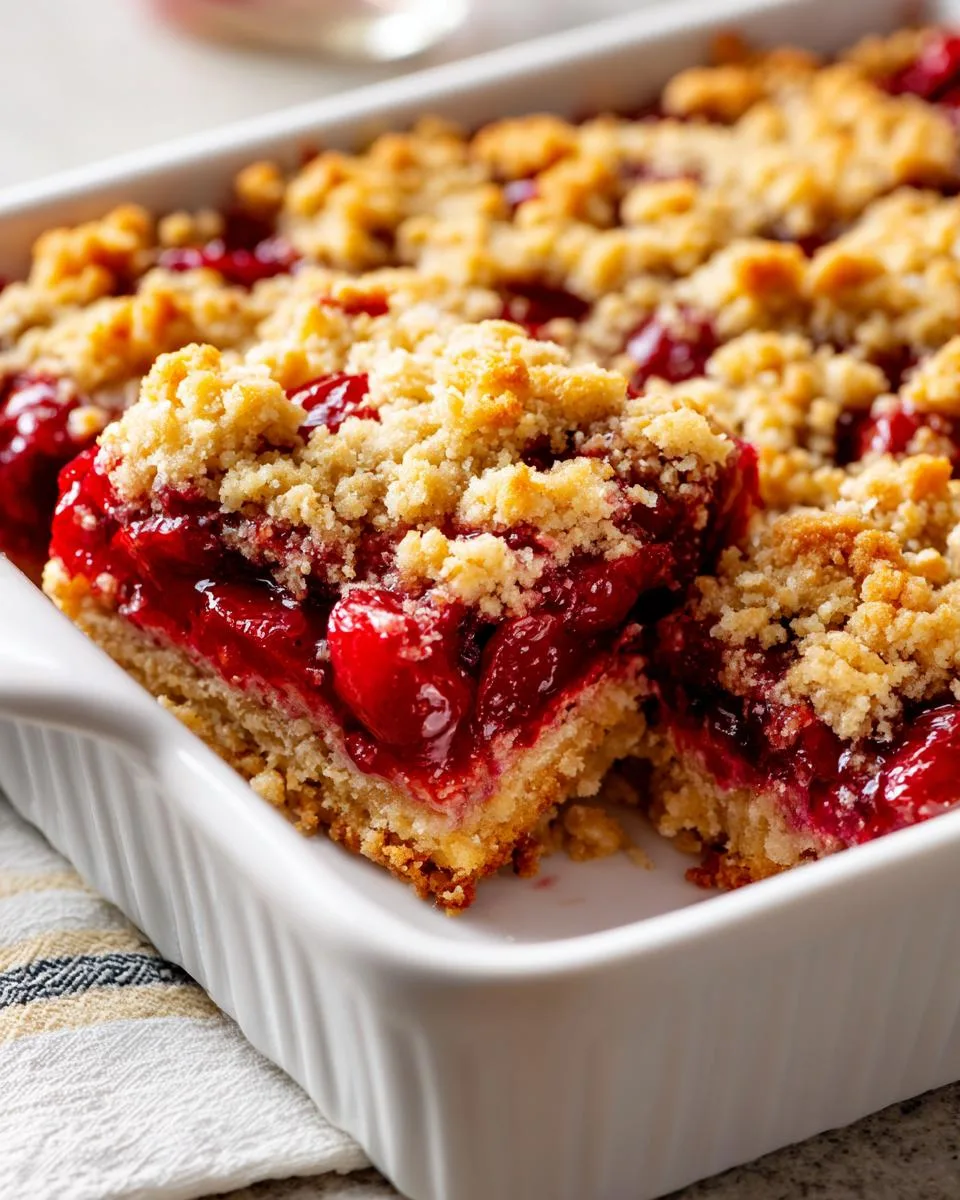
Quick Cherry Crumble Bars are a delicious and easy-to-make dessert featuring a buttery crust, sweet cherry filling, and crumbly topping.
- Total Time: 50 minutes
- Yield: 9 bars 1x
Ingredients
- 1/2 cup chilled unsalted butter (cut into 1/2-inch cubes)
- 2 tbsp milk
- 1/4 tsp salt
- 3/4 cup granulated sugar
- 1/2 tsp baking powder
- 1 egg (large, room temperature)
- 1 3/4 cups all-purpose flour
- 2 tbsp cornstarch
- 2 1/4 cups fresh pitted cherries
- 3 tbsp granulated sugar
Instructions
- Preheat oven to 375°F. Line a square baking dish with parchment paper.
- Combine flour, sugar, baking powder, and salt. Add butter, then egg and milk to form dough.
- Press 2/3 of dough into dish to form crust.
- Mash cherries, strain excess liquid, then mix with sugar and cornstarch.
- Spread cherry mixture over crust. Sprinkle remaining dough over top.
- Bake 32-36 minutes until golden. Cool completely before slicing.
Notes
- Use room temperature egg for better emulsion
- Double-acting baking powder works best
- Let bars cool completely for clean slices
- Prep Time: 15 minutes
- Cook Time: 35 minutes
- Category: Dessert
- Method: Baking
- Cuisine: American
- Diet: Vegetarian
Nutrition
- Serving Size: 1 bar
- Calories: 210
- Sugar: 18g
- Sodium: 80mg
- Fat: 8g
- Saturated Fat: 5g
- Unsaturated Fat: 2g
- Trans Fat: 0g
- Carbohydrates: 32g
- Fiber: 1g
- Protein: 3g
- Cholesterol: 35mg
Variations on Quick Cherry Crumble Bars
One of my favorite things about this recipe is how easily you can mix it up! Don’t have fresh cherries? No problem – frozen work beautifully (just thaw and drain first). I’ve even used jarred cherries in a pinch – just reduce the sugar since they’re usually packed in syrup.
For a fun twist, try adding:
- Almond extract – Just 1/4 teaspoon in the dough gives that classic cherry-almond combo
- Chocolate chips – Sprinkle a handful over the cherry layer before adding topping
- Mixed berries – Swap half the cherries for raspberries or blackberries
- Coconut – Toast 1/4 cup and mix into the crumble topping
The possibilities are endless – that’s why this recipe stays in my regular rotation all year! For another great fruit bar, you might enjoy my Salted Caramel Apple Bars recipe.
Serving and Storing Quick Cherry Crumble Bars
Oh, the joy of serving these beauties! My favorite way? Warm from the oven with a scoop of vanilla ice cream melting over the top – pure heaven! The contrast of cold creamy ice cream and warm cherry filling is just magical. For parties, I cut them into smaller squares and serve on a pretty platter.
Now, storing them is just as easy. Once completely cooled, keep them in an airtight container at room temperature for up to 2 days. If you need them to last longer (though they rarely do in my house!), pop them in the fridge for up to 5 days. Want to freeze some? These bars freeze beautifully! Just wrap individual portions tightly in plastic wrap, then foil, and they’ll keep for 3 months. Thaw overnight in the fridge or at room temperature for an hour – perfect for satisfying sudden cherry cravings!
Quick Cherry Crumble Bars FAQs
Can I use canned cherries instead of fresh?
Absolutely! Drain a 15-ounce can of tart cherries really well (save that juice for cocktails!) and reduce the sugar to 2 tablespoons since canned cherries are usually sweeter. The texture will be slightly softer but still delicious. I’ve even used cherry pie filling in a pinch – just skip the extra sugar and cornstarch.
How do I freeze these bars properly?
These freeze like a dream! Let them cool completely first, then cut into portions. Wrap each bar tightly in plastic wrap, then foil (this prevents freezer burn). They’ll keep beautifully for 3 months. Thaw overnight in the fridge or at room temperature for about an hour. Pro tip: freeze some before baking day – my future self always thanks me!
Can I make these gluten-free?
You bet! I’ve had great results using a 1:1 gluten-free flour blend. The texture will be slightly more delicate, so be extra gentle when pressing the crust. My friend swears by adding 1/4 teaspoon xanthan gum for better structure, but it works fine without too.
Why did my bars turn out soggy?
Two likely culprits: either you didn’t strain enough cherry juice (I aim for about 3 tablespoons removed), or you cut them while still warm. Both cause moisture to redistribute unevenly. Next time, be patient – good things come to those who wait (and strain)!
Can I double this recipe?
Yes! Just use a 9×13-inch pan instead and increase baking time by 5-7 minutes. Watch for that golden-brown topping – that’s your cue they’re done. Perfect for potlucks or when you just really love cherry desserts! If you’re looking for another easy baked good, try my Pumpkin Chocolate Chip Bars recipe.
Nutrition Information
Just a quick note – these nutrition facts are estimates since actual values can vary based on ingredient brands and exact measurements. But here’s the general breakdown per bar (based on cutting into 9 squares):
- Calories: 210
- Fat: 8g (5g saturated)
- Carbs: 32g
- Sugar: 18g
- Protein: 3g
Not too shabby for such a decadent-tasting treat! The fresh cherries add fiber and vitamin C, while that buttery crust… well, let’s just call it happiness in crumb form. For a savory option, you might enjoy my Fajita Chicken Cottage Cheese Bake recipe.
Did You Make This Recipe?
I’d love to hear how your Quick Cherry Crumble Bars turned out! Leave a comment below or snap a photo and tag me – nothing makes me happier than seeing your baking successes. While you’re here, tell me: what’s your all-time favorite summer dessert? Mine changes weekly, but these cherry bars are definitely in my top three!