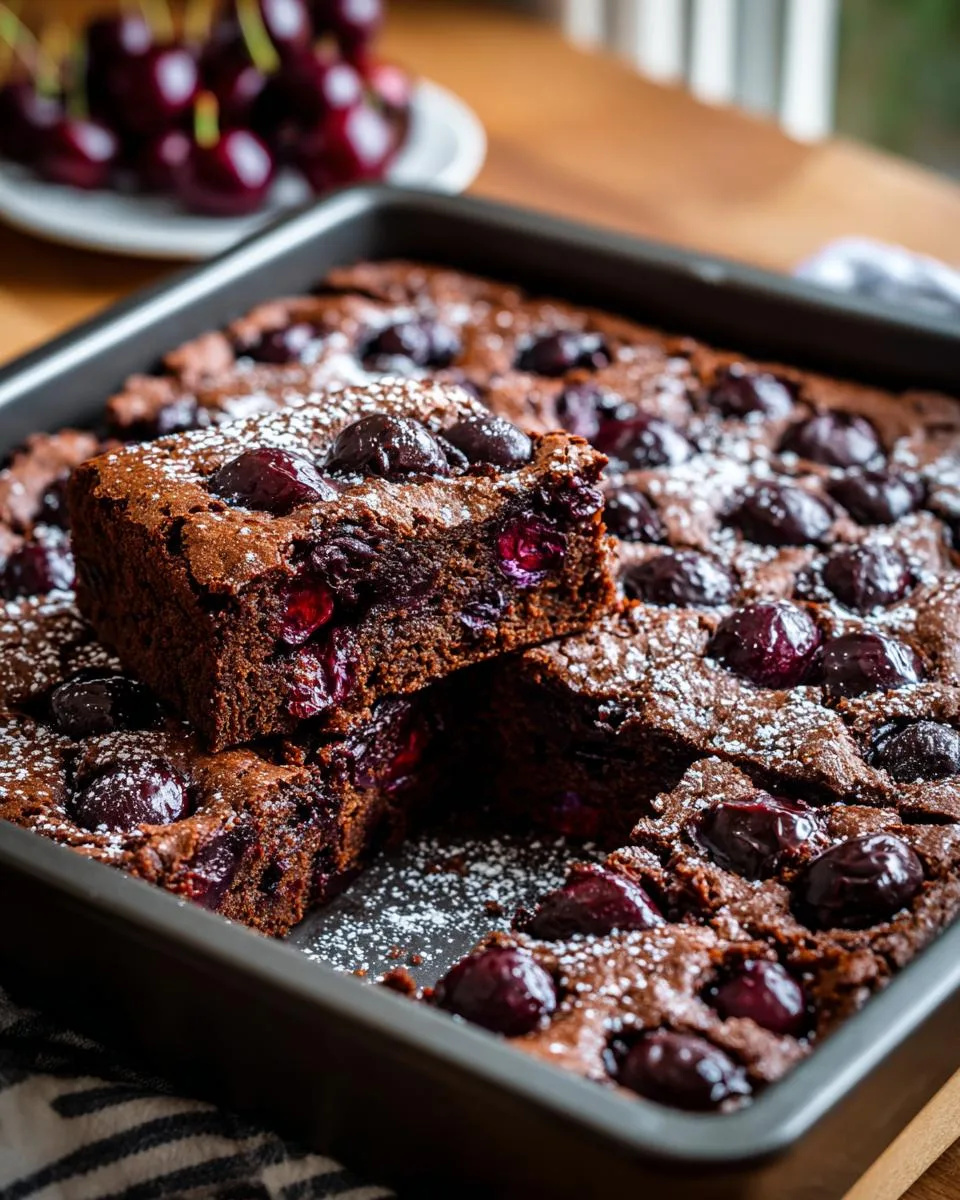
Let me tell you about the day I discovered roasted cherry brownies – it was pure kitchen magic! I had a bowl of cherries sitting on my counter, leftover from the farmer’s market, and a serious chocolate craving. “What if…” I thought, tossing those ruby-red beauties into a hot oven before folding them into my favorite brownie batter. The result? Absolute perfection – tart roasted cherries bursting through rich chocolate like little flavor fireworks.
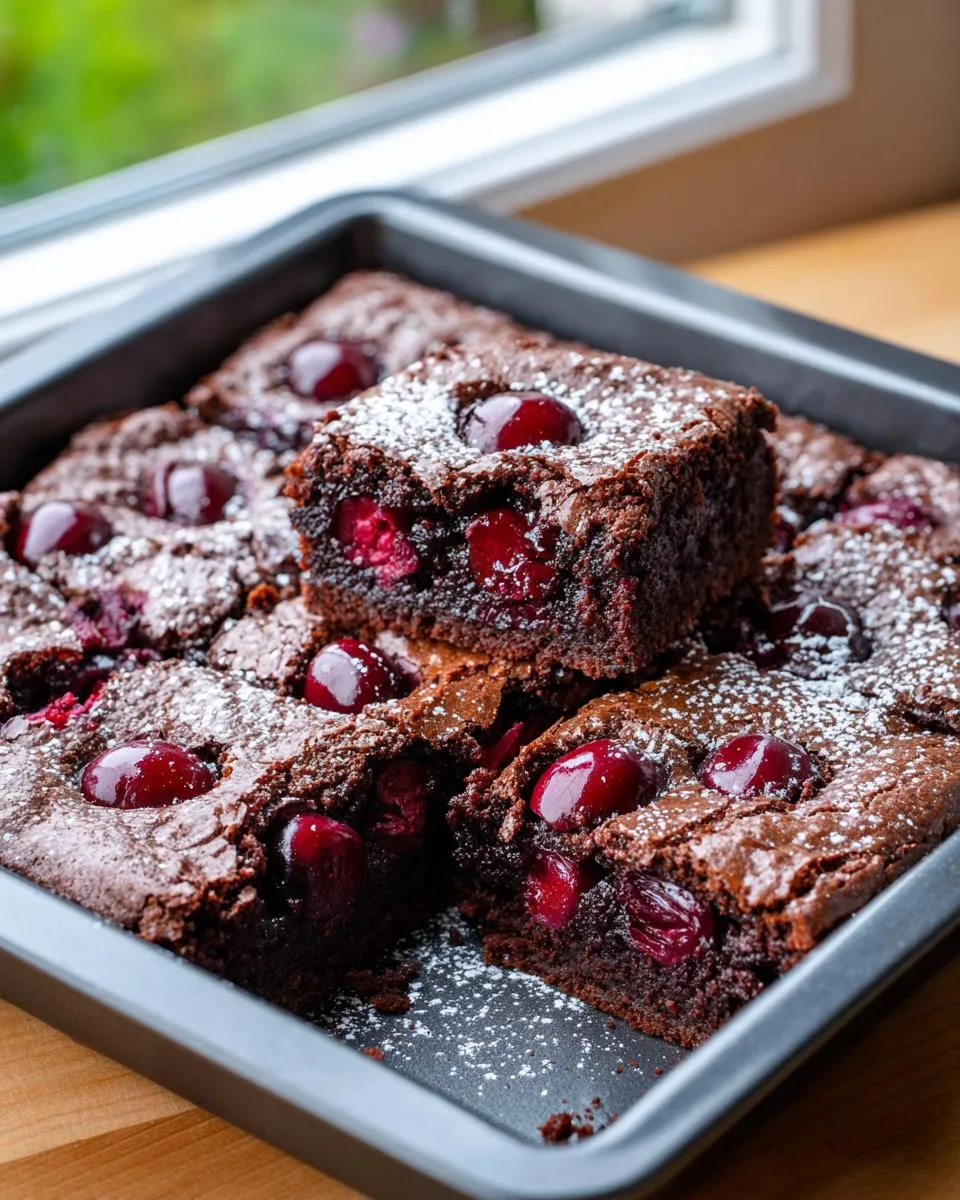
This recipe couldn’t be simpler – it’s basically foolproof. The cherries roast while you mix up the batter (no fancy techniques here!), and the whole thing comes together in about an hour. But don’t let the simplicity fool you – these brownies taste like something from a fancy bakery. The caramelized edges of the roasted cherries play against the deep chocolate flavor in a way that’ll make you close your eyes and sigh.
Table of Contents
Table of Contents
Why You’ll Love These Roasted Cherry Brownies
Listen – these aren’t just any brownies. These roasted cherry brownies have that magical combination of being ridiculously easy to make while tasting like you slaved over them for hours. Here’s why they’ve become my most-requested dessert:
- One-bowl wonder: Minimal cleanup means more time enjoying your masterpiece (and less time scrubbing dishes!)
- Flavor fireworks: Tart roasted cherries cut through the rich chocolate for the perfect sweet-tart balance
- Crowd-pleaser magic: Works equally well at fancy dinner parties and casual backyard BBQs
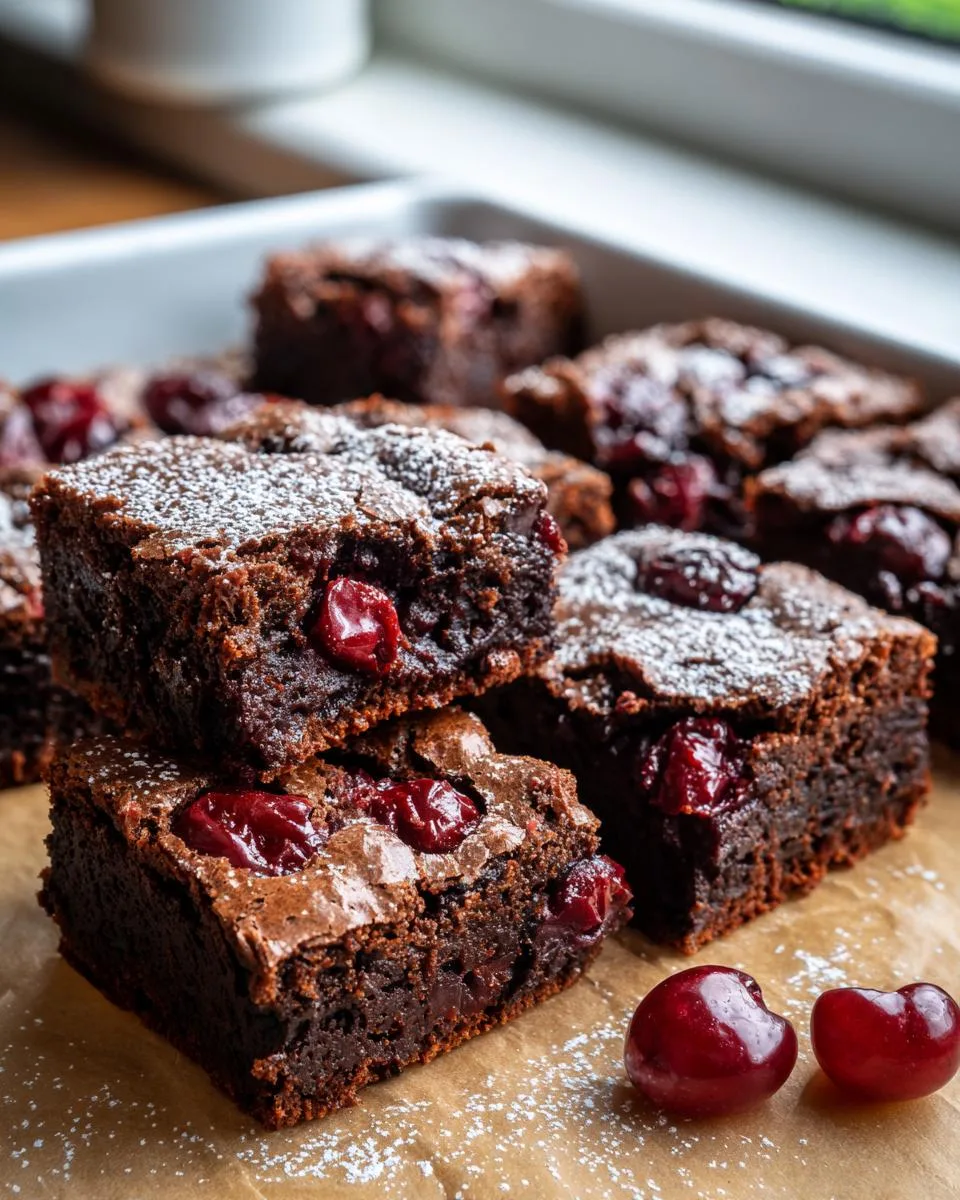
- Texture heaven: The cherries stay juicy while the brownie gets that perfect crackly top
- Secret Motivation: My kids actually eat fruit when it’s baked into chocolate – parenting win!
Ingredients for Roasted Cherry Brownies
Okay, here’s the beautiful part – you probably have most of this stuff in your pantry already! The magic happens when simple ingredients come together just right. I’ll never forget the time I tried substituting almond flour on a whim (more on that later) – lesson learned! Stick to these measurements for foolproof results every time.
- 1 1/2 cups fresh sweet cherries, pitted (or canned cherries, drained – no shame in shortcuts!)
- 3 large eggs, room temperature (take them out when you preheat the oven – cold eggs don’t play nice)
- 1/2 cup all-purpose flour (I’ve used gluten-free blends successfully too)
- 1/2 cup granulated sugar, plus 2 tablespoons reserved for sprinkling (that crunchy top? Worth it.)
- 1 cup whole milk or half and half (the richer, the better – this isn’t diet food, friends)
- 1 1/2 teaspoons vanilla extract (splurge on the good stuff if you can)
- 1/2 teaspoon almond extract (secret weapon alert – enhances the cherries beautifully)
- 1/4 teaspoon salt (balances all that sweetness)
- Powdered sugar for dusting (because presentation matters – my kids call this “snowing” on desserts)
Pro tip from my many kitchen experiments: Measure everything before you start! There’s nothing worse than realizing mid-mix that you’re out of vanilla. Trust me, I’ve been there – the frantic pantry digging isn’t cute.
How to Make Roasted Cherry Brownies
Alright, let’s get to the fun part – making these beauties! I promise it’s easier than you think. Just follow these steps, and you’ll have a tray of cherry-studded chocolate heaven in no time. The key is taking it slow and enjoying the process – baking should be fun, not stressful!
Roasting the Cherries
First things first – let’s transform those cherries into little flavor bombs! Preheat your oven to 350°F (175°C) while you pit those gorgeous cherries. I like to use a paperclip – just unfold it and pop those pits right out. Arrange the cherries in a single layer in your buttered baking dish. Don’t crowd them! We want each cherry to get nice and caramelized around the edges.
Here’s my secret: sprinkle about half of that reserved sugar over the cherries before roasting. This creates this incredible syrupy glaze as they bake. Pop them in the oven for about 10 minutes while you make the batter – just until they start releasing their juices and smelling amazing.
Preparing the Brownie Batter
While those cherries are getting happy in the oven, let’s whip up the easiest batter ever. Grab your biggest mixing bowl (trust me, splash space matters!) and beat those room-temperature eggs until they’re frothy – about 30 seconds with a whisk should do it.
Slowly add in the sugar, milk, vanilla and almond extracts, whisking as you go. The almond extract is magic with cherries – don’t skip it! Gently fold in the flour and salt just until combined. We’re not making bread – a few lumps are totally fine. Overmixing is the enemy of fudgy brownies!
Baking and Cooling Tips
Now for the best part – assembly! Carefully pull the cherries from the oven (they’ll be bubbling and glorious) and pour your batter right over the top. The cherries might shift a bit – that’s okay! Sprinkle with the remaining sugar for that perfect crispy top.
Bake for 35-45 minutes until the edges pull away slightly from the pan and a toothpick comes out with just a few moist crumbs (not wet batter). Here’s my golden rule: when you think they’re done, wait 2 more minutes. That extra time makes all the difference for the perfect texture!
Let them cool for at least 15 minutes before cutting – I know it’s hard to wait, but this prevents the dreaded crumble disaster. The waiting is torture, but so worth it when you get that first perfect square!
Print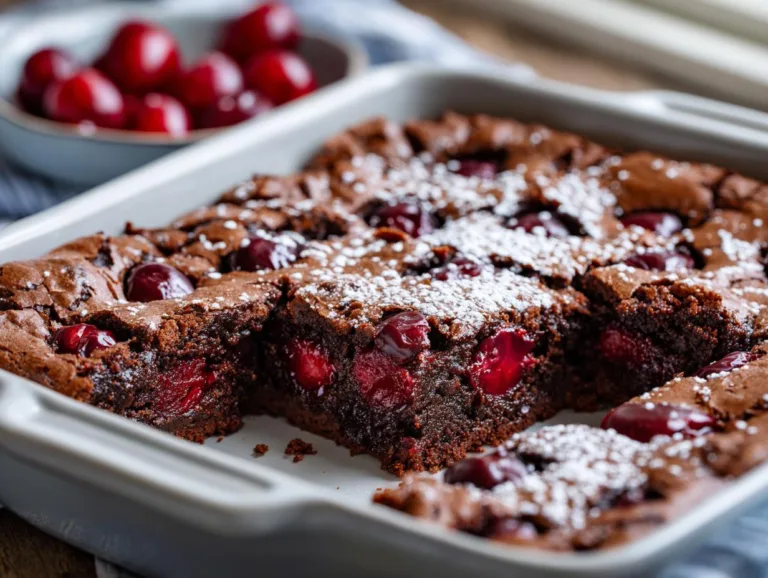
Irresistible Roasted Cherry Brownies with 3 Secret Tricks
A simple dessert combining roasted cherries with rich chocolate brownies for a sweet and indulgent treat.
- Total Time: 55 minutes
- Yield: 6 servings 1x
Ingredients
- 1 1/2 cups fresh sweet cherries, pitted (or canned cherries, drained)
- 3 large eggs, room temperature
- 1/2 cup all-purpose flour
- 1/2 cup granulated sugar, plus 2 tablespoons for topping
- 1 cup whole milk or half and half
- 1 1/2 teaspoons vanilla extract
- 1/2 teaspoon almond extract
- 1/4 teaspoon salt
- Powdered sugar for dusting
Instructions
- Preheat oven to 350°F. Butter a 9 or 10-inch baking dish.
- Arrange cherries evenly in the dish.
- Blend eggs, sugar, milk, flour, extracts, and salt until smooth. Pour over cherries.
- Sprinkle with reserved sugar.
- Bake 35–45 minutes until custard sets.
- Cool 15 minutes before serving.
Notes
- Use fresh or canned cherries.
- Serve warm, at room temperature, or cold.
- Store leftovers in the fridge for up to 4 days.
- Prep Time: 15 minutes
- Cook Time: 40 minutes
- Category: Dessert
- Method: Baking
- Cuisine: American
- Diet: Vegetarian
Nutrition
- Serving Size: 1 slice
- Calories: 280
- Sugar: 24g
- Sodium: 120mg
- Fat: 8g
- Saturated Fat: 4g
- Unsaturated Fat: 3g
- Trans Fat: 0g
- Carbohydrates: 45g
- Fiber: 2g
- Protein: 6g
- Cholesterol: 100mg
Expert Tips for Perfect Roasted Cherry Brownies
After making these roasted cherry brownies more times than I can count (for research purposes, obviously), I’ve picked up some game-changing tricks. These little nuggets of wisdom will take your brownies from “pretty good” to “oh my goodness, what IS this magic?” Here’s what I’ve learned through plenty of trial and error:
Room temperature eggs are non-negotiable
I used to think this was just baking snobbery – until I tried skipping it one rushed afternoon. Cold eggs make your batter lumpy and dense, while room temp eggs blend beautifully into that silky batter we want. If you forgot to take them out early (story of my life!), just pop them in a bowl of warm water for 5 minutes. Works like a charm every time!
The toothpick test is a dirty liar
Here’s the thing – these brownies continue cooking as they cool, so if your toothpick comes out completely clean, you’ve overbaked them! What you want is a few moist crumbs clinging to the toothpick. The edges should pull away slightly from the pan, and the center should jiggle just a tiny bit when you gently shake the pan. Trust me – they’ll set up perfectly as they cool.
Let the cherries shine
When arranging your cherries before roasting, resist the urge to pack them in too tightly. They need space to roast properly and release their juices. I like to arrange them in a single layer with about 1/4 inch between each cherry. This prevents them from steaming each other and ensures maximum caramelization. The extra roasting space makes all the difference in flavor!
The patience payoff
I know it’s torture to wait when your kitchen smells like chocolate heaven, but letting these brownies cool completely before cutting is CRUCIAL. Those 15 minutes allow the structure to set up properly. If you cut too soon, you’ll end up with delicious-but-messy cherry chocolate pudding (been there!). Pro tip: Use a plastic knife for cleaner cuts – it sounds weird but works perfectly!
One last secret? These taste even better the next day! The flavors meld and deepen overnight. Just pop leftovers in an airtight container at room temperature (if they last that long). Now go forth and bake – your future self will thank you!
Serving and Storing Roasted Cherry Brownies
Now comes the best part – eating these beauties! Here’s how I like to serve and keep my roasted cherry brownies for maximum enjoyment. Honestly, they’re good any which way – warm, room temp, or cold straight from the fridge. My family can never agree on the “perfect” way to eat them, so we do a little of everything!
The Great Warm vs. Cold Debate
Fresh from the oven (after that 15-minute cooling period, of course!), these brownies are absolute magic with a scoop of vanilla ice cream. The warm cherries melt the ice cream just enough to create this dreamy cherry-chocolate sauce. But don’t sleep on the fridge version either – the flavors intensify overnight, and the texture gets this amazing fudgy density. My husband swears they’re best straight from the fridge with his morning coffee – who am I to argue?
Storage Secrets
If by some miracle you have leftovers (it happens!), here’s how to keep them fresh. I just cover the baking dish tightly with plastic wrap at room temperature for up to 2 days. For longer storage, pop them in the fridge in an airtight container – they’ll keep beautifully for 4 days. The almond extract helps preserve them naturally, but let’s be real – they never last that long in my house!
Pro tip: Layer parchment paper between slices if you’re stacking them in a container. This prevents them from sticking together and losing that gorgeous crackly top.
Reviving Leftovers
Cold brownies straight from the fridge are delicious, but if you’re craving that fresh-from-the-oven experience, here’s my trick: Microwave individual slices for 10-15 seconds, or warm the whole batch in a 300°F oven for about 8 minutes. The cherries get all juicy again, and the chocolate becomes gloriously melty. Just don’t overdo it – we’re warming, not recooking!
One final note: These freeze like a dream! Wrap individual portions tightly in plastic wrap, then foil, and freeze for up to 3 months. Thaw at room temperature when the craving strikes – it’s like having warm cherry brownie sunshine even in the middle of winter!
Variations for Roasted Cherry Brownies
Sometimes you gotta mix things up! Here are my favorite twists on this recipe that still keep that perfect cherry-chocolate harmony:
- Flour swap: Almond flour gives an incredible nutty depth (use 3/4 cup instead of 1/2 cup all-purpose)
- Chocolate upgrade: Fold in 1/2 cup dark chocolate chips for extra decadence
- Citrus zing: Add 1 tsp orange zest to the batter for a bright contrast
- Boozy cherries: Soak the cherries in 2 tbsp bourbon before roasting (adults-only version!)
- Nutty crunch: Sprinkle chopped walnuts or pecans on top before baking
The beauty of this recipe? It’s like your favorite little black dress – endlessly adaptable for whatever mood strikes! If you enjoy baking variations, you might also love my recipe for Coconut Joy Brownies.
Nutritional Information for Roasted Cherry Brownies
Okay, let’s be real – we’re not eating brownies for their health benefits! But since you asked (or maybe your curious conscience is wondering), here’s the nutritional breakdown per serving. Remember, these numbers can vary based on your exact ingredients -лаяф like whether you use whole milk versus half-and-half, or fresh versus canned cherries.
A typical serving (one generous square) contains approximately:
- Calories: 280
- Fat: 8g (4g saturated)
- Carbohydrates: 45g
- Fiber: 2g (thank you, cherries!)
- Sugar: 24g
- Protein: 6g
- Sodium: 120mg
A few notes from my kitchen experiments: Using dark chocolate chips adds about 20 calories per serving but brings antioxidants. Almond flour lowers the carbs slightly but increases healthy fats. And if you’re watching sugar, you can reduce the added sugar by 1/4 cup – the cherries bring plenty of natural sweetness!
My philosophy? Enjoy every delicious bite mindfully – these roasted cherry brownies are meant to be savored, not stressed over. Life’s too short to count chocolate chips! If you’re looking for a healthier chocolate treat, check out my Avocado Cacao Protein Brownies recipe.
FAQs About Roasted Cherry Brownies
Q1. Can I use frozen cherries instead of fresh?
Absolutely! Just thaw and drain them really well first – I pat mine dry with paper towels to remove excess moisture. Frozen cherries work great in a pinch, though fresh ones give that perfect caramelized edge when roasted. Either way, you’ll still get that amazing cherry-chocolate combo!
Q2. Why do my brownies sometimes turn out soggy?
Ah, the dreaded sogginess! This usually happens if the cherries release too much juice. Here’s my trick: roast them first (like the recipe says!) to evaporate some liquid. Also, don’t skip sprinkling that extra sugar on top – it creates a protective crust that keeps things crisp. If all else fails, bake įt 5 minutes longer than you think!
Q3. Can I make these gluten-free?
You bet! I’ve successfully used a 1:1 gluten-free flour blend instead of all-purpose. Almond flour works too (use 3/4 cup instead of 1/2 cup regular flour). The texture will be slightly different – more dense and fudgy – but still totally delicious. Just make sure your extracts and other ingredients are GF certified if that’s important.
Q4. How do I know when they’re perfectly done?
This was my biggest learning curve! Look for three signs: 1) edges pulling away from the pan slightly, 2) a toothpick with moist crumbs (not wet batter), and 3) the center should jiggle just a tiny bit when you gently shake the pan. Remember – they keep cooking as they cool, so err on the side of underdone!
บ
Q5. Can I prepare these ahead of time?
Oh honey, these might even be better the next day! The flavors meld beautifully overnight. Bake them a day ahead, let them cool completely, then cover tightly at room temperature. For longer storage (up to 4 days), refrigerate them. Pro tip: Warm slices slightly before serving to bring back that fresh-baked magic!
Share Your Roasted Cherry Brownies Experience
Okay, confession time – nothing makes me happier than seeing your kitchen creations! Did you try these roasted cherry brownies? Did you add your own twist? I want to hear ALL about it! Drop a comment below telling me:
- What surprised you most about this recipe
- Any brilliant modifications you made
- Who you shared them with (or if you hid them all for yourself – no judgment!)
And hey – if you snapped a photo of your masterpiece (that crackly top gets me every time!), tag me @FrostyRecipes on Instagram or Facebook. There’s nothing more inspiring than seeing your beautiful brownie variations. I might even feature your creation in my stories! You can also follow my updates on Facebook.
One last thing – if this recipe brought you as much joy as it brings my family, would you consider leaving a star rating? It helps other bakers know this recipe is worth their time (and cherries!). Whether it’s your first time baking with cherries or you’re a seasoned pro, I’d love to hear about your roasted cherry brownies adventure!