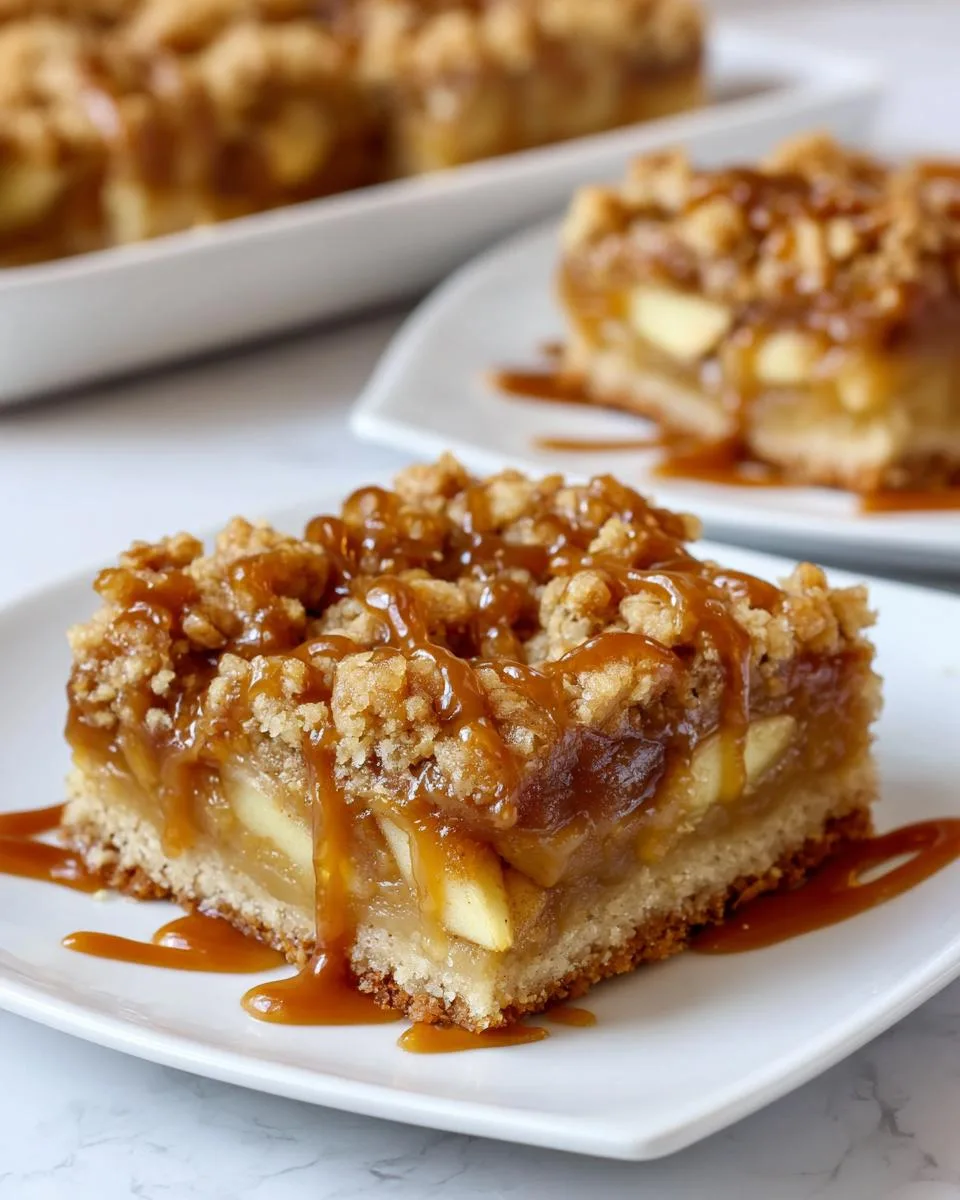
There’s something magical about the first crisp days of fall that sends me straight to the kitchen, apron tied tight, ready to bake up all the cozy flavors of the season. And let me tell you, nothing says “autumn” quite like the smell of these salted caramel apple bars baking in my oven—buttery crust, cinnamon-spiced apples, and that glorious drizzle of caramel that makes these impossible to resist.
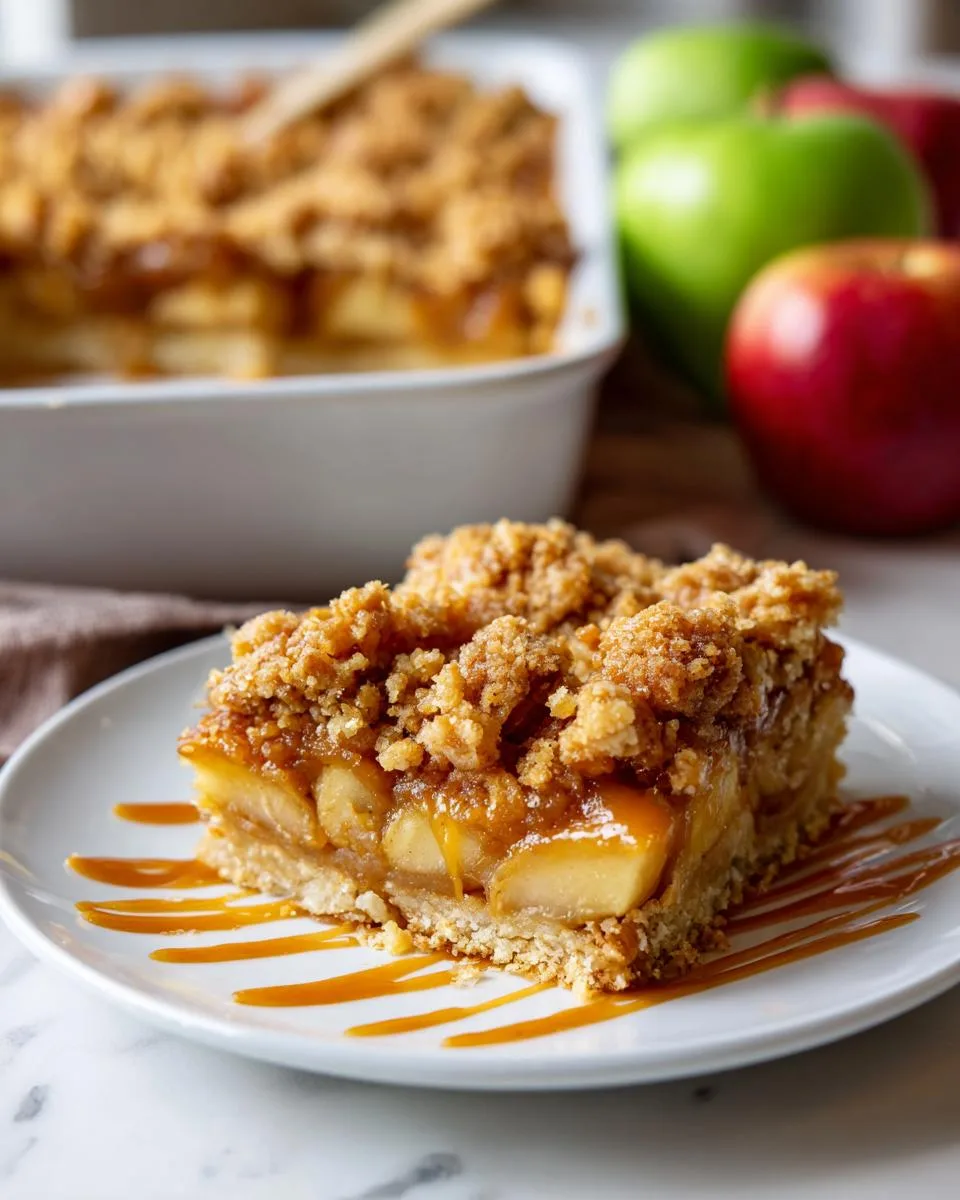
This recipe came about one rainy Saturday when my kids begged for “something sweet with apples,” and I wanted something easier than pie but just as special. What started as a quick pantry-cleanout experiment has become our must-make treat every September through November. The beauty? You probably have most ingredients on hand already, and even if you’re not a seasoned baker, these salted caramel apple bars come together with minimal fuss for maximum reward. Just try keeping them around longer than a day—I dare you!
Table of Contents
Table of Contents
Why You’ll Love These Salted Caramel Apple Bars
Trust me, these bars will become your new fall obsession—here’s why:
- Effortless baking: No fancy techniques or mixer required—just melt, mix, layer, and bake
- That perfect sweet-salty punch: The caramel’s richness plays beautifully against the tart apples and buttery crust
- Your kitchen will smell incredible: Cinnamon + apples + caramel = instant autumn vibes
- Crowd-pleaser magic: Equally perfect for school bake sales or fancy dinner parties
- Better than pie: All the cozy flavors without the fuss of pastry dough
Seriously, I’ve lost count of how many times I’ve made these since discovering the recipe—they’re that good.
Ingredients for Salted Caramel Apple Bars
Here’s what you’ll need to make these irresistible bars—and yes, every ingredient matters! I’ve learned through trial and error (and many happy taste-testers) that these measurements create the perfect balance:
- 2 sticks (1 cup) unsalted butter, melted – Trust me, unsalted lets you control the saltiness better
- 1 1/2 cups granulated sugar – Pack it lightly when measuring
- 1 teaspoon vanilla extract – The good stuff makes all the difference
- 1/2 teaspoon salt – Enhances all the flavors beautifully
- 2 1/2 cups all-purpose flour – Spoon and level it for accuracy
- 3 cups peeled and thinly sliced apples – About 3 medium Granny Smiths (see my tip below!)
- 1/2 cup salted caramel sauce – Homemade or quality store-bought
- 1 teaspoon cinnamon + 1/4 teaspoon nutmeg – My secret spice blend
Quick tip: If you’re out of Granny Smiths, Honeycrisp apples work wonderfully too—just avoid super juicy varieties that might make the crust soggy!
How to Make Salted Caramel Apple Bars
Okay, let’s get baking! These salted caramel apple bars come together in simple steps, but I’ll walk you through each one to ensure perfection. Grab your favorite mixing bowl—this is where the magic happens.
Preparing the Crust
First things first: preheat that oven to 375°F (190°C). While it’s heating up, line your 9×13 inch baking pan with parchment paper—trust me, this makes cleanup a breeze and helps lift the bars out later.
In a large bowl, combine the melted butter, sugar, vanilla, and salt. Stir until it looks like wet sand. Now add the flour and mix until you get a crumbly texture—you’re aiming for something that holds together when pressed but still looks coarse. This is your crust and topping!
Here’s my trick: take about two-thirds of this mixture and press it firmly into the bottom of your prepared pan. I mean really press it—use the bottom of a measuring cup to compact it evenly. This creates that perfect sturdy base for our apple filling.
Layering the Apples and Caramel
Now for the fun part! In another bowl, toss your thinly sliced apples with the cinnamon and nutmeg. Don’t be shy—get those spices coating every slice. Spread this spiced apple mixture evenly over your crust layer.
Next comes the showstopper: drizzle that glorious salted caramel sauce over the apples. I like to warm it slightly first so it pours easily—just don’t make it too runny! Try to distribute it evenly so every bite gets that sweet-salty goodness.
Finally, take the remaining crumb mixture and sprinkle it over the top. No need to press this part—just scatter it loosely for that perfect rustic crumble look.
Baking and Cooling
Pop your creation into the preheated oven for 40-45 minutes. You’ll know it’s done when the topping turns a beautiful golden brown and the apples are tender when poked with a fork—your kitchen will smell absolutely heavenly!
Here’s the hardest part: patience. Let the pan cool completely on a wire rack before cutting into bars. I know it’s tempting, but cutting too soon leads to crumbly messes. I usually wait at least 2 hours—perfect time to clean up and brew some coffee to enjoy with your first bite!
Tips for Perfect Salted Caramel Apple Bars
After making these bars more times than I can count (and eating plenty of test batches!), I’ve picked up some foolproof tricks:
- Apple selection is key: Granny Smiths hold their shape best, but if you prefer sweeter bars, mix in some Honeycrisp – just pat the slices dry first
- Caramel consistency matters: If using jarred sauce, warm it slightly so it drizzles beautifully without making the crust soggy
- Slice apples thin: About 1/4-inch thick ensures they soften perfectly during baking
- Storage secret: Layer cooled bars between parchment paper in an airtight container – they’ll keep at room temp for 3 days (if they last that long!)
Oh! And always make extra caramel sauce for drizzling over individual servings – because why not?
Print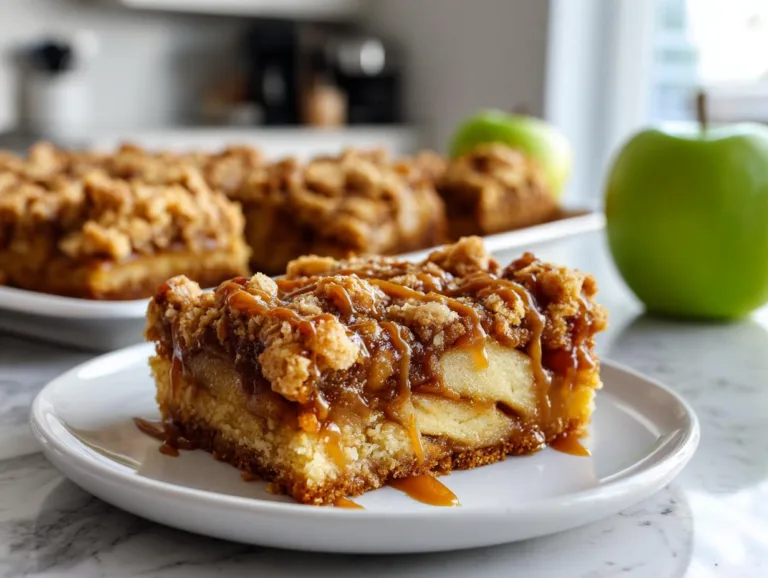
Salted Caramel Apple Bars Recipe – 45-Minute Bliss
Delicious salted caramel apple crumble bars that combine sweet apples, rich caramel, and a buttery crumble topping. Perfect for fall treats or dessert.
- Total Time: 60 minutes
- Yield: 12 bars 1x
Ingredients
- 1 cup (2 sticks) unsalted butter, melted
- 1 1/2 cups granulated sugar
- 1 teaspoon vanilla extract
- 1/2 teaspoon salt
- 2 1/2 cups all-purpose flour
- 3 cups peeled and thinly sliced apples (about 3 medium)
- 1/2 cup salted caramel sauce (store-bought or homemade)
- 1 teaspoon ground cinnamon
- 1/4 teaspoon ground nutmeg
Instructions
- Preheat oven to 375°F (190°C). Line a 9×13 inch baking pan with parchment paper.
- In a large bowl, combine melted butter, sugar, vanilla extract, and salt.
- Add flour and stir until crumbly. The mixture should resemble coarse sand.
- Press about two-thirds of the mixture evenly into the bottom of the prepared pan. This forms the base.
- In a separate bowl, toss sliced apples with cinnamon and nutmeg.
- Spread the spiced apple mixture over the crust in the pan.
- Drizzle salted caramel sauce over the apples.
- Crumble the remaining flour mixture over the top.
- Bake for 40-45 minutes, or until the topping is golden brown and the apples are tender.
- Let cool completely in the pan before cutting into bars.
Notes
- Use firm apples like Granny Smith or Honeycrisp for best texture.
- Let the bars cool completely before cutting to ensure clean slices.
- Store leftovers in an airtight container at room temperature for up to 3 days.
- Prep Time: 15 minutes
- Cook Time: 45 minutes
- Category: Dessert
- Method: Baking
- Cuisine: American
- Diet: Vegetarian
Nutrition
- Serving Size: 1 bar
- Calories: 320
- Sugar: 25g
- Sodium: 120mg
- Fat: 14g
- Saturated Fat: 9g
- Unsaturated Fat: 4g
- Trans Fat: 0g
- Carbohydrates: 45g
- Fiber: 2g
- Protein: 3g
- Cholesterol: 35mg
Variations for Salted Caramel Apple Bars
One of my favorite things about this recipe? How easily you can tweak it! Here are some delicious twists we’ve loved:
- Nutty crunch: Mix 1/2 cup chopped pecans or walnuts into the crumble topping
- Pear swap: Use firm Bartlett pears instead of apples for a subtle flavor change
- Spice it up: Add 1/4 teaspoon cardamom to the apple mixture for extra warmth
- Chocolate love: Sprinkle 1/4 cup mini chocolate chips with the final crumb layer
My kids particularly love the chocolate chip version – though honestly, they’ll eat any variation as long as that caramel drizzle is involved!
Serving and Storing Salted Caramel Apple Bars
These bars taste best at room temperature—that’s when the caramel gets all gooey and irresistible! I love serving them with an extra drizzle of caramel and a dusting of powdered sugar for special occasions. For storage, tuck them into an airtight container with parchment between layers (they’ll keep beautifully for 3 days… if they last that long!).
Salted Caramel Apple Bars Nutritional Information
Just so you know—each of these dreamy salted caramel apple bars comes in at about 320 calories. Remember, these values are estimates (your caramel thickness and apple size might tweak things slightly!). Here’s the full breakdown per serving:
- Calories: 320
- Total Fat: 14g
- Saturated Fat: 9g
- Carbohydrates: 45g
- Fiber: 2g
- Sugar: 25g
As with any homemade treat, exact numbers will vary based on your specific ingredients and portion sizes. But hey—everything in moderation, right?
Frequently Asked Questions
Over the years, I’ve gotten so many questions about these salted caramel apple bars—here are the ones that pop up most often:
Can I use homemade caramel sauce?
Absolutely! Homemade caramel gives these bars extra love—just make sure it’s thick enough to drizzle without making the crust soggy. My trick? Let it cool slightly before pouring so it clings to the apples beautifully. If it’s too thin, simmer it for 2-3 more minutes to thicken.
How do I prevent a soggy crust?
Three secrets: 1) Press that bottom crust firmly—I mean really pack it in there. 2) Pat your apple slices dry after slicing. 3) Don’t overdo the caramel—stick to the 1/2 cup measurement. These steps guarantee that perfect crisp base every time!
Can I freeze these apple bars?
You bet! Freeze them uncut in the pan (wrapped tightly in plastic) for up to 2 months. Thaw overnight in the fridge, then bring to room temp before slicing. The texture stays surprisingly good—just add fresh caramel drizzle when serving.
What if I don’t have parchment paper?
No worries! Just grease your pan well with butter or nonstick spray. Let the bars cool completely before carefully loosening the edges with a knife. They’ll still taste amazing—just might need a little extra coaxing to come out cleanly.
Got more questions? Drop them in the comments—I’m happy to help troubleshoot your baking adventures! You can also follow us on Facebook for more tips and recipes.
Final Thoughts
There you have it—my foolproof recipe for salted caramel apple bars that never fails to impress. Every time I make them, I’m reminded why this humble dessert became my family’s favorite fall tradition. Now I’m passing the torch to you—bake them, share them (or don’t!), and let me know how they turn out. Happy baking, friends!