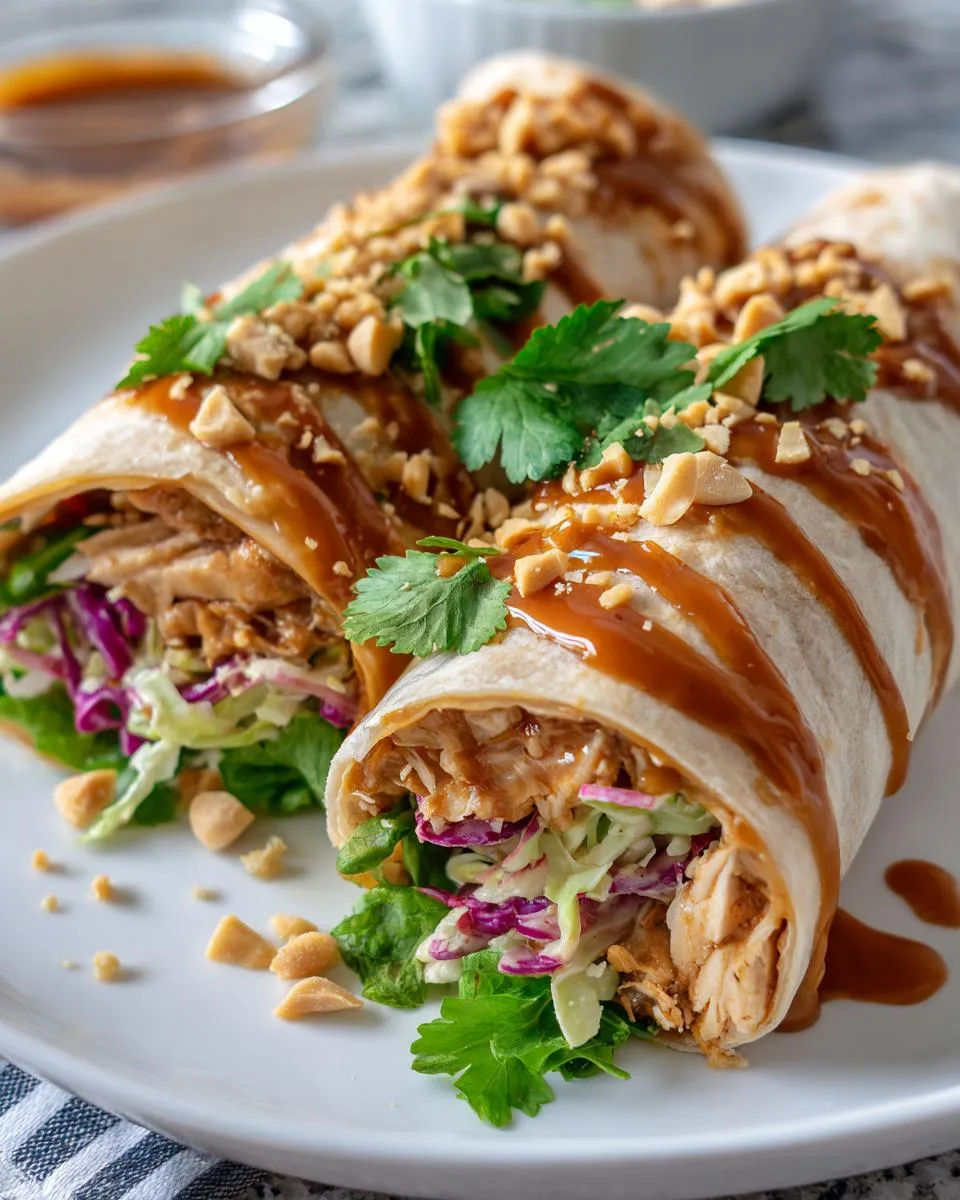
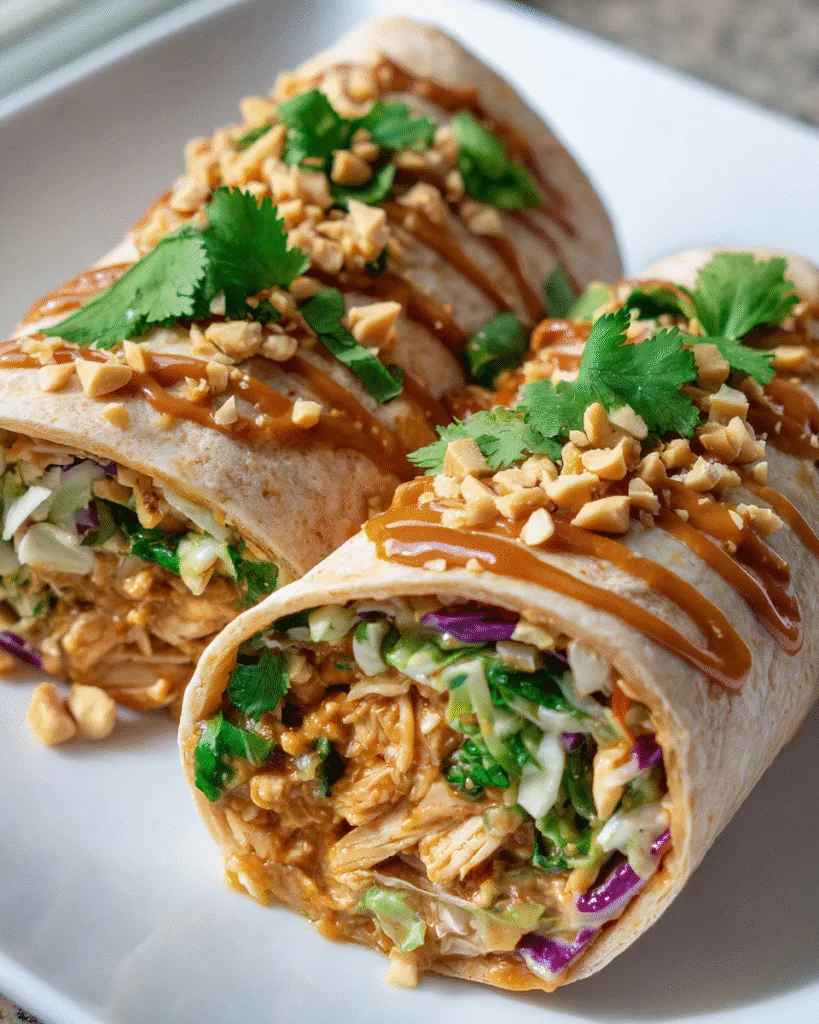
You know those nights when you need dinner on the table fast, but you’re craving something with big flavor? Meet my go-to lifesaver—Thai Peanut Chicken Wraps. These wraps are my secret weapon when I need a meal that feels special but comes together in minutes. Between soccer practice and homework, I’ve perfected this recipe to be as quick as it is delicious—packed with creamy peanut dressing, crunchy slaw, and just the right kick of spice. Trust me, even my picky eaters gobble these up!
What I love most is how flexible these wraps are—swap ingredients based on what’s in your fridge, pack them for lunch, or serve them as a fun hands-off dinner. After years of tweaking, I’ve landed on this version that balances sweet, salty, and tangy flavors perfectly. The best part? You’ll spend more time eating than cooking. Let’s get rolling—literally!
Table of Contents
Table of Contents
Why You’ll Love These Thai Peanut Chicken Wraps
Okay, let me count the ways these wraps steal the show—because honestly, they’re kind of magic. First off, that peanut dressing? It’s lick-the-spoon good. Creamy, tangy, with just enough heat to keep things interesting. And the best part? You probably have everything in your pantry right now to whip it up.
- Crazy-fast: 25 minutes start-to-finish—and that includes chopping! Perfect for when hunger strikes and patience is MIA.
- Flavor bomb: Sweet peanut butter, salty soy sauce, spicy sriracha—it’s like a party in your mouth. My kids call it “restaurant food,” and I don’t correct them.
- Meal chameleon: Pack ’em cold for lunch (no sad desk sandwiches!), serve ’em warm for dinner, or even chop leftovers into a next-day salad.
- No-cook flexibility: Use leftover rotisserie chicken, canned chickpeas for vegetarian, or swap in whatever crunchy veggies are wilting in your fridge.
Seriously, these wraps are the culinary equivalent of a trusty pair of jeans—comfortable, reliable, and somehow they make everything better. Even on my most chaotic days, one bite of that peanut-drenched chicken and crunchy slaw makes me feel like I’ve got my life together.
Ingredients for Thai Peanut Chicken Wraps
Here’s the beauty of this recipe – you likely have most of these ingredients already! I’ve made these wraps with everything from fancy organic peanut butter to the last scoop of a nearly-empty jar (we’ve all been there). Just promise me one thing: don’t skip the fresh ginger and garlic. They’re the secret weapons that take this from good to “oh wow” status.
- For the peanut dressing:
- 1/4 cup peanut butter (creamy or crunchy – I use creamy for smoothness, but crunchy adds fun texture!)
- 1/4 cup low-sodium soy sauce (regular works too, just taste before adding salt)
- 2 Tbsp brown sugar, packed (or honey if you prefer)
- 2 Tbsp rice wine vinegar (that tang is everything!)
- 1/2 Tbsp minced garlic (about 2 cloves – yes, really!)
- 1/2 Tbsp minced fresh ginger (peel it with a spoon – game changer!)
- 1 tsp sriracha sauce (or more if you like it spicy)
- 1-2 Tbsp water (only if your dressing needs thinning)
- For the filling:
- 2 chicken breasts, cooked and chopped into bite-sized pieces (rotisserie chicken works great here)
- 3 cups coleslaw mix (the bagged kind with purple and green cabbage – no need to chop!)
- 1/2 cup grated carrot (optional but adds sweetness and color)
- 1/4 cup chopped fresh cilantro (omit if you’re one of those cilantro-haters)
- 1/4 cup roasted, salted peanuts (for that essential crunch)
- For assembly:
- 4-6 tortillas (I use the burrito-sized ones – more room for filling!)
See? Nothing crazy here. The beauty is in how these simple ingredients come together. Pro tip: if your peanut butter is super thick (looking at you, natural varieties), microwave it for 15-20 seconds before mixing – makes the dressing come together like a dream.
How to Make Thai Peanut Chicken Wraps
Alright, let’s get down to business! These wraps come together so fast you’ll barely have time to blink. I’ve made this recipe probably a hundred times (no exaggeration), and I’ve learned a few tricks along the way to make it foolproof. Follow these steps, and you’ll have restaurant-quality wraps with zero stress.
Step 1: Prepare the Peanut Dressing
This is where the magic starts! Grab a small bowl and whisk together your peanut butter, soy sauce, brown sugar, rice wine vinegar, garlic, ginger, and sriracha. Now, here’s my secret – if your peanut butter is being stubborn (especially the natural kind that separates), pop it in the microwave for 15-20 seconds first. Makes it so much easier to blend!
Whisk until it’s smooth as silk. If it looks too thick – like it could stand up a spoon – add water one tablespoon at a time until it’s pourable but still coats the back of a spoon. Taste it! This is your moment to adjust – more sriracha for heat, more sugar for sweetness, or a splash of vinegar if it needs more tang.
Step 2: Combine Filling Ingredients
In a big bowl, toss together your chopped chicken, coleslaw mix, carrots (if using), cilantro, and peanuts. Now drizzle that glorious peanut dressing over everything. Here’s where I get hands-on – I literally use my clean hands to mix it all together, making sure every single piece gets coated. The warmth from your hands helps the dressing cling better too!
Let it sit for 5-10 minutes if you can. I know, waiting is hard when it smells this good, but this resting time lets the flavors mingle and the cabbage soften just slightly. Trust me, it makes a difference in every bite.
Step 3: Warm Tortillas
While your filling is getting happy, grab those tortillas. Cold tortillas crack when you try to roll them – learned that the hard way! Stack them on a plate with a damp paper towel on top and microwave for about 30 seconds. The steam makes them soft and pliable. No microwave? Warm them one at a time in a dry skillet for 10 seconds per side.
Step 4: Assemble Wraps
Time for the fun part! Spoon about 3/4 cup of filling onto each tortilla, slightly off-center toward the bottom. Don’t overstuff – I’ve made that mistake too many times. Fold the bottom up over the filling, then fold in the sides and roll tightly away from you, like a burrito. If you’re packing these for lunch, wrap them in parchment paper or foil – it keeps them neat and makes them easy to eat on the go!
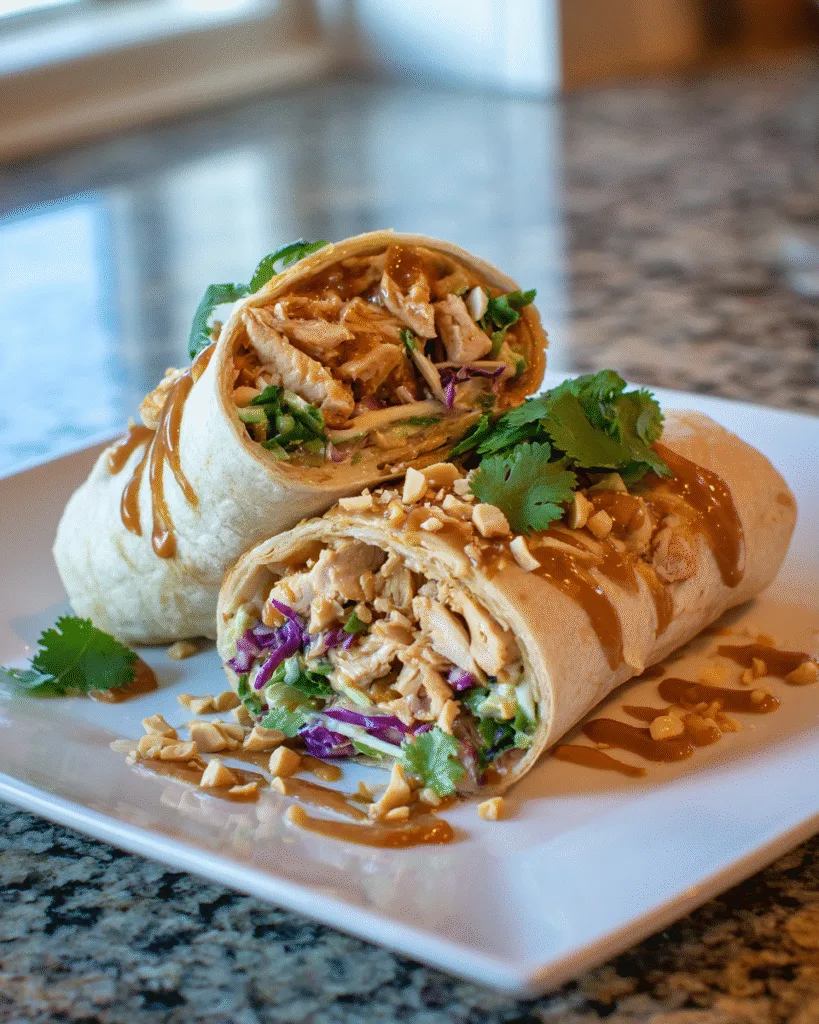
And there you have it – Thai peanut chicken wraps that’ll make you feel like a kitchen rockstar. The hardest part now? Deciding whether to share them!
Tips for Perfect Thai Peanut Chicken Wraps
After making these wraps more times than I can count (seriously, my family requests them at least once a week!), I’ve picked up some tricks that take them from good to can’t-stop-eating-them amazing. Here are my best tips to make sure your wraps turn out perfect every time!
- Shred vs. chop: While chopped chicken works great, I actually prefer shredded chicken for these wraps. It soaks up more of that delicious peanut dressing and gives you better texture in every bite. My quick method? Throw chicken breasts in the Instant Pot with 1 cup of chicken broth for 12 minutes – falls apart with just a fork!
- Double the dressing: I always, always make extra peanut sauce. Why? Because you’ll want to drizzle more on top after assembling (trust me), and any leftover makes an incredible salad dressing or veggie dip the next day. Just store it in a mason jar in the fridge – it keeps for up to a week!
- Lettuce wrap hack: Going low-carb? Swap tortillas for big butter lettuce leaves. They add the perfect crunch and make this meal feel extra fresh. Bonus: no need to warm them up – just fill and go!
- The squeeze trick: If your slaw seems watery after mixing, give it a gentle squeeze in a clean kitchen towel before adding the dressing. This prevents soggy wraps, especially if you’re meal prepping. Learned this the hard way after too many limp wraps!
One last pro tip from my many kitchen experiments: if you’re serving these to guests, set up a DIY wrap station with all the fillings and toppings. Everyone can customize their own, and you get to enjoy the party instead of playing short-order cook. Works like a charm every time!
Print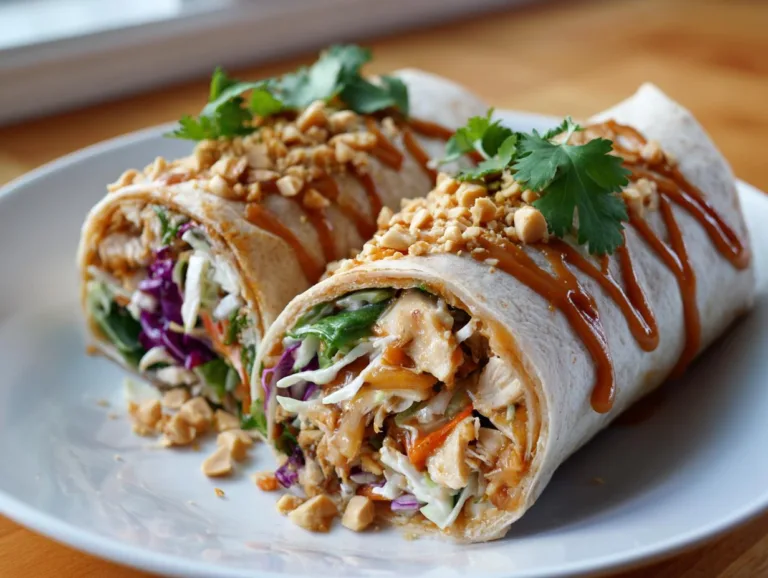
25-Minute Thai Peanut Chicken Wraps
A quick and flavorful Thai-inspired chicken wrap with a creamy peanut dressing, fresh coleslaw, and crunchy peanuts.
- Total Time: 25 minutes
- Yield: 4–6 wraps 1x
Ingredients
- 1/4 cup peanut butter
- 1/4 cup low-sodium soy sauce
- 2 Tbsp brown sugar or honey
- 2 Tbsp rice wine vinegar
- 1/2 Tbsp minced garlic
- 1/2 Tbsp minced ginger
- 1 tsp sriracha sauce
- 1–2 Tbsp water (optional)
- 2 chicken breasts, cooked and chopped
- 3 cups coleslaw mix
- 1/2 cup grated carrot (optional)
- 1/4 cup chopped cilantro
- 1/4 cup roasted, salted peanuts
- 4–6 tortillas
Instructions
- Whisk together peanut butter, soy sauce, brown sugar or honey, rice wine vinegar, garlic, ginger, and sriracha sauce in a small bowl or liquid measuring cup. Optionally, thin with water.
- In a large bowl, mix together chicken, coleslaw mix, grated carrot, cilantro, and peanuts. Drizzle dressing over the mixture and toss to combine evenly. Let sit for a few minutes to absorb flavors.
- Heat tortillas in the microwave for 30 seconds to soften and make them easier to roll.
- Divide the filling evenly between the tortillas, wrap tightly, and serve immediately.
Notes
- If using thick peanut butter, microwave it for about 30 seconds to make it easier to mix.
- The number of wraps will vary depending on filling preference and tortilla size.
- Prep Time: 15 minutes
- Cook Time: 10 minutes
- Category: Lunch
- Method: No-Cook
- Cuisine: Thai
- Diet: Low Lactose
Nutrition
- Serving Size: 1 wrap
- Calories: 350
- Sugar: 8g
- Sodium: 600mg
- Fat: 15g
- Saturated Fat: 3g
- Unsaturated Fat: 10g
- Trans Fat: 0g
- Carbohydrates: 30g
- Fiber: 4g
- Protein: 25g
- Cholesterol: 50mg
Variations for Thai Peanut Chicken Wraps
One of my favorite things about this recipe? How easily it adapts to whatever you’ve got on hand or dietary needs. I’ve tweaked these wraps more ways than I can count—here are my favorite spins that keep the magic alive while mixing things up!
- Protein swaps:
- Tofu twist: Cubed extra-firm tofu (pressed and pan-fried) works beautifully for vegetarian versions. My kids love when I toss it in cornstarch first for extra crispiness—it soaks up the peanut sauce like a dream!
- Shrimp shoutout: Swap in cooked shrimp for a seafood version. I like to toss them with a bit of the dressing and quick-pickle some red onions for extra zing.
- Pork possibility: Leftover pulled pork? Oh yes—the sweetness pairs shockingly well with the peanut dressing. My husband’s favorite “clean out the fridge” hack.
- Nut butter alternatives:
- Almond butter makes a great sub for peanut allergies—just add an extra teaspoon of honey to balance its natural bitterness.
- Sunflower seed butter works too (perfect for school lunches where nuts aren’t allowed), though it’ll turn the dressing slightly green—embrace the galaxy wrap vibe!
- Fruity additions:
- Thin mango slices add bursts of sweetness that cut through the richness—my summer go-to.
- Crushed pineapple (well-drained!) gives tropical vibes and keeps the filling extra moist.
- Sliced apples in fall? Don’t mind if I do—the crunch is everything.
- Heat adjustments:
- For spice wimps (no judgment!): Skip the sriracha and add a pinch of smoked paprika instead—all the flavor, none of the burn.
- Spice lovers: Double the sriracha AND add a diced Thai chili to the mix. My brother-in-law insists on this version—we call it “fire wrap” in our house.
The beauty is—much like my kids’ artwork on the fridge—there’s no “wrong” way to do this. Last week I subbed in leftover spaghetti squash for half the slaw (don’t knock it till you try it!) and it was bizarrely delicious. That’s the joy of cooking—play with it until it makes your taste buds happy!
Serving Suggestions
Okay, let’s talk about turning these wraps into a full meal that’ll make your family think you’ve been slaving away for hours (our little secret—it took 25 minutes!). Over the years, I’ve discovered some perfect pairings that complement these Thai peanut chicken wraps without overpowering them. Here’s what I serve when I really want to impress—or just make weeknight dinner feel special!
- Cool cucumber salad: Thinly sliced cucumbers tossed with rice vinegar, a pinch of sugar, and sesame seeds. It’s crunchy, refreshing, and cuts through the richness of the peanut sauce perfectly. My kids call it “pool noodles” because of how the slices curl—whatever gets them to eat veggies, right?
- Baked sweet potato fries: Tossed with just a bit of oil and salt, these add warmth and sweetness that plays so nicely with the wraps. Pro tip: sprinkle them with a tiny bit of cinnamon before baking—trust me on this one!
- Simple edamame: Steamed and sprinkled with sea salt—the easiest protein-packed side that keeps everyone happy. Bonus: tossing the pods keeps kids (and adults!) occupied during dinner.
- Kid-friendly fruit skewers: Alternate pineapple chunks and grapes on sticks—fun to eat and balances the meal. My daughter loves “helping” assemble these while I finish the wraps.
For parties or potlucks? I set up a wrap bar with all the fixings—extra peanuts, cilantro, lime wedges, and different veggies. Let guests build their own—it’s interactive and means no last-minute wrapping frenzy for you! Just keep the dressing in a cute little pitcher with a spoon for drizzling. Watch how fast these disappear—I’ve seen grown adults race for seconds!
Storing and Reheating Thai Peanut Chicken Wraps
Here’s the good news – these wraps taste amazing fresh and as leftovers! But – and this is a big but – you’ve got to store them right, or you’ll end up with sad, soggy tortillas. After many trial-and-error lunches (oh, the tragedies of limp wraps past), here’s exactly how I keep everything tasting fresh.
Smart storing: Keep components separate
My golden rule? Never assemble wraps ahead if you’re storing them. The filling can hang out happily in an airtight container in the fridge for up to 2 days, but tortillas should live separately at room temperature in their package or a zip-top bag. That peanut dressing makes the slaw softer over time (in a good way!), but no one wants a mushy tortilla.
If you’ve already made wraps (we’ve all been overeager!), wrap each tightly in foil and refrigerate for no more than a day. The texture won’t be quite as perfect, but they’ll still taste delicious – just eat them cold rather than trying to reheat assembled wraps.
Reheating like a pro
When you’re ready for round two, here’s my method:
- Filling only: Microwave in 30-second bursts, stirring between, until just warmed through. Or better yet – gently heat in a skillet over medium-low with a splash of water to prevent drying out.
- Tortillas: Always re-warm them! Microwave between damp paper towels for 10-15 seconds, or heat in a dry skillet for about 10 seconds per side.
Important safety note: That peanut dressing contains perishable ingredients (looking at you, garlic and ginger), so don’t push past 2 days in the fridge. If you won’t eat it all within that time, freeze the filling in portion-sized containers for up to a month. Thaw overnight in the fridge, then reheat as above.
Pro tip: Any leftover dressing makes an incredible salad dressing or veggie dip for up to 5 days when stored separately in a jar. My kids love it drizzled over rice bowls with whatever veggies we have – zero waste, maximum flavor!
Nutrition Information
Now, let’s talk numbers—but remember, these are estimates based on using exact ingredients listed. Your wraps might vary slightly depending on tortilla size or how generous you are with that addictive peanut dressing (no judgement—I always go heavy!). Here’s the nutritional breakdown per wrap if you make 6 servings:
- Calories: About 350 – filling enough for a meal but won’t leave you sluggish
- Protein: 25g – thanks to that chicken and peanuts, this meal sticks with you
- Carbs: 30g – mostly from the tortilla and that bit of brown sugar in the dressing
- Fiber: 4g – the cabbage and carrots do their good work
- Fat: 15g (only 3g saturated) – the good kind from peanuts and chicken
- Sugar: 8g – mostly natural from the carrots and dressing sweetness
- Sodium: 600mg – the soy sauce does most of this, so use low-sodium if you’re watching salt
A few quick notes from my kitchen experiments: Using lettuce wraps instead of tortillas cuts about 150 calories and 30g carbs per serving. And if you’re monitoring sodium, swapping tamari for soy sauce can save you about 200mg per wrap—I’ve done this for my dad who watches his salt intake, and the flavor difference is minimal!
Remember—nutrition is important, but so is joy. One of these wraps delivers plenty of both in my book!
FAQs About Thai Peanut Chicken Wraps
After years of making these wraps for everyone from picky kids to foodie friends, I’ve heard every question under the sun! Here are the answers to the big three that always come up – consider this your cheat sheet for wrap success.
Can Thai Peanut Chicken Wraps Be Meal Prepped?
Absolutely! In fact, I meal prep these every Sunday for my work lunches. The trick is to keep the filling and tortillas separate until you’re ready to eat. The dressed filling stays perfect in the fridge for up to 2 days (the flavors actually get better!), while tortillas should stay at room temp in their package. When lunchtime rolls around, I just warm a tortilla (10 seconds in the microwave does it), scoop in the cold filling, and roll it up. Crisp, fresh, and way better than takeout!
What If I Don’t Have Sriracha?
No sweat! I’ve been there when the fridge is looking bare. For heat, you can use:
- 1/4 tsp crushed red pepper flakes (what I use when my sriracha bottle mysteriously disappears)
- A dash of hot sauce like Tabasco (not quite the same, but works in a pinch)
- 1/2 tsp chili garlic paste (if you’ve got it – adds great depth)
Or skip the heat altogether! The wraps will still be delicious with just the sweet-savory peanut flavors. My 6-year-old prefers it this way – I just add sriracha to individual portions for us spice lovers.
How Do I Keep the Wraps from Getting Soggy?
Ah, the eternal wrap struggle! Here are my battle-tested tricks:
- Assemble right before eating – even 30 minutes ahead can make tortillas soggy
- Layer smartly – spread a thin layer of slaw first, then chicken on top to create a moisture barrier
- Pat chicken dry if it’s freshly cooked – excess liquid is the enemy!
- Use sturdier tortillas – the whole wheat or spinach ones hold up better than plain white
My favorite hack? For packed lunches, I put the filling in a container and the tortilla in a baggie – assemble at my desk for a fresh, crisp wrap every time. Works like a charm!
For More recipes Follow me on Facebook!