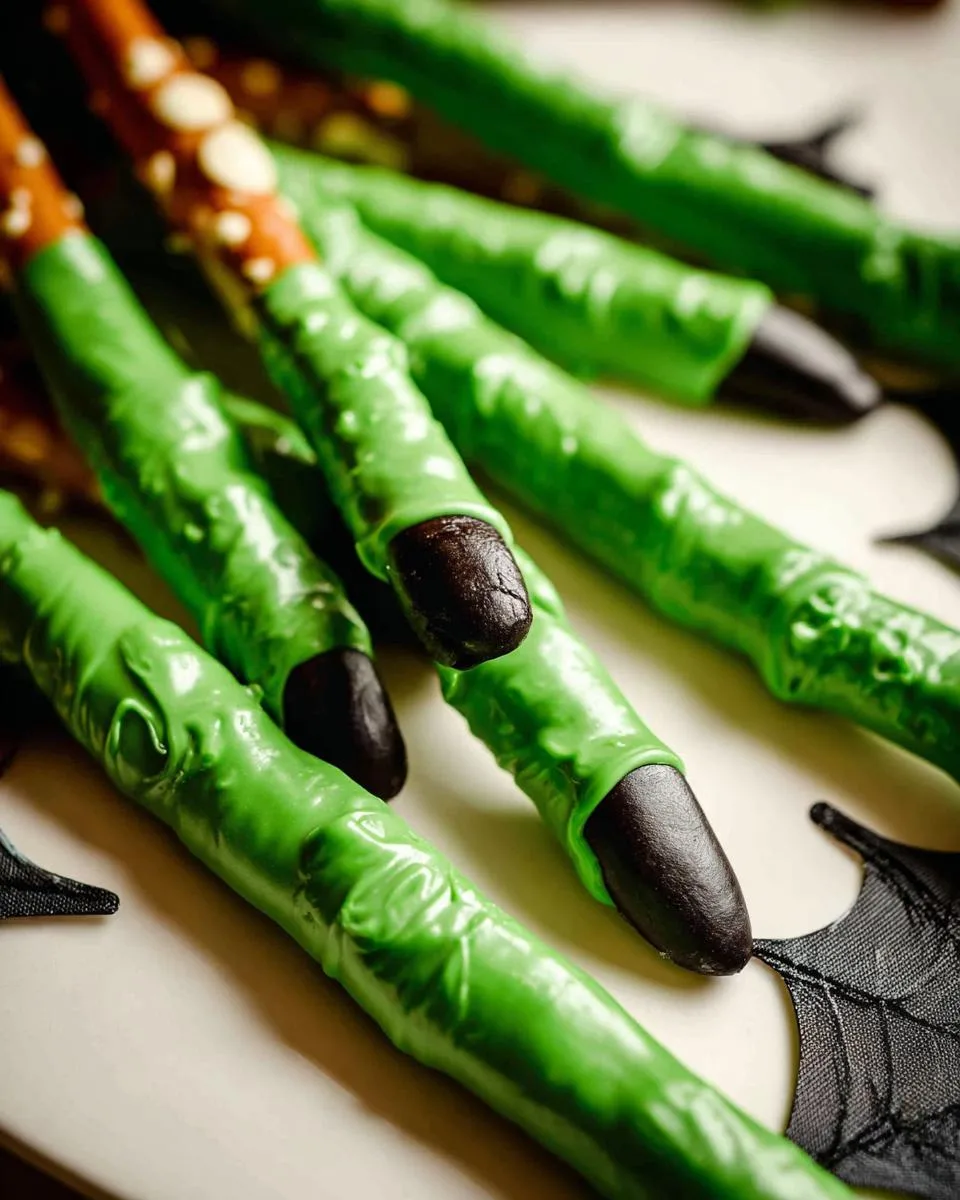
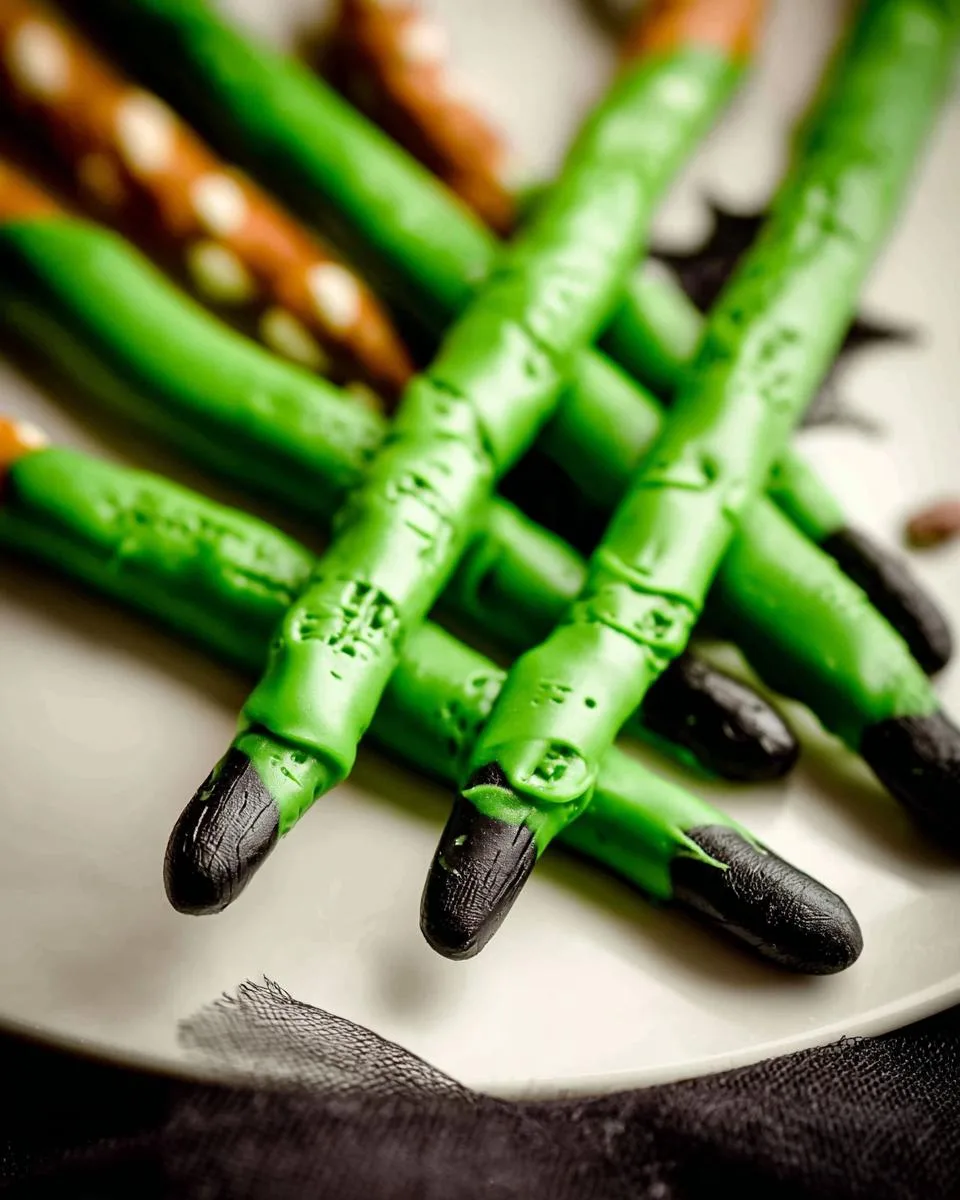
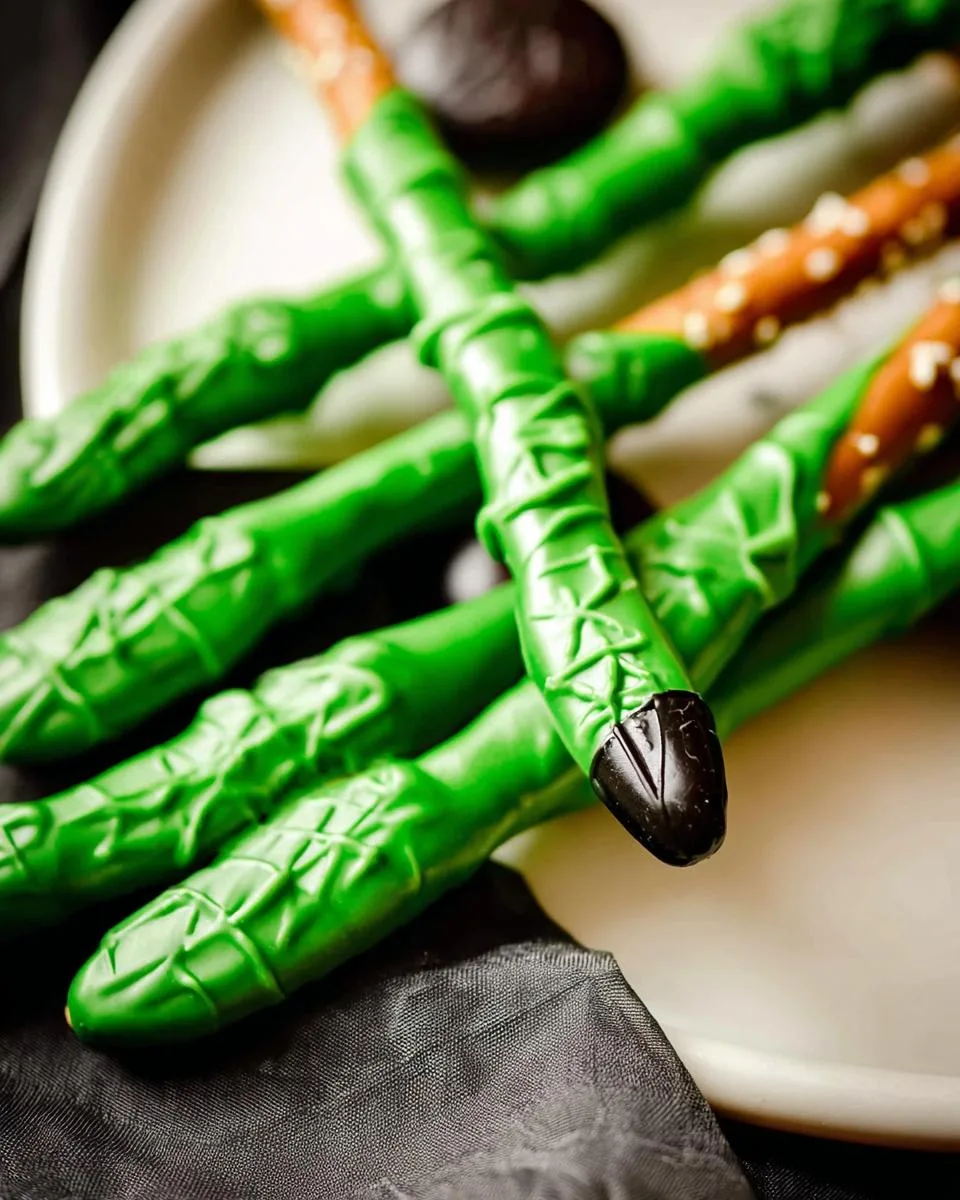
Halloween baking should be equal parts spooky and simple – that’s why I’m obsessed with these witch finger pretzels! Last year, my kids and I whipped up a batch for their class party, and let me tell you, they were the hit of the haunted house. These creepy-crawly treats look like they jumped straight out of a witch’s cauldron, but they’re actually super easy to make with just pretzel rods, candy melts, and a little imagination.
The best part? No oven required. Just melt, dip, and decorate – even my kindergartener could help (though she did sneak a few extra pretzels when I wasn’t looking). Whether you’re hosting a monster mash or just want a fun after-school project, these witch finger pretzels deliver all the Halloween spirit without any of the stress. Trust me, they’ll disappear faster than a ghost in the night!
Table of Contents
Table of Contents
Why You’ll Love These Witch Finger Pretzels
Listen, I know Halloween prep can feel overwhelming—between costumes, decorations, and sugar-crazed kids—but these witch finger pretzels are your secret weapon. Here’s why:
- No-bake magic: Skip the oven! Just melt, dip, and decorate—perfect for when you’re short on time (or patience).
- Kid-approved creepy: My littles go wild for the “eww!” factor. Bonus: They can help coat pretzels and press on almond nails.
- Party superstar: These always vanish first at our Halloween bash. Pile them on a tray with dry ice for extra drama.
- Foolproof fun: Even if your candy coating isn’t perfect, the wrinkled knuckles still look delightfully gross.
Ingredients for Witch Finger Pretzels
Gather these simple ingredients – you probably have most in your pantry already! The key is precision here, especially with the candy melts. Trust me, I learned the hard way that eyeballing measurements leads to sticky fingers (and not the fun, Halloween kind).
- 2 ounces (57g) black candy melts – for those creepy fingernails
- 12 slivered almonds – look for the pointiest ones you can find!
- 12 large pretzel rods (about 7 to 8 inches long) – the “bones” of our witch fingers
- 6 ounces (170g) green candy melts – the perfect sickly skin tone
That’s it! See? I told you this was easy. Now let’s turn these simple ingredients into something gloriously gross.
How to Make Witch Finger Pretzels
Okay, let’s get spooky! These witch finger pretzels come together faster than you can say “double double toil and trouble.” Follow these steps, and you’ll have a batch of ghoulish goodies ready to haunt your snack table.
Preparing the Almond Nails
First up – the fingernails! Melt your black candy melts in a microwave-safe bowl, heating in 20-second bursts and stirring between each round until smooth. Now here’s my trick: use tweezers or toothpicks to dip each almond completely in the black candy. Lay them on parchment paper to harden – this takes about 15-20 minutes. Don’t rush it! I made that mistake last year and ended up with smudged nails that looked more like witch finger blobs.
Coating the Pretzel Rods
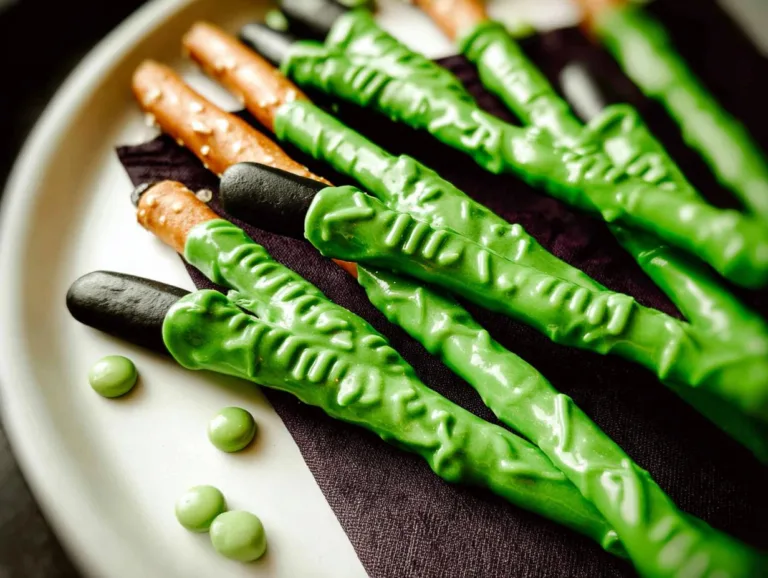
While those nails set, melt your green candy melts the same way (20-second bursts!). Hold each pretzel rod by the uncoated end and dip about ⅔ of it into the green candy. Give it a gentle shake to let the excess drip off – you want creepy fingers, not candy-coated clubs. Lay them flat on parchment paper and immediately press an almond nail onto each tip. The coating should still be soft enough for the almond to stick but set enough that it won’t slide off.
Adding the Final Touches
Here’s where the magic happens! After about 5 minutes (when the coating has firmed up slightly but isn’t fully hardened), grab a toothpick. Gently drag it horizontally across each pretzel rod to create knuckle wrinkles – two or three per finger looks perfectly gross. Let them set completely, about 20 more minutes. Pro tip from my kitchen disasters: resist the urge to touch them while they dry unless you want fingerprint-textured witch hands!
Tips for Perfect Witch Finger Pretzels
After making these witch finger pretzels every Halloween for the past five years (and yes, I’ve had my share of candy melt catastrophes), here are my hard-earned secrets:
- Move fast with melts: Candy coating starts setting quickly – work in small batches and keep reheating your bowl in 10-second bursts if needed.
- Parchment is your BFF: Skip the wax paper – I learned the messy way that candy melts stick to it like, well, witches to broomsticks.
- Cool completely: Let those fingers set fully before moving them, unless you want smudged knuckles (though honestly, extra wrinkles can look creepier!).
- Storage smarts: Layer them in an airtight container with parchment between layers – they’ll stay fresh for 2 weeks (if they last that long!).
Remember – even “imperfect” fingers look perfectly spooky, so don’t stress!
Storing and Serving Witch Finger Pretzels
Here’s the spooky truth – these witch finger pretzels never last long in our house! But if you need to store them, tuck them into an airtight container at room temperature. They’ll stay fresh for up to 2 weeks (ha – like they’ll last that long!). For parties, I love arranging them crawling out of a “cauldron” bowl or poking through a foam tombstone – the gasps are priceless!
Witch Finger Pretzels Variations
Once you’ve mastered the classic green witch fingers, the spooky possibilities are endless! Try swapping green candy melts for white to create ghost fingers (add mini chocolate chip eyes for extra creep factor). Feeling extra ghoulish? Dab red candy melts at the nail base for a “bloody” effect – my horror-movie-loving husband goes wild for this version. You could even use orange coating and call them zombie fingers for a fun twist. The best part? These variations all use the same simple technique – just change up your colors and let your Halloween imagination run wild!
Nutritional Information for Witch Finger Pretzels
Now, let’s be real—these witch finger pretzels aren’t health food (they’re Halloween magic!), but here’s the nutritional breakdown per finger:
- 120 calories – perfect for sneaky snacking
- 10g sugar – just enough sweet to balance the salty pretzel
- 5g fat (3g saturated) – mostly from those creamy candy melts
- 80mg sodium – thank the pretzel gods
*Values are estimates based on standard ingredients. Your mileage may vary depending on how thick you coat those fingers—no judgment if you go extra!
Frequently Asked Questions About Witch Finger Pretzels
Over the years, I’ve gotten all sorts of questions about these witch finger pretzels – here are the ones that pop up most often in my kitchen (and my very honest answers!):
Can I use milk chocolate instead of candy melts?
Technically yes, but I don’t recommend it – chocolate doesn’t set as firm and tends to melt in your hands (literally!). Candy melts give that perfect creepy texture. If you must use chocolate, add a teaspoon of coconut oil to help it harden.
How long do witch finger pretzels last?
Stored properly in an airtight container, they’ll stay fresh for up to 2 weeks at room temperature. But between you and me? They’ve never lasted more than 2 days in my house before getting gobbled up!
My candy coating is too thick – help!
Been there! Just add a tiny bit of vegetable oil (start with ¼ teaspoon) to thin it out. Microwave for 10 more seconds and stir well. Too thin? Mix in a few extra candy melt pieces.
Can kids help make these?
Absolutely! My 5-year-old loves pressing on the almond nails. Just supervise the hot candy melts (I put the bowl on a folded towel so little hands don’t tip it) and let them handle the cooled pieces.
Spooky Witch Finger Pretzels for a Delicious Halloween
Spooky and fun witch finger pretzels are perfect for Halloween. These easy-to-make treats use pretzel rods and candy melts for a creepy yet delicious snack.
- Total Time: 30 minutes
- Yield: 12 pretzels 1x
Ingredients
- 2 ounces (57g) black candy melts
- 12 slivered almonds
- 12 large pretzel rods (about 7 to 8 inches long)
- 6 ounces (170g) green candy melts
Instructions
- Line a baking sheet with parchment paper or a silicone mat.
- Melt black candy melts in a microwave-safe bowl in 20-second increments, stirring until smooth.
- Dip each almond into the melted black candy, coating completely, then place on the baking sheet to harden (15-20 minutes).
- Melt green candy melts in a microwave-safe bowl in 20-second increments, stirring until smooth.
- Coat each pretzel rod about ½ to ⅔ of the way with the green candy, shaking off excess.
- Lay each pretzel rod flat on the baking sheet and press an almond onto the tip as a nail.
- Let the coating set slightly, then use a toothpick to draw knuckle wrinkles if desired.
- Allow to set completely before serving or storing (lasts up to 2 weeks at room temperature).
Notes
- Use slivered or whole almonds for the nails.
- Store in an airtight container to keep fresh.
- Great for Halloween parties or spooky-themed treats.
- Prep Time: 20 minutes
- Cook Time: 10 minutes
- Category: Dessert
- Method: No-Bake
- Cuisine: American
- Diet: Vegetarian
Nutrition
- Serving Size: 1 pretzel
- Calories: 120
- Sugar: 10g
- Sodium: 80mg
- Fat: 5g
- Saturated Fat: 3g
- Unsaturated Fat: 2g
- Trans Fat: 0g
- Carbohydrates: 18g
- Fiber: 1g
- Protein: 2g
- Cholesterol: 0mg
For More recipes Follow me on Facebook!