Oh, how I love Halloween in our house – the costumes, the decorations, and of course, the treats! Nothing gets my kids more excited than whipping up a batch of these adorable Witch Hat Cookies together. They’re ridiculously fun to make, even if our kitchen ends up looking like a sprinkle explosion by the end (totally worth it). These little hats are the perfect blend of peanut butter cookie goodness and chocolatey magic, with just enough spooky charm to make them the star of any Halloween party. I’m Emily, by the way – mom, cookie enthusiast, and your guide to stress-free holiday baking. Trust me, if I can pull these off with two kiddos “helping,” anyone can!
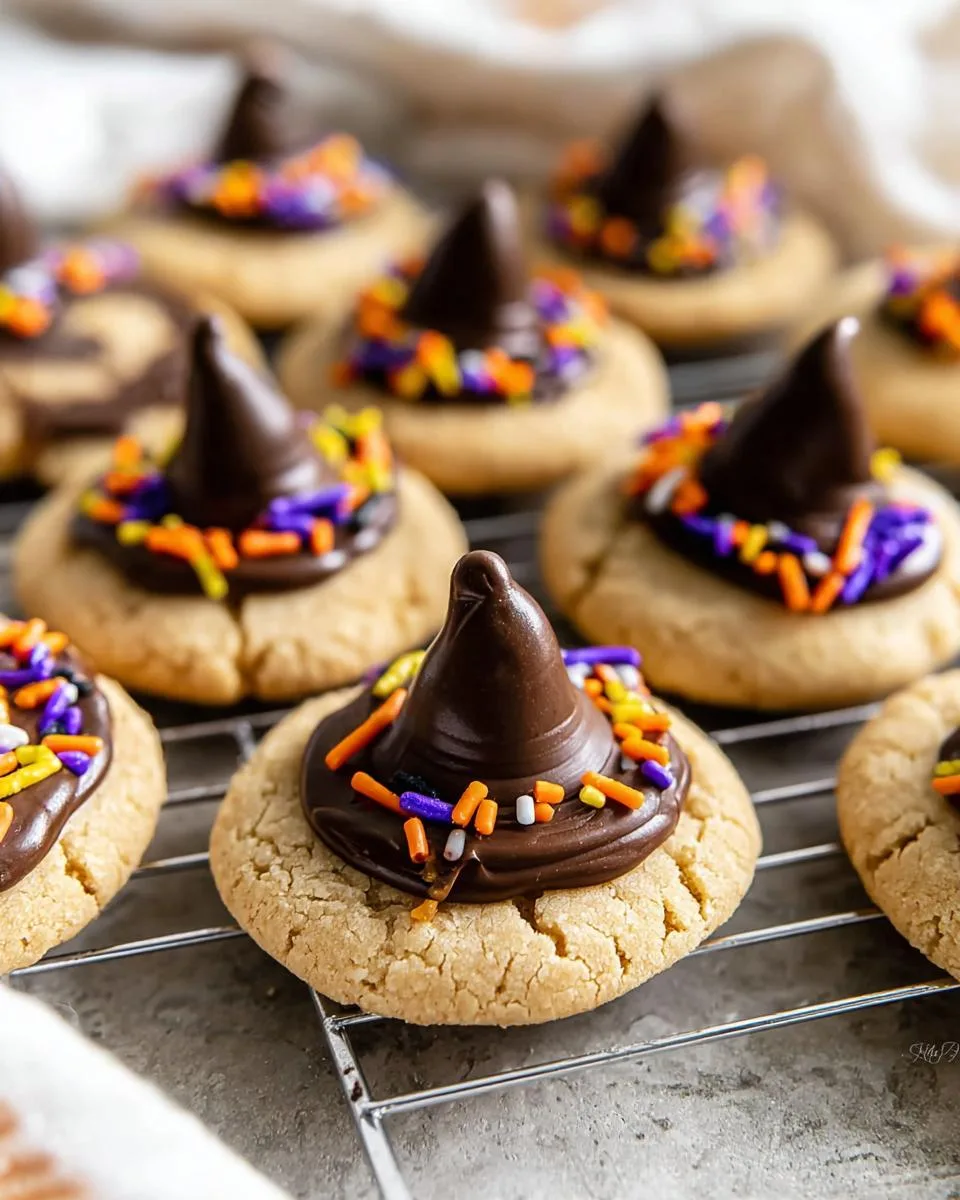
Table of Contents
Table of Contents
Ingredients for Witch Hat Cookies
Alright, witches and wizards – let’s gather our magical supplies! Here’s everything you’ll need for these enchanting cookies, plus a few very important notes I’ve learned through trial and (many) tasty errors:
- 1 ¾ cups (218 g) all-purpose flour – spooned and leveled, because packed flour leads to sad, dense hats
- 1 teaspoon baking soda – check the expiration date! Nothing’s worse than flat cookies
- ¼ teaspoon salt – just enough to make the sweet flavors pop
- ½ cup (218 g) granulated sugar, plus extra for rolling – that sparkly coating is non-negotiable
- ½ cup (100 g) light brown sugar – packed tight for that caramel-like depth
- ½ cup (128 g) no-stir creamy peanut butter – not natural PB (trust me, the separation drama isn’t worth it)
- ½ cup (1 stick) unsalted butter, room temp – soft enough to leave a thumbprint, but not greasy
- 1 large egg, room temp – cold eggs = lumpy batter
- 1 teaspoon pure vanilla extract – imitation vanilla? In this cauldron? Never.
For the spellbinding decorations:
- 30 chocolate melting wafers – these are your hat brims, so don’t skimp!
- Another ½ cup (1 stick) unsalted butter, room temp – for the frosting glue
- 1 ¼ cups (150 g) confectioners’ sugar, sifted – lump-free frosting is happy frosting
- 1 teaspoon vanilla extract + pinch salt – balances the sweetness
- 1-2 Tablespoons heavy cream, room temp – add slowly until pipeable
- Orange/purple/green gel food coloring – liquid dyes make frosting weep (ask me how I know)
- 30 chocolate kisses, unwrapped – pro tip: unwrap while cookies bake!
- Sprinkles – because extra sparkle = extra magic
How to Make Witch Hat Cookies
Okay, let’s turn these ingredients into magical little hats! I promise it’s easier than it looks – just follow these steps and you’ll have a cauldron full of spooky treats in no time.
Mixing the Cookie Dough
First things first – preheat that oven to 375°F and line your baking sheets with parchment paper. Now, grab your trusty mixer (or strong arms and a wooden spoon) and let’s make some dough!
Cream together the butter, both sugars, and peanut butter until it’s light and fluffy – about 2 minutes should do it. This is where the magic starts! Add the egg and vanilla, mixing just until combined. Now, slowly add your dry ingredients (flour, baking soda, and salt) on low speed. Don’t overmix! We want tender cookies, not tough little hockey pucks.
Roll tablespoon-sized portions into balls, then coat them in that extra granulated sugar we set aside earlier. Place them on your baking sheet about 2 inches apart – these babies will spread! Gently flatten each ball slightly with your fingers. They should look like little UFOs ready for takeoff.
Baking and Assembling the Hats
Bake for exactly 10 minutes – you’ll know they’re done when the edges turn that perfect golden brown. Now here’s the fun part! As soon as the cookies come out of the oven, press a chocolate wafer onto each one. Use the back of a spoon to gently spread it toward the edges – this creates that perfect witch hat brim.
Let the cookies cool completely (patience is hard, I know!) while you whip up the frosting. Beat the butter until creamy, then gradually add the powdered sugar. Mix in vanilla, salt, and just enough cream to make it pipeable. Divide into bowls and tint with your gel colors – I always go for classic Halloween hues like orange, purple and green.
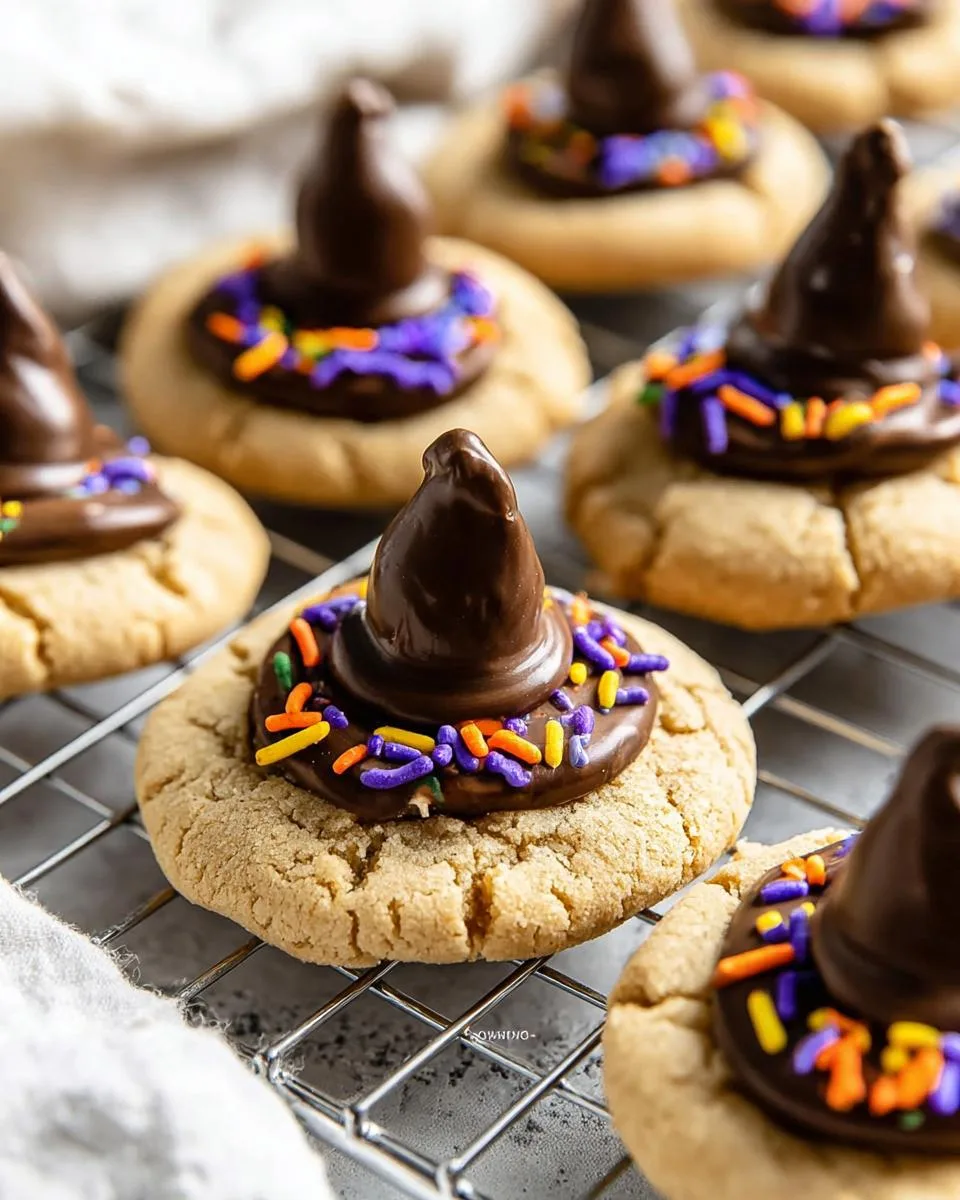
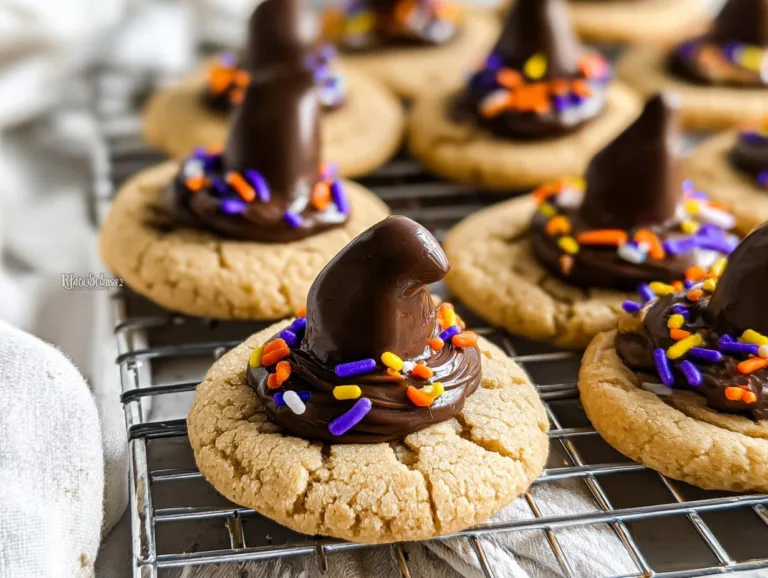
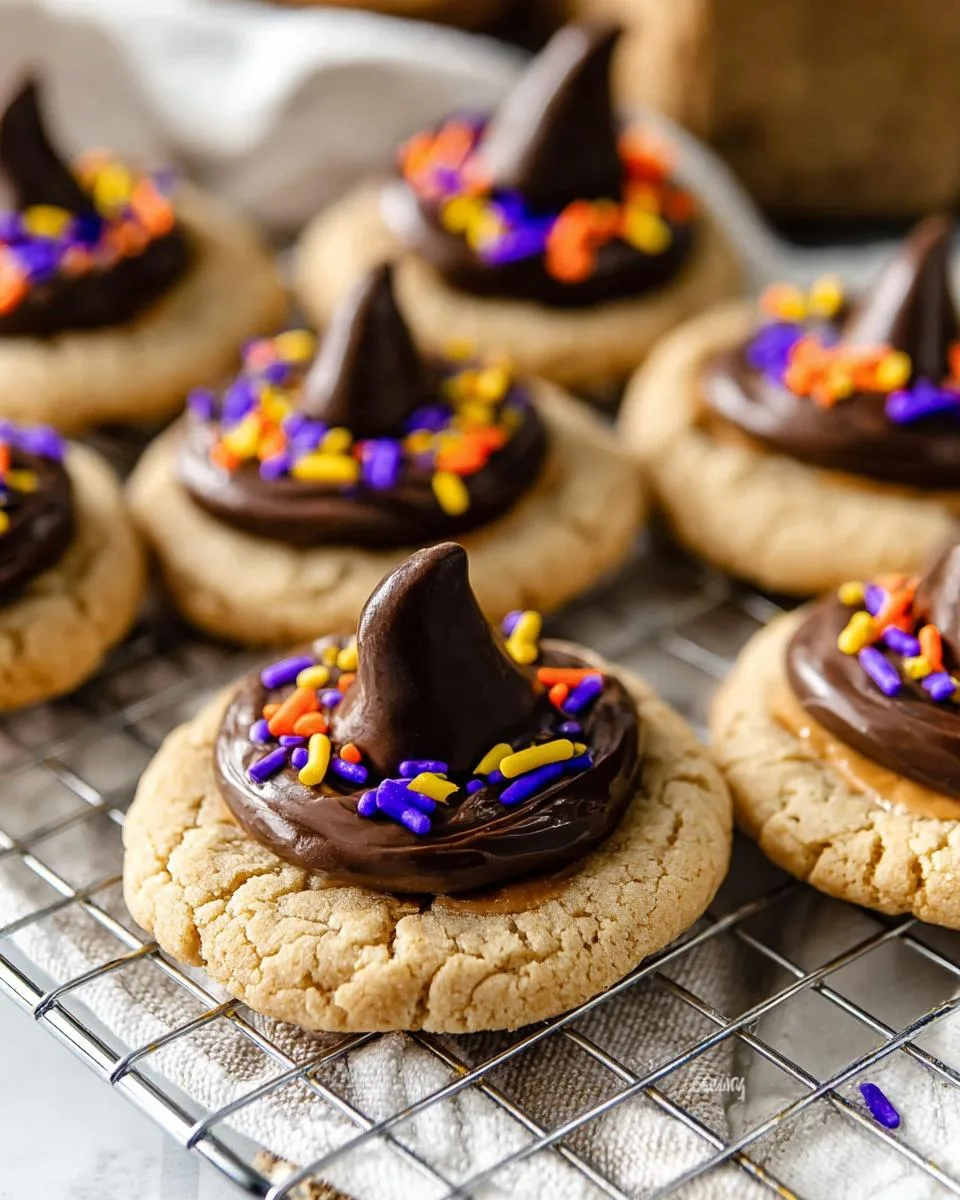
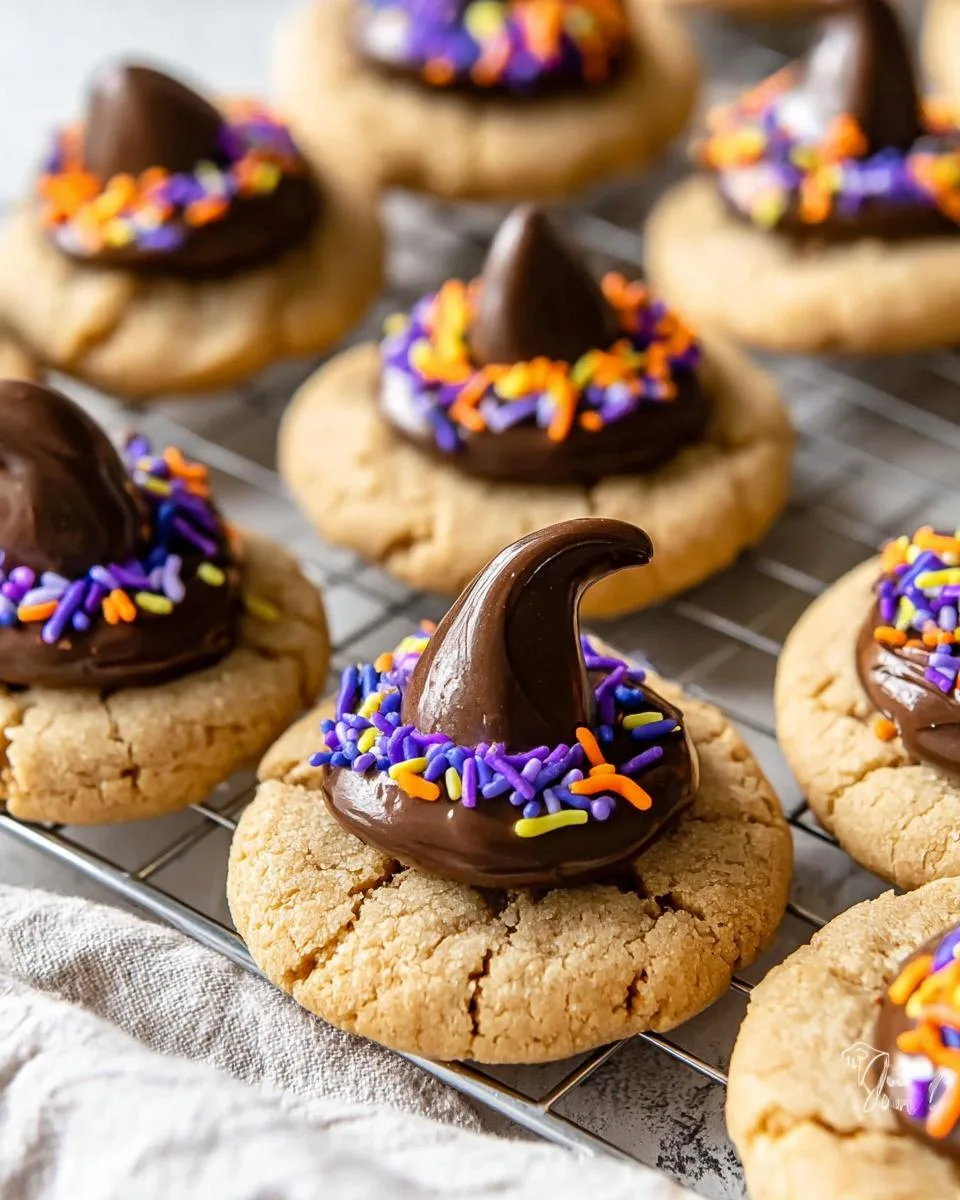
Pipe a little frosting around the edge of each wafer, then press a chocolate kiss into the center. Add sprinkles immediately before the frosting sets – this is where kids love to help! And voila – you’ve got yourself an army of adorable witch hat cookies ready to cast their delicious spell on everyone who sees them.
Magical Witch Hat Cookies Your Kids Will Adore
Witch Hat Cookies are a fun and festive treat perfect for Halloween. These peanut butter cookies are topped with chocolate wafers, frosting, and chocolate kisses to resemble witch hats.
- Total Time: 30 minutes
- Yield: 30 cookies 1x
Ingredients
- 1 ¾ cup (218 g) all-purpose flour
- 1 teaspoon baking soda
- ¼ teaspoon salt
- ½ cup (100 g) granulated sugar, plus more for rolling cookies in
- ½ cup (100 g) light brown sugar
- ½ cup (128 g) no-stir creamy peanut butter
- ½ cup (113 g or 1 stick) unsalted butter, room temperature
- 1 large egg, room temperature
- 1 teaspoon pure vanilla extract
- 30 chocolate melting wafers
- ½ cup (113 g or 1 stick) unsalted butter, room temperature
- 1 ¼ cups (150 g) confectioners’ sugar, sifted
- 1 teaspoons pure vanilla extract
- Pinch salt
- 1–2 Tablespoons heavy cream or whole milk, room temperature
- Gel food coloring, orange, purple, green
- 30 chocolate kisses, unwrapped
- Sprinkles
Instructions
- Preheat oven to 375º F. Line baking sheet with parchment paper and set aside.
- In a medium bowl, whisk together flour, baking soda, and salt. Set aside.
- In the bowl of a stand mixer, combine granulated sugar, brown sugar, butter, and peanut butter. Beat until fluffy, about 2 minutes.
- Add egg and vanilla. Beat until mixed, about 30 seconds.
- With the mixer on low, slowly add the flour mixture and beat just until combined.
- Scoop a full tablespoon of dough and roll into 1-inch balls. Roll in extra sugar and place on baking sheet. Press down slightly.
- Bake for 10 minutes, or until light golden brown.
- Remove from oven and immediately press a chocolate wafer on top. Spread slightly with the back of a spoon.
- Transfer cookies to a wire rack to cool.
- Make the frosting by beating butter until creamy. Gradually add confectioners’ sugar.
- Add vanilla, heavy cream, and salt. Mix until combined.
- Divide frosting into bowls and add food coloring. Stir until desired color is reached.
- Transfer frosting to piping bags with round tips.
- Frost the bottom of a chocolate kiss and press it onto the hardened chocolate wafer.
- Add sprinkles if desired and serve.
Notes
- Use room temperature ingredients for best results.
- Adjust frosting consistency with more cream or sugar as needed.
- Store cookies in an airtight container for up to 3 days.
- Prep Time: 20 minutes
- Cook Time: 10 minutes
- Category: Dessert
- Method: Baking
- Cuisine: American
- Diet: Vegetarian
Nutrition
- Serving Size: 1 cookie
- Calories: 120
- Sugar: 8g
- Sodium: 60mg
- Fat: 6g
- Saturated Fat: 3g
- Unsaturated Fat: 2g
- Trans Fat: 0g
- Carbohydrates: 15g
- Fiber: 1g
- Protein: 2g
- Cholesterol: 15mg
Tips for Perfect Witch Hat Cookies
After making these little hats more times than I can count (and surviving a few kitchen disasters), here are my absolute must-know tips for witchy cookie success:
- Room temp is everything! Cold butter and eggs make lumpy batter that spreads weirdly. I leave mine out for at least 30 minutes – when the butter gives slightly to a finger press, you’re golden.
- Frosting too runny? Add powdered sugar 1 tablespoon at a time. Too thick? A few drops of cream will save the day. You want it pipeable but not drippy.
- Press those wafers FAST – like, the-second-they-come-out-of-the-oven fast. The cookies firm up quickly, and you want the chocolate to melt slightly into them.
- Store in layers with parchment between in an airtight container. They’ll stay fresh for 3 days… if they last that long!
- Kids love decorating! Set up a sprinkle station with small bowls – less mess and more fun for little helpers.
Witch Hat Cookies Variations
Don’t have peanut butter or want to mix things up? No problem! These cookies are super flexible – here are my favorite twists:
- Nut-free? Swap the peanut butter for sunflower seed butter (just know it’ll turn cookies slightly green – bonus spooky points!).
- Gluten-free? Use a 1:1 GF flour blend – my neighbor swears by Bob’s Red Mill for these.
- Extra festive: Try black frosting with neon sprinkles for a witchy midnight vibe.
- Short on time? Use store-bought peanut butter cookie dough – I won’t tell!
The best part? However you make them, they’ll still disappear just as fast!
Storing and Serving Witch Hat Cookies
These little witch hats are almost too cute to eat – almost! If by some miracle you have leftovers (we never do), stack them carefully in an airtight container with parchment between layers. They’ll stay fresh and delicious for up to 3 days at room temperature – no fridge needed!
Perfect for Halloween parties, I like to arrange them on a tiered stand with some fake spiderwebs for a spooky display. The kids go wild for them, and let’s be honest – the adults “taste test” just as many! If your chocolate hardens too much, 5 seconds in the microwave brings back that perfect melty texture.
Witch Hat Cookies FAQs
Over years of Halloween baking (and plenty of kitchen experiments gone hilariously wrong), I’ve answered every witch hat cookie question imaginable. Here are the ones that pop up most:
Can I use crunchy peanut butter instead?
You bet! The texture adds fun little surprises – just know it might make rolling the dough balls trickier. If the peanut chunks cause cracking, add an extra teaspoon of butter to help bind everything.
How do I prevent chocolate wafers from cracking?
Timing is everything! Press them on immediately after baking while cookies are still soft and warm. If they still crack? No stress – cover it with sprinkles! (My favorite baking life hack.)
Can I make these ahead?
Absolutely! Bake the cookies and attach wafers up to 2 days early. Wait to add frosting and kisses until party day – nobody likes soggy hat brims.
Help! My frosting won’t stick!
If kisses keep sliding off, your frosting might be too stiff. Add a tad more cream until it’s like toothpaste consistency. Still trouble? A tiny dot of melted chocolate works as edible glue.
Why are my cookies spreading too much?
Usually means your butter was too soft or dough got too warm. Chill the shaped dough balls for 15 minutes before baking – works like a charm!
Nutritional Information
Just a quick witch’s note – these magical treats are definitely in the “sometimes food” category! Nutritional values are estimates and can vary based on ingredients and brands used. Everything in moderation… except maybe Halloween fun!
Share Your Creations!
I absolutely live for seeing your magical cookie masterpieces! Snap a pic of your witchy creations and tag me @FrostyRecipes – bonus points if your little helpers are covered in sprinkles (we’ve all been there). Nothing makes me happier than seeing your kitchen adventures with these spooky treats. Now go cast that delicious spell! You can also follow along on Facebook for more baking fun.
For More recipes Follow me on Facebook!