You know those days when you’re staring into the fridge, trying to figure out what to make that’s both quick and healthy? That’s exactly how my obsession with baked cottage cheese wraps began. As a busy mom, I needed something I could whip up fast but wouldn’t leave me hungry an hour later. This recipe became my lunchtime lifesaver – high-protein, satisfying, and endlessly customizable.
I first tried this method after seeing a similar idea online, but let me tell you, my version is simpler and tastes way better. The magic happens when you blend cottage cheese with eggs (trust me, it works!) and bake it into these soft, pliable wraps. My kids don’t even realize they’re eating something so good for them, especially when I stuff them with their favorite fillings.
Table of Contents
Table of Contents
Why You’ll Love This Baked Cottage Cheese Wrap
Here’s the thing about these wraps—they’re one of those rare recipes that actually delivers on every promise. Let me tell you why they’ve become a staple in my kitchen:
- Crazy fast to make: Five minutes of prep, pop it in the oven, and you’ve got lunch ready with almost no effort.
- Packed with protein: Each wrap gives you 20g of protein to keep you full for hours—no mid-afternoon snack attacks!
- Totally customizable: Change up the seasonings or fillings based on what you’re craving. My kids love taco-style, while I’m all about Mediterranean flavors.
- No fancy ingredients: Just cottage cheese, eggs, and whatever seasonings you’ve got in your pantry.
- Works for any diet: Low-carb, high-protein, gluten-free—these wraps check all the boxes without tasting like “diet food.”
Ingredients for the Baked Cottage Cheese Wrap
Here’s everything you’ll need to make these magical wraps – I promise it’s nothing complicated! I’ve made this recipe dozens of times, and these simple ingredients never fail me:
- 1 cup cottage cheese (2%): The star of the show! I use 2% for the perfect balance of creaminess without being too heavy.
- 2 large eggs: These bind everything together and help create that perfect wrap texture.
- 1 tsp onion powder (optional): My secret flavor booster – it adds depth without any chopping!
- 1 tsp garlic powder (optional): Because everything tastes better with garlic, right?
- 1 tsp Italian seasoning (optional): My go-to blend, but feel free to get creative here.
Ingredient Notes & Substitutions
Don’t stress if you’re missing something – I’ve tested all sorts of variations:
- Cottage cheese: Full-fat works great for extra richness, and light versions still give good results. Small or large curd – doesn’t matter since we’re blending it!
- Egg alternatives: For egg-free versions, I’ve had success with flax eggs (1 tbsp ground flax + 3 tbsp water per egg).
- Seasoning swaps: Try taco seasoning, everything bagel spice, or just simple salt and pepper. My kids love when I add a pinch of smoked paprika!
- For extra flavor: Sometimes I’ll toss in a handful of grated Parmesan or a squeeze of lemon juice if I’m feeling fancy.
The beauty of this recipe is how forgiving it is – I’ve never had a batch fail on me, no matter what substitutions I’ve tried!
Equipment You’ll Need
Let’s talk tools – but don’t worry, you probably already have everything needed to make these baked cottage cheese wraps. Here’s what I grab from my kitchen:
- Blender or food processor: My trusty old blender does the job perfectly. You just need something to get that cottage cheese nice and smooth.
- Baking sheet: A standard half-sheet pan (about 18×13 inches) works great for spreading the batter thin.
- Parchment paper: Non-negotiable! It prevents sticking and makes cleanup a breeze. (I learned this the hard way with my first attempt!)
- Spatula: For spreading the batter evenly – a silicone one works best.
- Knife or pizza cutter: To slice the baked wrap in half when it’s done.
That’s it! No special equipment needed. I love recipes like this that use everyday kitchen tools – makes life so much easier when you don’t need to dig out the fancy gadgets.
How to Make a Baked Cottage Cheese Wrap
Alright, let’s get baking! I’ve made this recipe so many times I could probably do it in my sleep, but I’ll walk you through each step carefully – it’s foolproof when you know the little tricks.
- Preheat your oven to 350°F. This is crucial – you want the oven fully heated before the batter goes in. While it’s heating, line your baking sheet with parchment paper. (Trust me, skipping the parchment leads to sad, stuck-on wraps!)
- Blend it smooth. Dump the cottage cheese, eggs, and any seasonings into your blender. Blend for a full 1-2 minutes – I set a timer because it needs longer than you’d think. You want it completely smooth like pancake batter, with no cottage cheese lumps remaining.
- Spread it thin. Pour the batter onto your prepared baking sheet and use a spatula to spread it into a large rectangle, about 1/4 inch thick. Don’t stress about perfect edges – rustic is charming! But do aim for even thickness so it bakes uniformly.
- Bake for 35-40 minutes. You’ll know it’s done when the edges are lightly golden and the center feels firm when gently pressed. It might puff up a bit – that’s normal and it’ll settle as it cools.
- Cool completely. This is the hardest part – waiting! Let it cool on the pan for at least 10 minutes before carefully transferring to a cutting board with the parchment. It firms up as it cools and becomes perfectly pliable for wrapping.
- Cut and fill! Once cool, slice it in half to make two large wraps. Load them up with your favorite fillings and enjoy immediately, or store for later.
Tips for Perfect Wraps
After making countless batches (some more successful than others!), here are my top tips to guarantee wrap success every time:
- Blend longer than you think. Those last few seconds make all the difference in getting that perfectly smooth batter. If you see any cottage cheese specks, keep blending!
- Watch the thickness. Too thick and it won’t bend well; too thin and it might tear. Aim for about 1/4 inch – roughly the thickness of a tortilla.
- Oven too hot? If your oven runs hot (like mine does), check at 30 minutes. The wrap should be set but still flexible – overbaking makes it brittle.
- Sticky situation? If your wrap sticks when cutting, run a butter knife under it to release from the parchment before lifting.
- Make ahead tip: These keep beautifully! Bake a double batch, cool completely, then layer between parchment in an airtight container for quick lunches all week.

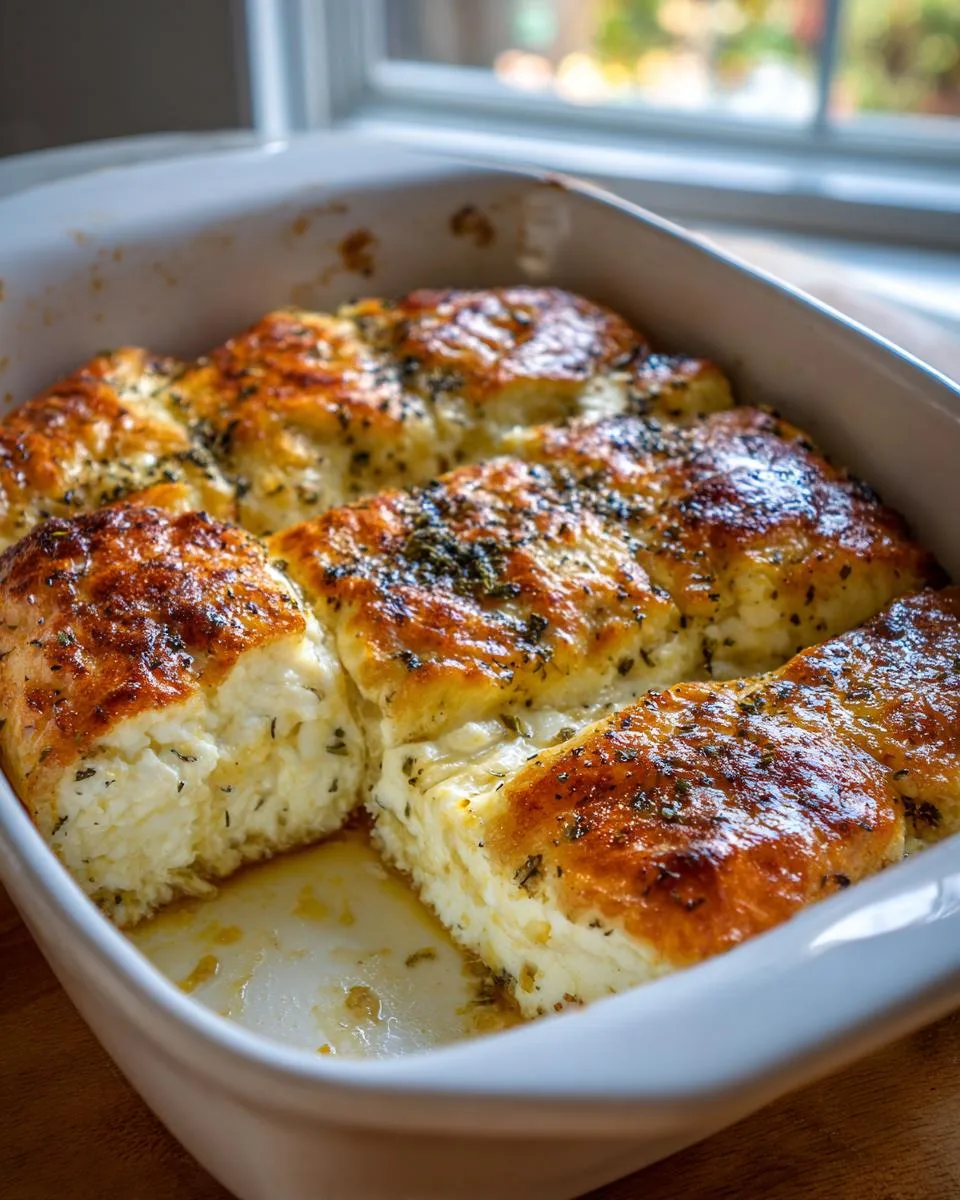
20g Protein Baked Cottage Cheese Wrap – Healthy & Fast Fix!
A simple and healthy baked cottage cheese wrap recipe that’s perfect for a quick meal.
- Total Time: 45 minutes
- Yield: 2 wraps 1x
Ingredients
- 1 cup Cottage Cheese (2%)
- 2 Eggs
- 1 teaspoon Onion Powder (optional)
- 1 teaspoon Garlic Powder (optional)
- 1 teaspoon Italian Seasoning (optional)
Instructions
- Preheat the oven to 350°F.
- In a blender, combine cottage cheese, eggs, and optional seasonings.
- Blend for 1-2 minutes until smooth.
- Pour the batter onto a parchment-lined sheet pan.
- Bake for 35-40 minutes.
- Let it cool, then cut in half to make two wraps.
- Fill with your favorite ingredients and enjoy.
Notes
- Small or large curd cottage cheese works.
- Full-fat or light cottage cheese can be used.
- Customize with any seasonings you prefer.
- Prep Time: 5 minutes
- Cook Time: 40 minutes
- Category: Main Dish
- Method: Baking
- Cuisine: American
- Diet: Low Fat
Nutrition
- Serving Size: 1 wrap
- Calories: 180
- Sugar: 3g
- Sodium: 320mg
- Fat: 6g
- Saturated Fat: 3g
- Unsaturated Fat: 2g
- Trans Fat: 0g
- Carbohydrates: 8g
- Fiber: 1g
- Protein: 20g
- Cholesterol: 120mg
Serving Suggestions for Your Baked Cottage Cheese Wrap
Now comes the fun part – loading up these wraps with all your favorite fillings! I love how versatile they are. Some days I go full veggie mode, other times I pile on the protein – it’s all about what I’m craving. Here are my family’s absolute favorite ways to enjoy them:
Classic Combos That Never Fail
- Mediterranean style: Hummus, sliced cucumbers, cherry tomatoes, feta, and a drizzle of tzatziki. (My personal lunchtime go-to!)
- Breakfast wrap: Scrambled eggs, avocado, and a sprinkle of cheddar – perfect for busy mornings.
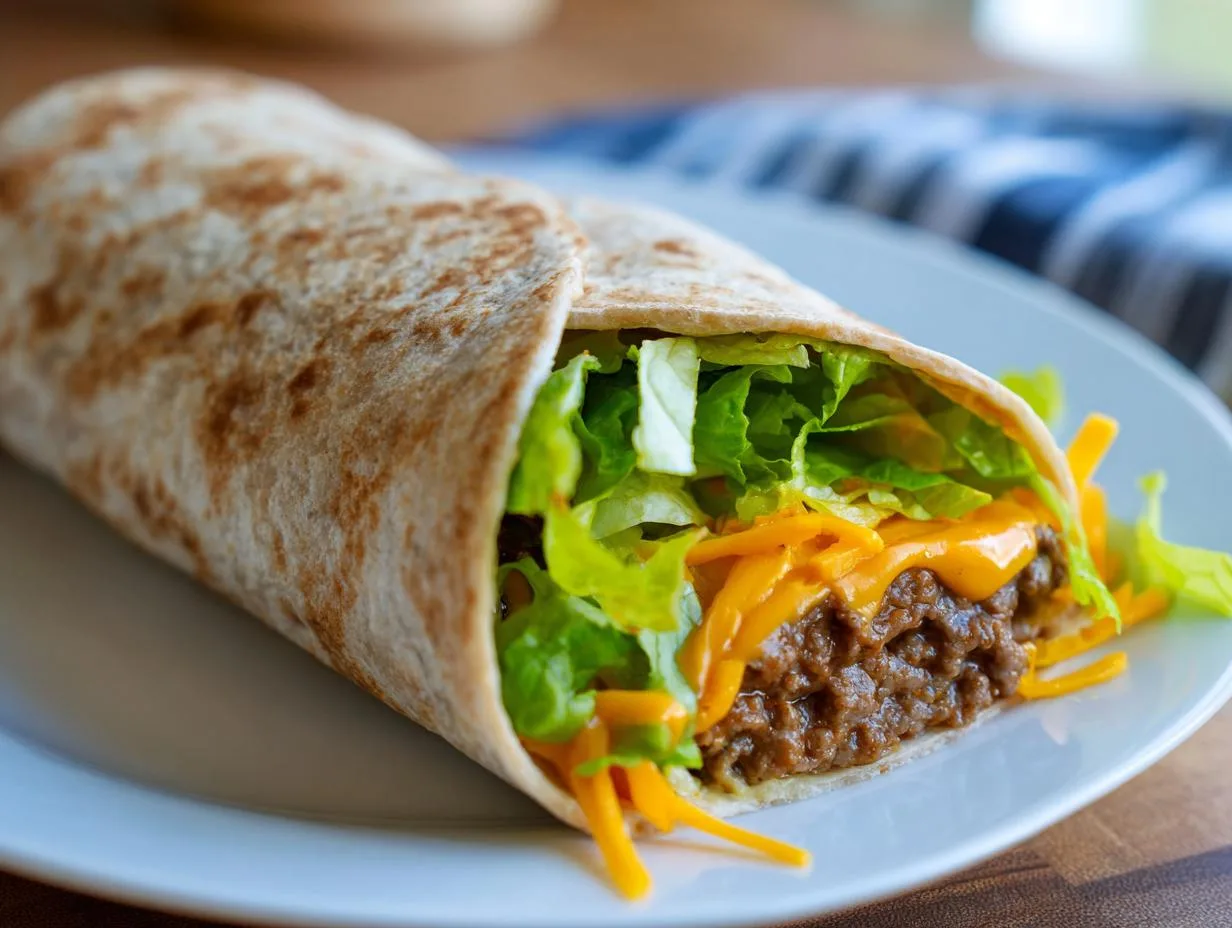
- Taco night reinvented: Seasoned ground turkey, shredded lettuce, pico de gallo, and a dollop of Greek yogurt instead of sour cream.
Veggie-Packed Options
When I’m trying to sneak more greens into my kids’ meals, these combos do the trick:
- Spinach, roasted bell peppers, and goat cheese with balsamic glaze
- Shredded carrots, thinly sliced cabbage, and peanut sauce for an Asian-inspired twist
- Mashed avocado with microgreens and everything bagel seasoning (so simple but SO good)
Meaty & Hearty Fillings
For days when you need something more substantial:
- Leftover rotisserie chicken with barbecue sauce and coleslaw
- Thinly sliced steak with sautéed mushrooms and horseradish cream
- Turkey slices with cranberry sauce and brie – holiday flavors all year round!
My best advice? Get creative with what you’ve got in the fridge. These wraps are the perfect vehicle for leftovers – I’ve even used last night’s roasted veggies with a smear of pesto for an instant delicious lunch. The sturdy texture holds up to saucy fillings better than regular tortillas, so don’t hold back!
Storage & Reheating Instructions
Here’s the good news – these baked cottage cheese wraps hold up beautifully when stored properly. I regularly make extra batches because they’re just as good (if not better) the next day! Here’s exactly how I store and reheat them:
Fridge Storage
After they’ve cooled completely, I stack the wraps between sheets of parchment paper in an airtight container. They’ll stay fresh for 2-3 days this way. The texture does firm up a bit in the fridge, but they’ll still bend without cracking when you’re ready to use them.
Pro tip from my many trials: Don’t pre-fill them! Store the wraps plain and add fillings right before eating. The moisture from fillings can make them soggy if stored together.
Freezing (Yes, It Works!)
I was skeptical at first, but turns out these wraps freeze surprisingly well! Here’s how:
- Cool completely after baking
- Wrap each one individually in parchment, then foil
- Place in a freezer bag, squeezing out excess air
- They’ll keep for up to 1 month this way
When ready to use, thaw overnight in the fridge. The texture becomes slightly more delicate after freezing, but still totally usable.
Reheating Like a Pro
My favorite method? A quick 10-15 second zap in the microwave to take the chill off before adding fillings. But if you want them warm all the way through:
- Oven method: 5 minutes at 300°F on a baking sheet – perfect for restoring that freshly-baked texture
- Skillet method: 30 seconds per side in a dry non-stick pan over medium-low heat
One word of caution – they can dry out if reheated too long. I always err on the side of under-reheating since you can always add more heat if needed!
The texture changes slightly with storage – expect it to be more pliable when freshly made, and slightly firmer after refrigeration. But honestly? Even straight from the fridge, these still beat store-bought wraps in both taste and nutrition! If you want to see more of my quick fixes, check out my Facebook page for daily inspiration.
Baked Cottage Cheese Wrap FAQs
After making this recipe dozens of times (and sharing it with all my friends!), I’ve gotten the same few questions over and over. Here are the answers to everything you might be wondering:
Can I freeze baked cottage cheese wraps?
Absolutely! I freeze them all the time for quick future meals. Just make sure they’re completely cooled first. I wrap each one individually in parchment paper, then foil, and pop them in a freezer bag. They’ll keep beautifully for up to a month. Thaw overnight in the fridge before using – they might be slightly more delicate but still totally workable.
Is this recipe keto-friendly?
Yes! Each wrap has just 8g of carbs, making it perfect for low-carb or keto diets. The high protein content (20g per wrap!) helps keep you full too. I like to fill mine with keto-friendly ingredients like avocado, bacon, and cheese for an extra satisfying meal.
Why does my batter look lumpy after blending?
This usually means you didn’t blend it long enough – trust me, I made this mistake my first time too! Cottage cheese needs a full 1-2 minutes in a good blender to get completely smooth. If you still see lumps, just keep blending. No worries if there are tiny specks though – they’ll disappear during baking.
Can I make these wraps egg-free?
You sure can! I’ve successfully used flax eggs as a substitute (1 tbsp ground flax + 3 tbsp water per egg). The texture comes out slightly more delicate, but still totally usable as a wrap. Just be extra careful when transferring it from the pan.
Why did my wrap crack when I tried to fold it?
This usually means one of three things: 1) It was underbaked (needs the full 35-40 minutes), 2) It was too thick (aim for 1/4 inch), or 3) You tried to wrap it while still warm (let it cool completely first!). Don’t worry – even cracked wraps still taste amazing when loaded with toppings! If you are looking for other high-protein, low-carb ideas, check out my recipe for Cottage Cheese Everything Bread Loaf.
Got more questions? Drop them in the comments below and I’ll answer them faster than you can say “pass the cottage cheese!”
Nutritional Information
Let’s talk numbers! One of my favorite things about these baked cottage cheese wraps is how they pack such a nutritional punch while tasting indulgent. Here’s the breakdown per wrap (and yes, I’ve done the math so you don’t have to!):
- Calories: 180 – Perfect for a satisfying yet light meal
- Protein: 20g – That’s nearly as much as 3 eggs to keep you full for hours
- Carbs: 8g – Great for low-carb lifestyles
- Fiber: 1g – More if you load up with veggie fillings!
- Fat: 6g (3g saturated) – Just enough for that satisfying richness
A quick note – these numbers are estimates based on using 2% cottage cheese and large eggs. Your exact nutrition may vary slightly depending on:
- The brand of cottage cheese you use
- Egg size (I always use large)
- Any additional seasonings or mix-ins
What really excites me is how these macros stack up against regular tortillas – way more protein, fewer carbs, and none of the processed ingredients. My nutritionist friend calls these “a complete meal in wrap form,” especially when you load them with veggies! For another great high-protein breakfast option, take a look at my Cottage Cheese Breakfast Muffins.
Share Your Baked Cottage Cheese Wrap Creations
Nothing makes me happier than seeing how you put your own spin on these wraps! Seriously, I do a little happy dance every time someone tags me in their creations. Whether you stuck to the classic recipe or went wild with your own fillings, I want to hear all about it.
Drop a comment below to tell me:
- What fillings rocked your world
- Any clever twists you added to the batter
- How your family reacted (my kids still don’t believe it’s cottage cheese!)
Snap a photo of your masterpiece and tag me on Instagram – I’ll feature my favorites in stories! And if you loved this recipe as much as we do, please consider leaving a star rating. It helps other busy cooks find this recipe when they need a quick, healthy meal solution.
Happy wrapping, friends! Can’t wait to see what delicious combinations you come up with. If you’re looking for more savory ideas using cottage cheese, you might enjoy my Cottage Cheese Mozzarella Egg Cups.