Every Halloween, my kitchen turns into a mad scientist’s lab—but instead of bubbling potions, we’re whipping up batches of Candy Corn Rice Krispies with my kids. There’s something magical about watching their eyes light up when we layer that bright yellow, orange, and white marshmallow goodness. Honestly, it’s become our favorite October tradition—messy hands, sticky countertops, and all. These treats aren’t just delicious; they’re pure edible joy shaped like candy corn (without the waxy aftertaste!). The best part? You probably have most ingredients in your pantry right now. Let’s make some Halloween magic together!
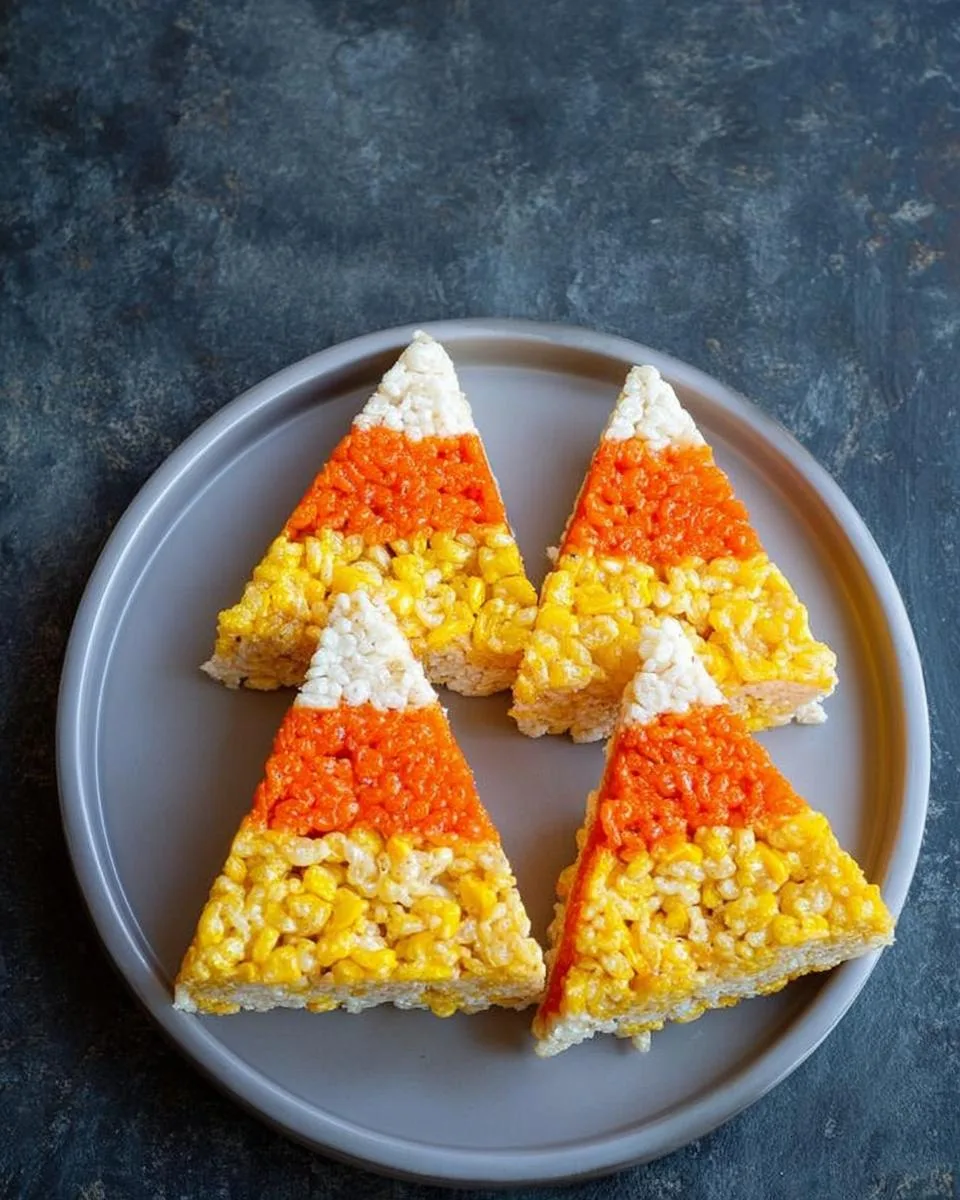
Table of Contents
Table of Contents
Why You’ll Love These Candy Corn Rice Krispies
Trust me, these treats aren’t just cute—they’re downright irresistible. Here’s why they’ve become our go-to Halloween staple:
- No-bake magic: No oven? No problem! Just a microwave and some sticky fingers get the job done.
- Kid-approved fun: My littles go wild for the bright colors (and sneaking marshmallows when I’m not looking).
- Festive flair: That candy corn look? Pure Halloween eye candy on a plate.
- Pantry-friendly: Marshmallows, cereal, food gel—chances are, you’ve got everything already!
Seriously, what’s not to love? They’re the perfect mix of easy, playful, and downright delicious.
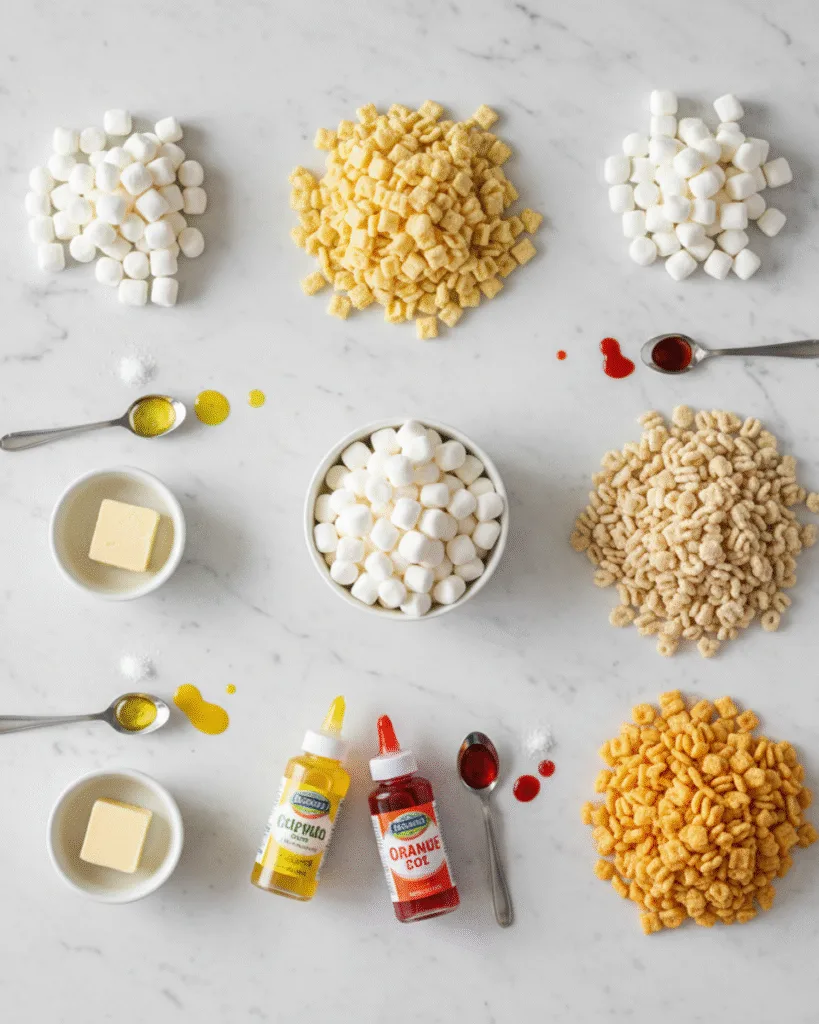
Candy Corn Rice Krispies Ingredients
Okay, let’s talk ingredients—and I promise, nothing weird here! Everything’s probably sitting in your kitchen right now. We’ll build our candy corn masterpiece layer by layer, so I’ve grouped everything accordingly. Pro tip: Use gel food coloring (not liquid!) for those vibrant candy corn colors that won’t water down your marshmallows.
For the yellow layer:
- 2 1/2 cups mini marshmallows (trust me, minis melt faster and smoother)
- 2 tablespoons butter (salted or unsalted both work—I use what’s in my fridge)
- Big pinch of salt (balances all that sweetness perfectly)
- 5 drops yellow food gel (I use Americolor “Electric Yellow” for that classic candy corn hue)
- 2 1/4 cups crisp rice cereal (generic works just as well as the name brand!)
For the orange layer:
- 1 3/4 cups mini marshmallows (see? Already less than the yellow layer)
- 2 tablespoons butter (yes, same amount—it’s the perfect ratio)
- Big pinch of salt (don’t skip this—it makes flavors pop)
- 5 drops yellow food gel plus 1-2 drops red food gel (mix to get that perfect candy corn orange)
- 1 1/4 cups + 2 tablespoons crisp rice cereal (weird measurement, I know, but it makes the layers stack just right)
For the white layer:
- 3/4 cup mini marshmallows (smallest layer for the top)
- 1 tablespoon butter (just enough to keep it smooth)
- Big pinch of salt (yes, again—it’s the secret weapon)
- 3/4 cup crisp rice cereal (no food coloring here—we want pure white!)
Equipment You’ll Need
You won’t need anything fancy here—just a few basics you probably already have. Grab a large microwave-safe bowl (trust me, it’ll get sticky!), an 8 or 9-inch cake pan, and some cooking spray or extra butter to grease it. Oh, and don’t forget a spoon for stirring—your hands will thank you later!
How to Make Candy Corn Rice Krispies
Alright, let’s get our hands sticky—this is where the magic happens! Follow these steps closely, and you’ll have picture-perfect candy corn treats in no time. Just remember: working quickly is key since marshmallow cools fast, and buttered hands are your best friends here!
Preparing the Yellow Layer
1. Start by greasing your cake pan—really get in there with that cooking spray or butter. You don’t want your masterpiece sticking!
2. In your large microwave-safe bowl, toss in the yellow layer’s marshmallows, butter, and that pinch of salt. Microwave on HIGH for 30 seconds—it’ll look puffy and amazing. Stir until smooth. If there are stubborn lumps, zap it for another 10-15 seconds, but don’t overdo it or the marshmallow turns rubbery.
3. Quickly whisk in the yellow food gel (5 drops for that sunny pop!). Fold in the rice cereal until every last piece is coated. Now here’s the fun part: butter your hands and press the mixture around the outer edge of the pan to form a thick, even ring. This is your candy corn’s base—pack it tight!
Assembling the Orange Layer
4. Same bowl (no need to wash—we’re saving time and flavor!), combine the orange layer’s marshmallows, butter, and salt. Microwave for 30 seconds, stir, then add your yellow and red food gel. Mix until you get that iconic candy corn orange—about 5 yellow drops and 1-2 red.
5. Stir in the cereal, then press this layer inside the yellow ring, leaving a small well in the center. Pro tip: Use the back of a spoon to smooth it—it helps keep the layers distinct when sliced.
Finishing with the White Layer
6. Here’s where you do need a clean bowl—any leftover orange will tint your white layer. Microwave the white layer ingredients (30 seconds, stir, done!), mix in the cereal, and press it firmly into the center. It should look like a tiny marshmallow snowcap!
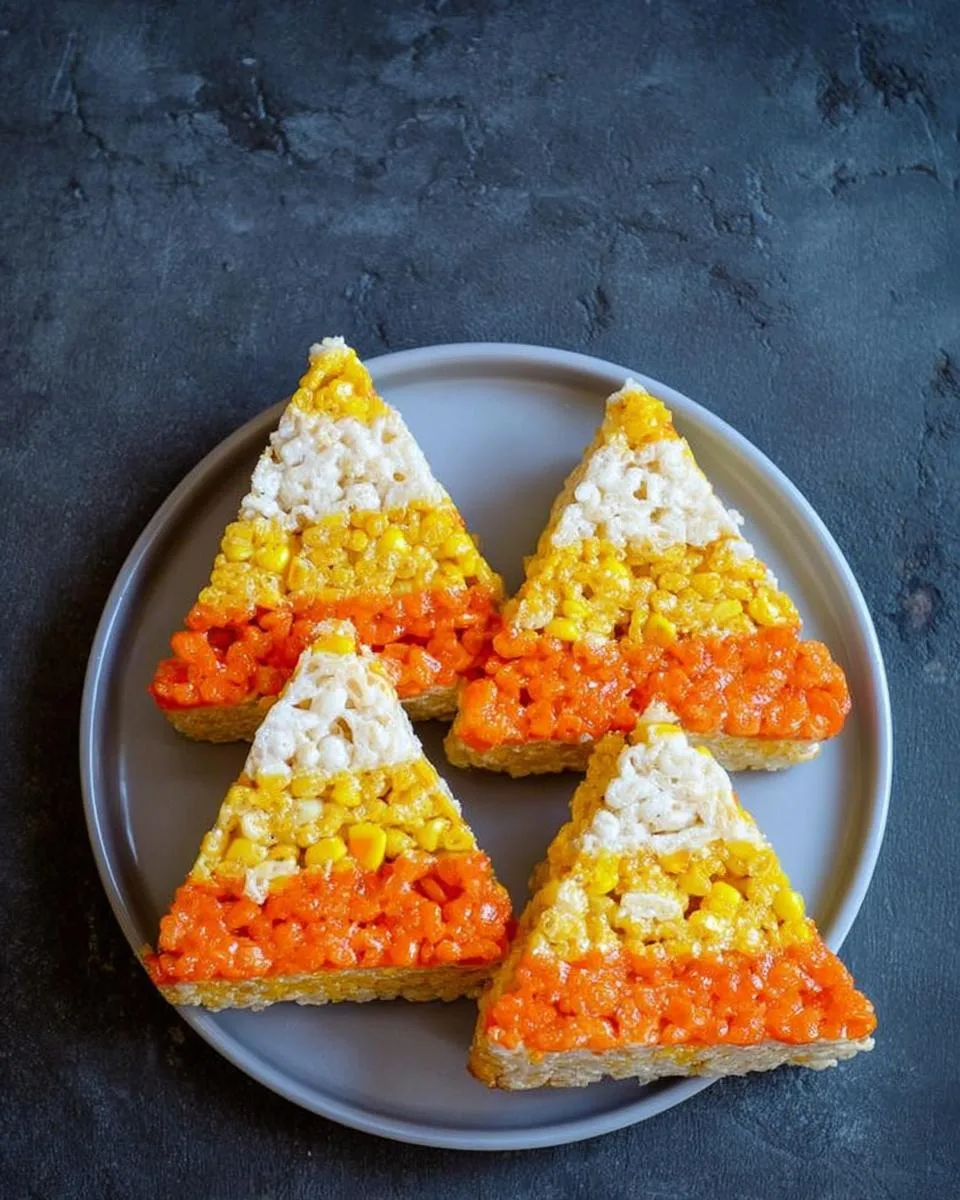
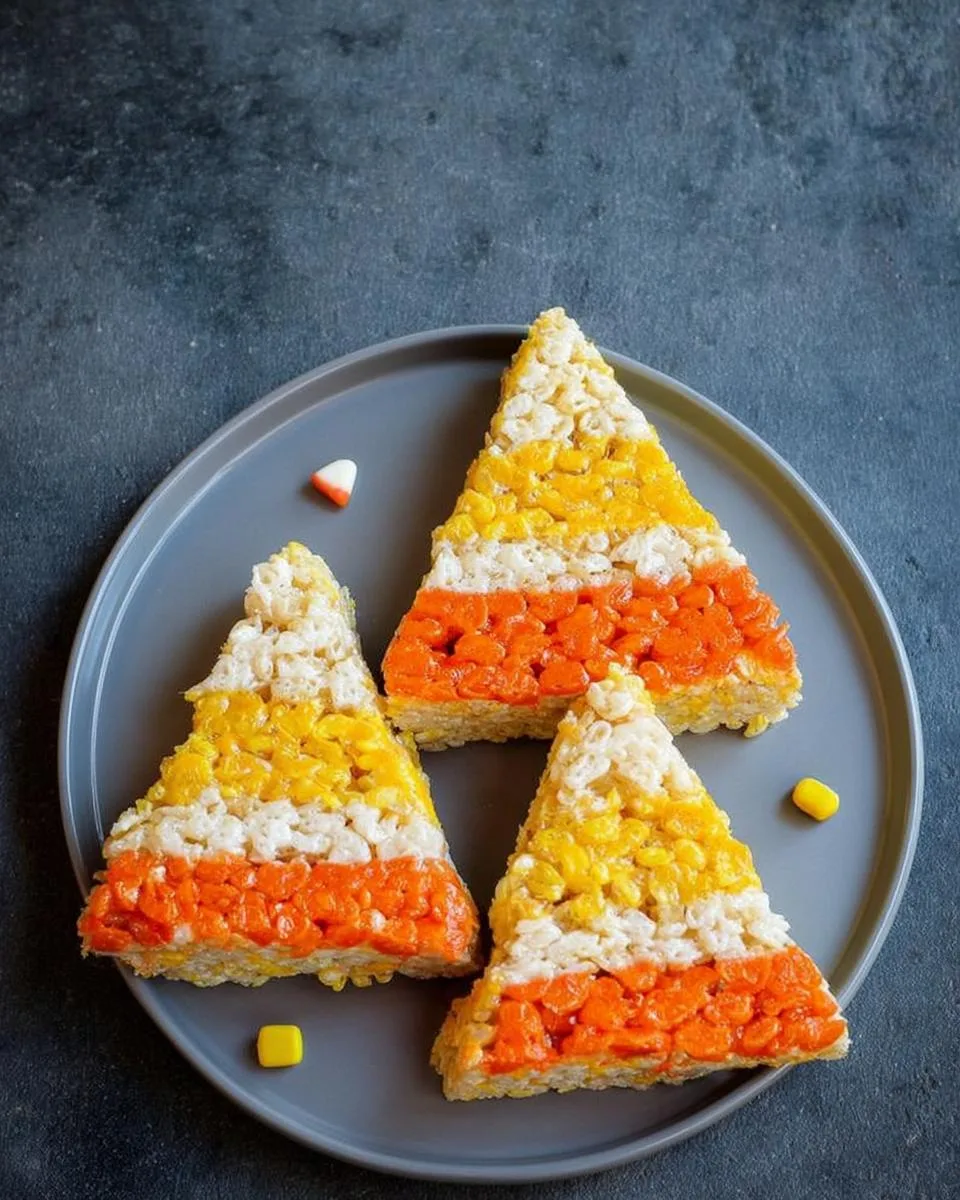
7. Let the whole pan cool at room temperature for at least 2 hours—I know, the wait is torture! Once set, slice into triangles with a buttered knife. Voilà—candy corn magic!
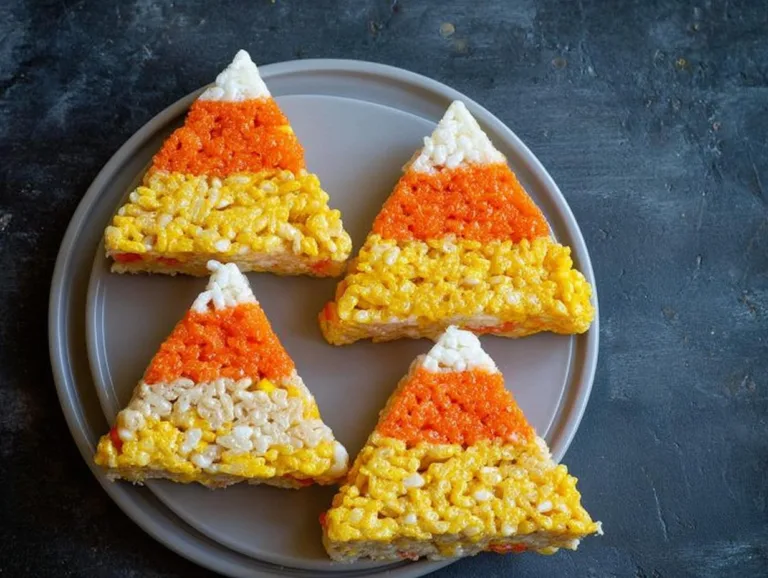
Candy Corn Rice Krispies: 3-Layer Halloween Magic Kids Love
A fun and colorful twist on classic Rice Krispies treats, Candy Corn Rice Krispies feature three layers of marshmallow-cereal goodness in yellow, orange, and white to mimic the look of candy corn.
- Total Time: 2 hours 20 minutes
- Yield: 12 servings 1x
Ingredients
- For the yellow layer:
- 2 1/2 cups mini marshmallows
- 2 tablespoons butter
- big pinch of salt
- 5 drops yellow food gel
- 2 1/4 cups crisp rice cereal
- For the orange layer:
- 1 3/4 cups mini marshmallows
- 2 tablespoons butter
- big pinch of salt
- 5 drops yellow food gel
- 1–2 drops red food gel
- 1 1/4 cups + 2 tablespoons crisp rice cereal
- For the white layer:
- 3/4 cup mini marshmallows
- 1 tablespoon butter
- big pinch of salt
- 3/4 cup crisp rice cereal
Instructions
- Spray an 8 or 9″ cake pan with cooking spray or grease with extra butter.
- In a large microwave-safe bowl, make the yellow layer: combine marshmallows, butter, and salt. Microwave on HIGH for 30 seconds, stirring until melted. If needed, microwave another 15 seconds.
- Whisk in yellow food gel, then stir in rice cereal until well-blended.
- Press the yellow layer around the edges of the pan to form a ring. Butter your hands if needed for easier handling.
- Repeat the process for the orange layer in the same bowl.
- Using a clean bowl, make the white layer in the microwave, then press it into the center of the pan.
- Let cool for at least 2 hours before slicing into triangles.
Notes
- Use gel food coloring for vibrant colors.
- Pack each layer firmly for clean slices.
- Store in an airtight container for up to 3 days.
- Prep Time: 15 minutes
- Cook Time: 5 minutes
- Category: Dessert
- Method: No-Bake
- Cuisine: American
- Diet: Vegetarian
Nutrition
- Serving Size: 1 triangle
- Calories: 120
- Sugar: 10g
- Sodium: 85mg
- Fat: 3g
- Saturated Fat: 2g
- Unsaturated Fat: 1g
- Trans Fat: 0g
- Carbohydrates: 22g
- Fiber: 0g
- Protein: 1g
- Cholesterol: 5mg
Tips for Perfect Candy Corn Rice Krispies
After making these more times than I can count (and learning from a few sticky disasters), here are my foolproof tips for candy corn perfection:
- Pack it tight: Really press each layer firmly—loose packing means crumbly slices. I use the bottom of a measuring cup for extra pressure.
- Gel colors rule: Liquid food coloring makes marshmallows soggy. Gel gives vibrant hues without the mess (I keep Americolor brand in my baking drawer year-round).
- Butter those hands: Seriously—grease your palms well before pressing layers. Marshmallow won’t stick to buttered fingers!
- Room temp storage: These keep best in an airtight container at room temp. Fridge = hard treats, counter = perfect chew for 3 days.
Follow these, and you’ll get clean, colorful slices every time!
Candy Corn Rice Krispies Variations
Feeling creative? Swap gel coloring for natural dyes—turmeric for yellow, carrot juice for orange. Or, sprinkle the top with edible glitter or Halloween sprinkles for extra sparkle. Want a twist? Add a dash of vanilla or almond extract to the white layer—it’s subtle but so good!
Storing Your Candy Corn Rice Krispies
Here’s the scoop—these treats stay freshest tucked into an airtight container at room temperature. No fridge needed (that just turns them into edible rocks!). They’ll stay deliciously chewy for up to 3 days—if they last that long around sneaky little fingers! Just layer them between parchment paper to prevent sticking.
Candy Corn Rice Krispies Nutritional Information
Nutrition varies based on brands, but here’s the scoop per serving (about 1 triangle): roughly 120 calories, 10g sugar, and 3g fat. Not too shabby for a festive treat! Remember—these numbers might wiggle a bit depending on your butter brand or marshmallow size, but they’re always pure joy in every bite.
Candy Corn Rice Krispies FAQs
Got questions? I’ve got answers! Here are the ones I get asked most about these colorful treats:
Can I use liquid food coloring instead of gel?
Oh honey, I don’t recommend it—liquid makes the marshmallows sticky and dilutes their binding power. Gel coloring packs vibrant pigment without the moisture. If you must use liquid, reduce it to 2-3 drops per layer and add an extra tablespoon of cereal to absorb the wetness.
Help—my layers won’t stick together!
No panic! This usually means we didn’t press firmly enough. Next time, really muscle those layers into the pan (buttered hands help!). For this batch? Just smoosh the slices back together—they’ll still taste amazing, I promise!
Can I double this recipe for a crowd?
Absolutely! Double everything and use a 9×13″ pan. Just work fast—marshmallow hardens quickly. Maybe recruit a helper to press layers while you stir the next batch. Halloween teamwork!
Why are my colors bleeding?
Ah—you probably didn’t let each layer cool enough before adding the next. Give each color 5 minutes to set slightly before stacking. And always use a clean bowl for the white layer!
Share Your Creations!
I’d love to see your candy corn masterpieces! Snap a pic and tag me @FrostyRecipes—nothing makes me happier than seeing your colorful kitchen adventures. Happy Halloween baking!
Follow us on Facebook for more fun recipes!