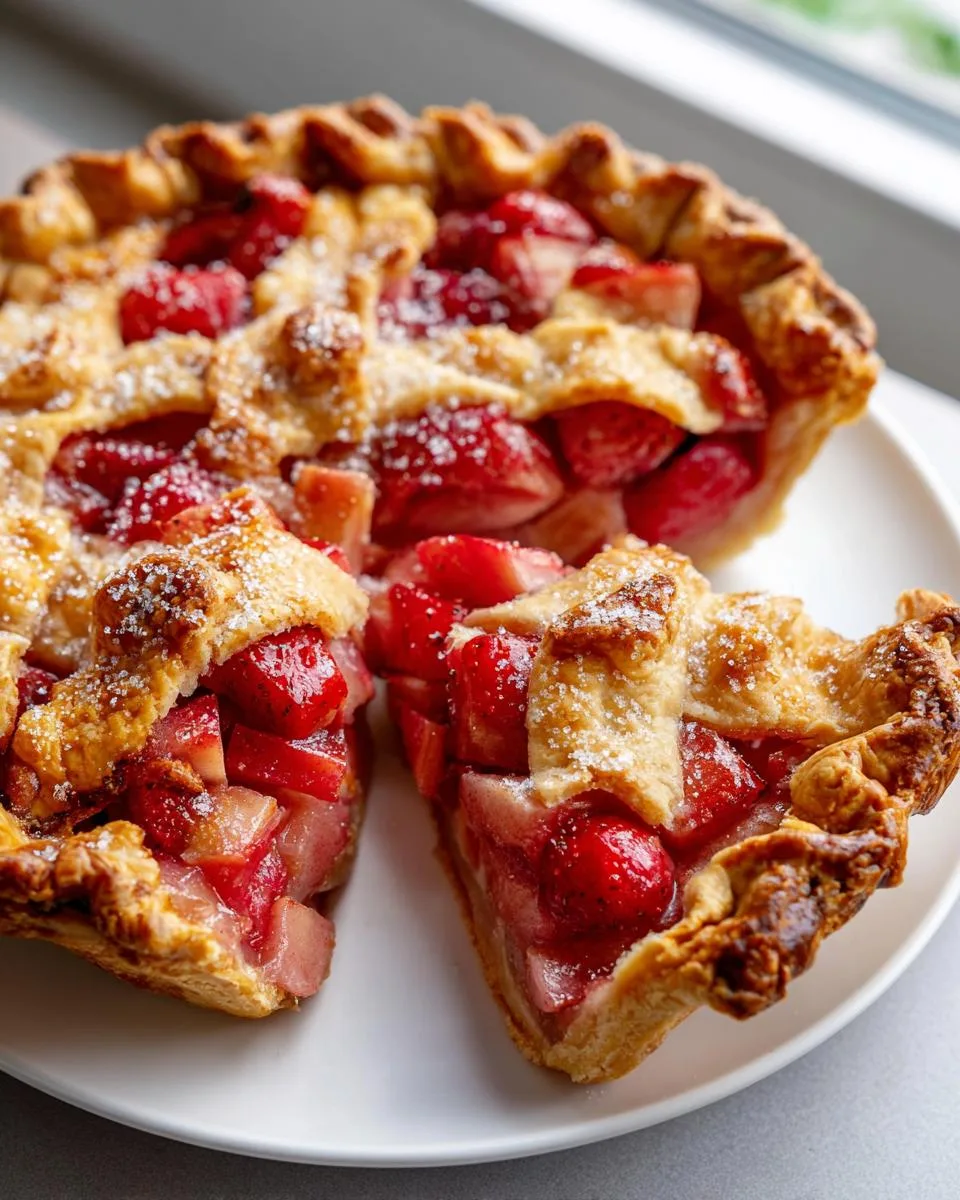
I still remember the first time I tasted rhubarb pie at my grandma’s farmhouse – that perfect balance of sweet and tart made my taste buds dance! Now, after twenty years of pie-making (and plenty of trial and error), I can confidently say this Classic Fresh Rhubarb Pie Recipe is my absolute favorite way to celebrate spring. There’s something magical about how the tangy rhubarb softens into juicy perfection beneath that flaky, buttery crust.
Every May when the rhubarb sprouts up in my garden, my kids know exactly what’s coming – mom’s infamous pie that fills the whole house with its sweet-bright aroma. Unlike store-bought versions that drown the rhubarb in sugar, my recipe lets that natural tartness shine through just enough, balanced beautifully with the right amount of sweetness. The secret? Using freshly picked rhubarb (none of that frozen stuff!) and taking the time to create proper layers in the pie – you’ll taste the difference in every forkful.
Table of Contents
Table of Contents
Why You’ll Love This Classic Fresh Rhubarb Pie Recipe
Oh honey, let me count the ways this pie will steal your heart! After testing more rhubarb pie recipes than I can remember (some good, some… let’s just say learning experiences), this version hits every note perfectly. Here’s why it’s become my go-to:
- That magical sweet-tart balance – not too puckery, not too sugary. Just right.
- Flaky crust that shatters beautifully with every forkful – no soggy bottoms here!
- Simple steps even beginner bakers can master – my teenage nephew nailed it on his first try.
- Pure nostalgia in every bite – tastes just like Grandma used to make, but with my little tricks.
- Flexible recipe – adjust the sugar to your rhubarb’s tartness (I’ll show you how).
Honestly? The hardest part is waiting for it to cool before slicing in. But trust me – that first warm bite with a scoop of vanilla ice cream? Pure heaven.
Ingredients for Classic Fresh Rhubarb Pie Recipe
Let me tell you – great pies start with great ingredients! This simple list creates magic when combined just right. Here’s what you’ll need (and yes, I measure everything carefully – baking’s a science, after all!):
- 1 ⅓ cups white sugar (yes, that extra ⅓ cup makes all the difference!)
- 6 tablespoons all-purpose flour (the thickener that keeps your filling from running)
- 1 (14.1 ounce) package double-crust pie pastry, thawed (or homemade if you’re feeling fancy)
- 4 cups freshly chopped rhubarb (about 6-8 stalks, leaves removed – those are poisonous!)
- 1 tablespoon butter (cut into tiny cubes – these little pockets of richness take it over the top)
Ingredient Notes & Substitutions
Now, here’s where my years of pie disasters taught me some valuable lessons:
Fresh rhubarb is non-negotiable – frozen works in a pinch but releases too much water and makes soggy crusts. Look for firm, bright red stalks (though green ones work too – they’re just tarter).
Sugar alert! If your rhubarb makes you pucker, bump up to 1 ½ cups sugar. Taste a raw piece – if it’s milder, you can drop to 1 ¼ cups. Trust your tongue!
Butter alternatives? Margarine works, but the flavor won’t be as rich. Coconut oil adds a fun twist, but reduce slightly to 2 teaspoons since it’s oilier.
One last tip – measure rhubarb after chopping (pack it lightly into the cup). Those stalks can be deceiving!
Equipment Needed
Listen, I’m all for kitchen gadgets, but this classic pie keeps it simple – just like Grandma used to make! Here’s what you’ll need:
- 9-inch pie plate (glass or ceramic works best for even baking)
- Mixing bowl (medium-sized – no need to haul out your giant salad bowl)
- Measuring cups and spoons (that extra ⅓ cup sugar matters!)
- Oven (with a working thermometer – mine lies about temperatures constantly)
That’s it! No fancy tools required. Though I will say – a pastry brush for water along the crust edges comes in handy if you want extra golden results. But honestly? Your hands work just fine too!
How to Make Classic Fresh Rhubarb Pie Recipe
Okay friends, let’s roll up our sleeves and make some pie magic happen! I’ve made this recipe more times than I can count, and I’ve learned all the little tricks to ensure perfection every time. Follow these steps just like I do, and you’ll have a pie that’ll make your grandma proud!
Step 1: Prep Crust & Sugar Mixture
First things first – preheat that oven to 450°F (230°C) and move your rack to the lowest position. This helps crisp up that bottom crust beautifully! While the oven heats, let’s get our crust ready.
Carefully unroll one pie crust and gently press it into your 9-inch pie plate. Don’t stretch it – just let it settle naturally into the corners. Now, in your mixing bowl, combine the sugar and flour. I like to whisk them together – it helps distribute the flour evenly and prevents clumps.
Here’s my secret move: sprinkle about ¼ of this sugar mixture over the bottom crust before adding the rhubarb. This creates a protective layer that helps prevent sogginess – learned that trick after one too many weepy pie bottoms!
Step 2: Assemble the Pie
Now for the fun part! Heap all that gorgeous chopped rhubarb into your crust – pile it high because it’ll shrink as it bakes. Don’t be shy! Then shower the remaining sugar mixture evenly over the top. I use my fingers to sprinkle it around like fairy dust – this ensures every bite gets the perfect sweet-tart balance.
Next comes the butter – dot those tiny cubes all over the surface. They’ll melt into little pockets of richness that make the filling extra luxurious. Finally, place your top crust over everything. Here’s where I get artistic – sometimes I do a classic lattice, sometimes simple vents. Whatever you choose, press the edges together firmly to seal in all that goodness!
Step 3: Bake to Perfection
Pop that beauty into your screaming-hot oven for exactly 15 minutes. This initial blast of heat sets the crust so it stays flaky. Then – here’s the crucial part – reduce the temperature to 350°F (175°C) and keep baking for about 40-45 minutes.
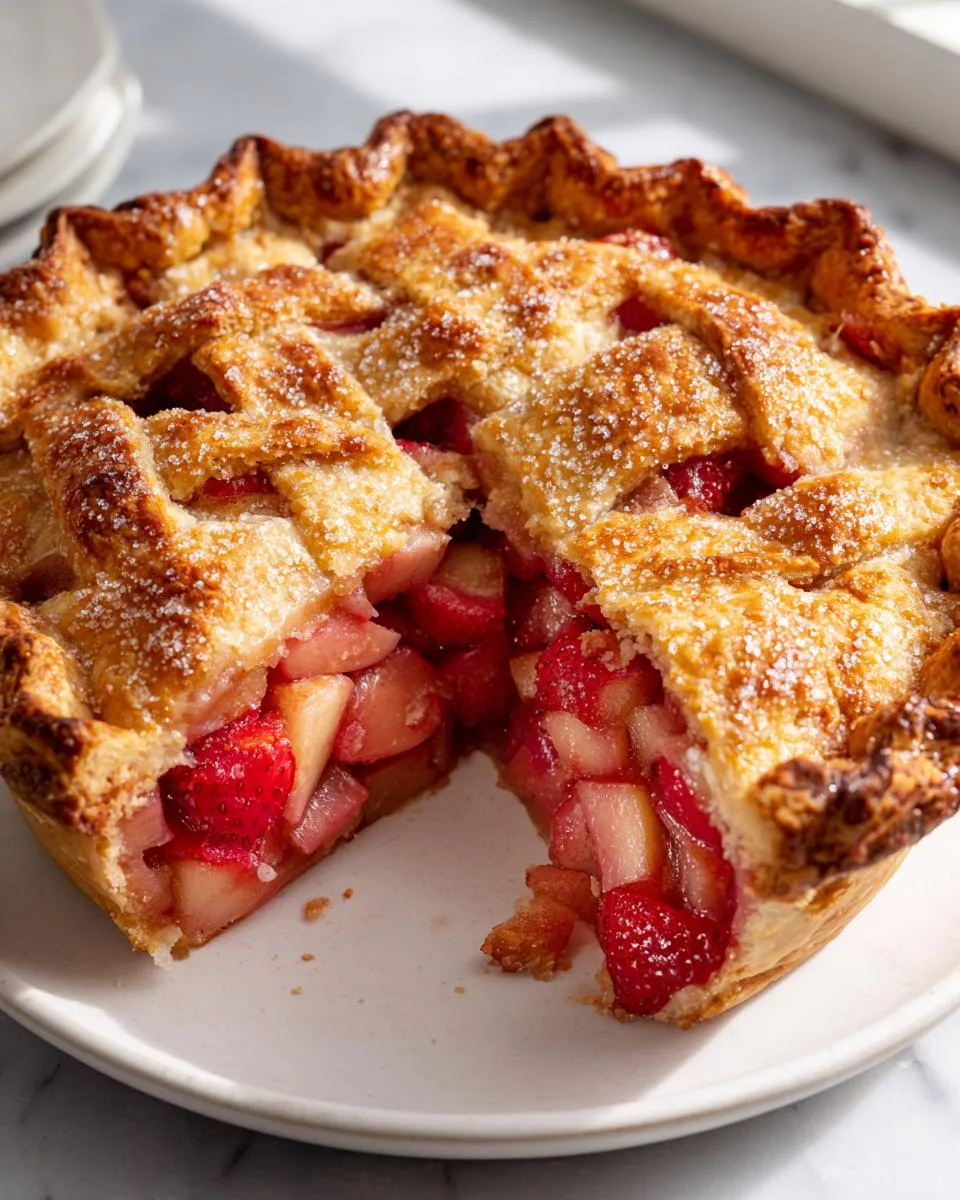
You’ll know it’s ready when the crust turns golden-brown and you see ruby-red juices bubbling through the vents like little volcanoes. Oh, and your kitchen will smell absolutely divine! Resist the temptation to slice right away – let it cool for at least an hour so the filling can set properly. I know, I know… the waiting is torture!
Tips for the Best Classic Fresh Rhubarb Pie Recipe
After burning my fair share of pies (who knew sugar could caramelize THAT fast?), I’ve picked up some golden rules that’ll guarantee pie perfection every time:
- Keep butter cold until the last second – those little frozen cubes melt slower, creating flakier layers
- Don’t overfill! Leave ½-inch space at the rim – rhubarb shrinks but juices bubble up
- Let it cool completely before slicing (I know, torture!) – this sets the filling so it doesn’t run everywhere
- Brush crust edges with egg wash for that picture-perfect golden shine
- Slice rhubarb evenly – ½-inch pieces cook uniformly (no mushy bits next to crunchy ones!)
Trust me – follow these simple tricks and your pie will look (and taste) like it came straight from a bakery window!
Print
Irresistible Classic Fresh Rhubarb Pie Recipe in 5 Easy Steps
A classic fresh rhubarb pie recipe with a flaky crust and sweet-tart filling.
- Total Time: 1 hour 15 minutes
- Yield: 1 (9-inch) pie 1x
Ingredients
- 1 ⅓ cups white sugar
- 6 tablespoons all-purpose flour
- 1 (14.1 ounce) package double-crust pie pastry, thawed
- 4 cups freshly chopped rhubarb
- 1 tablespoon butter
Instructions
- Gather all ingredients, and preheat the oven to 450 degrees F (230 degrees C). Place an oven rack in the lowest position.
- Line the bottom and sides of a 9-inch pie plate with one pie crust. Combine sugar and flour in a small bowl; sprinkle 1/4 of the sugar mixture over the prepared bottom crust.
- Heap chopped rhubarb on top and sprinkle with remaining sugar mixture. Dot with butter and cover with top crust.
- Bake pie in the preheated oven for 15 minutes. Reduce temperature to 350 degrees F (175 degrees C) and continue baking until filling is bubbly and crust is golden brown, about 40 to 45 minutes.
- Serve the pie warm or cold. Enjoy!
Notes
- Use fresh rhubarb for best results.
- Adjust sugar to taste if rhubarb is very tart.
- Let pie cool slightly before slicing.
- Prep Time: 20 minutes
- Cook Time: 55 minutes
- Category: Dessert
- Method: Baking
- Cuisine: American
- Diet: Vegetarian
Nutrition
- Serving Size: 1 slice
- Calories: 320
- Sugar: 25g
- Sodium: 180mg
- Fat: 12g
- Saturated Fat: 4g
- Unsaturated Fat: 6g
- Trans Fat: 0g
- Carbohydrates: 50g
- Fiber: 2g
- Protein: 3g
- Cholesterol: 5mg
Serving Suggestions
Oh, the joy of serving this Classic Fresh Rhubarb Pie! While it’s heavenly all on its own, here’s how I like to gild the lily:
- À la mode – A scoop of vanilla ice cream melting over warm pie creates the perfect temperature contrast
- Cloud nine – Freshly whipped cream with a whisper of vanilla makes each bite extra luxurious
- Breakfast? Maybe… – My secret? Leftover pie slightly warmed with a dollop of Greek yogurt – don’t judge!
Pro tip: Let slices sit at room temp for 15 minutes if refrigerated – that tart flavor shines brightest when not ice-cold!
Storage & Reheating
Here’s the thing about rhubarb pie – it never lasts long in my house! But if you miraculously have leftovers (or want to bake ahead), here’s how to keep it tasting fresh:
- Room temp – Cover loosely with foil and enjoy within 2 days (the crust stays crispest this way)
- Fridge – Tuck it in airtight for up to 4 days – the filling stays bright and tangy
- Freezer – Wrap whole pie or slices tightly in plastic, then foil. Thaw overnight before reheating
When reheating, just pop individual slices in a 350°F oven for 10 minutes – microwaving makes the crust soggy (lesson learned the hard way!).
Nutritional Information
Okay, let’s be real – we’re not eating pie for its health benefits! But since everyone asks, here’s the nutritional breakdown for one glorious slice of my Classic Fresh Rhubarb Pie. Remember, these are estimates – your exact numbers will depend on your specific ingredients (like how sweet your rhubarb was or which butter brand you used).
- Serving Size: 1 slice (about 1/8 of the pie)
- Calories: 320 (worth every single one!)
- Sugar: 25g (mostly from natural rhubarb sweetness)
- Sodium: 180mg
- Fat: 12g
- Saturated Fat: 4g
- Carbohydrates: 50g
- Fiber: 2g (hey, rhubarb’s got some fiber!)
- Protein: 3g
Now, if you’re feeling guilty (though you absolutely shouldn’t!), here’s my philosophy – life’s too short not to enjoy homemade pie. Balance is key! Maybe have a smaller slice and savor every bite, or take an extra walk around the block. But honestly? Some things – like my Classic Fresh Rhubarb Pie – are just meant to be enjoyed without overthinking it!
Frequently Asked Questions
Over the years, I’ve gotten so many great questions about my Classic Fresh Rhubarb Pie Recipe – here are the ones that pop up most often with all my hard-earned answers!
Can I Make This Pie Ahead?
Absolutely! Here’s how I do it for stress-free entertaining: Assemble the pie completely (right up to adding the top crust), then wrap tightly in plastic and freeze for up to 2 months. When ready to bake, pop it straight into the preheated oven – just add about 10 extra minutes to the baking time. Already baked? Let it cool completely, then refrigerate for up to 3 days or freeze for a month. Pro tip: Freeze individual slices for quick dessert fixes!
How Do I Prevent a Soggy Crust?
Oh honey, I’ve battled soggy bottoms more times than I’d like to admit! My foolproof tricks: First, sprinkle that sugar-flour mixture on the bottom crust before adding rhubarb (creates a moisture barrier). Second, bake on the lowest oven rack – that direct heat crisps things up beautifully. For extra insurance, you can blind bake the bottom crust for 5 minutes before filling – just prick it with a fork first!
Why Is My Filling Too Runny?
Three likely culprits here: First, did you use the full 6 tablespoons of flour? That thickener is crucial! Second, frozen rhubarb releases more liquid – always thaw and drain it first. Third (and most common) – slicing too soon! Let the pie cool completely (I know, torture) so the filling can set properly. If it’s still runny after cooling, try adding an extra tablespoon of flour next time – rhubarb moisture varies!
Can I Use Frozen Rhubarb?
You can, but fresh really is best! If frozen is all you’ve got, thaw it completely first, then drain in a colander for at least 30 minutes (press gently to remove excess liquid). You might need to reduce the sugar slightly since frozen rhubarb tends to be less tart. Expect the filling to be a bit softer – but still delicious!
What About Sugar Alternatives?
I’ve experimented with everything! For a lower-glycemic option, coconut sugar works beautifully (use same amount). Honey or maple syrup can be used, but reduce other liquids slightly – start with 1 cup and adjust to taste. Artificial sweeteners? They’ll sweeten but won’t give that caramelized depth – I’d stick with natural options. Whatever you choose, taste your rhubarb first – its natural tartness varies so much!
Final Thoughts
I’ll be honest – every time I pull this Classic Fresh Rhubarb Pie out of the oven, I do a little happy dance in my kitchen. There’s just something about that first perfect slice, with the flaky crust crumbling and that ruby-red filling glistening, that makes all the prep work worth it. And the best part? It’s not some fancy, complicated dessert – just honest-to-goodness homemade goodness that anyone can master.
If this is your first time baking with rhubarb, welcome to the club! You’re about to discover why this springtime treat has been beloved for generations. Don’t stress about making it look magazine-perfect – some of my most delicious pies were the “ugly” ones where the filling bubbled over dramatically (those caramelized edges are my favorite part!).
I’d love to hear how your pie turns out! Did you stick to the recipe or add your own twist? Did your family gobble it up as fast as mine always does? Drop me a comment below – I read every single one. And if you snap a photo of your masterpiece, tag me! There’s nothing I love more than seeing other bakers fall in love with this classic recipe. You can also follow along for more baking inspiration on Facebook!
Now go grab some fresh rhubarb and get baking – your taste buds (and probably your neighbors) will thank you!