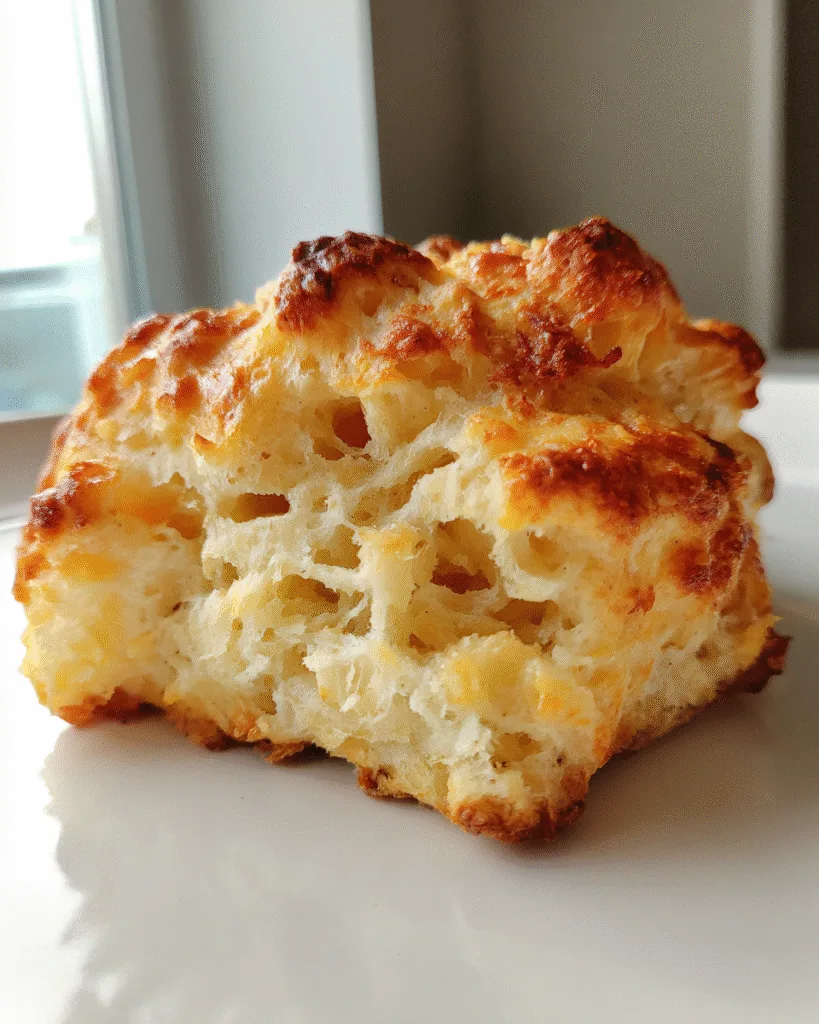
Oh my goodness, let me tell you about my latest breakfast obsession – these cottage cheese biscuits! They became my go-to morning lifesaver when my toddler started waking up at 5 AM (bless his heart). I needed something fast, filling, and protein-packed to keep me going through those marathon mom mornings. After dozens of kitchen experiments – some glorious, some… let’s just say “learning experiences” – I perfected this fluffy little miracle. It’s got all the comfort of a warm biscuit with none of the carb crash, and it comes together faster than you can say “but where are my car keys?” Trust me, once you try these, you’ll wonder how you ever survived busy mornings without them!

Table of Contents
Table of Contents
Why You’ll Love This Cottage Cheese Biscuit
Listen, I don’t just throw around the word “love” when it comes to breakfast recipes – but these cottage cheese biscuits? They’re special. Here’s why:
They’re ridiculously quick – I’m talking 5 minutes of prep and you’re done. No waiting for dough to rise, no fancy techniques. Just mix, cook, and devour.
Protein-packed power – With 12 grams of protein per biscuit, these babies will actually keep you full until lunch.
Low-carb magic – At just 5g net carbs, these satisfy that biscuit craving without the blood sugar rollercoaster.
Endless possibilities – Sweet or savory, these adapt to whatever you’re craving. Slather with butter and jam for a treat, or top with avocado and eggs for a hearty breakfast sandwich. My personal favorite? A schmear of cream cheese and everything bagel seasoning – absolute perfection.
Cottage Cheese Biscuit Ingredients
Okay, let’s talk ingredients – and I promise, there’s nothing weird or hard-to-find here! This recipe works because each component plays a specific role. I’ve learned through (many) trial and error that using the right ingredients just so makes all the difference between a good biscuit and a “holy cow this is amazing” biscuit.
1/4 cup cottage cheese (drained) – This is our secret weapon! I always use full-fat for maximum creaminess, but low-fat works too. Just make sure to drain off any excess liquid – I give mine a quick squeeze in a fine mesh strainer. The curds should be moist but not swimming.
1 large egg (room temperature) – Not fridge-cold, please! Cold eggs don’t blend as smoothly.
3 tbsp almond flour (packed) – Pack it in that measuring spoon, friends! This isn’t the time to be shy. The almond flour gives structure without making things heavy.
1/2 tsp baking powder (aluminum-free) – My grandma would roll over in her grave if I used anything else. Aluminum-free gives a cleaner taste.
Pinch of salt (adjust to taste) – I use about 1/8 tsp of fine sea salt, but start with less if your cottage cheese is salty. Taste the batter – it should have a faint savory note to balance the richness.
See? Nothing complicated! These five simple things transform into breakfast magic. Now let’s make some biscuits!
Equipment You’ll Need
Here’s the beautiful part – you probably already have everything you need right in your kitchen! No fancy gadgets required. Just grab:
A medium mixing bowl – My trusty Pyrex is always within reach. Anything big enough to whisk without splattering will do – no need to dig out the stand mixer for this one.
A whisk or fork – I usually grab my small balloon whisk, but honestly? A fork works just fine in a pinch. We’re not making soufflé here – just getting everything nicely combined.
Microwave-safe dish (about 4-inch diameter) OR small baking sheet – For microwaving, I use my favorite little ceramic ramekin. For oven baking, a small sheet pan lined with parchment saves cleanup. Either way – nothing fancy!
Your microwave or oven – That’s it! No preheating needed if you’re microwaving (hallelujah). If baking, just wait for that little “ding” telling you the oven’s ready at 350°F.
See? I told you this was easy. Now that we’ve got our gear assembled, let’s make some biscuit magic happen!
How to Make Cottage Cheese Biscuit

Step 1: Mix the Batter
Alright, let’s get mixing! This part couldn’t be easier – just dump everything into your bowl: cottage cheese, egg, almond flour, baking powder, and salt. Now grab that whisk (or fork, no judgment here!) and go to town. You’ll want to mix until everything is just combined – we’re aiming for smooth with no dry flour pockets, but don’t go crazy. Overmixing makes the biscuits tough, and nobody wants that!
Pro tip: If you spot any stubborn cottage cheese lumps, gently press them against the side of the bowl with your whisk. The batter should look like thick pancake batter – not too runny, not too stiff. Give it a quick taste (what? Quality control is important!) and adjust salt if needed. Done already? See, I told you this was quick!
Step 2: Cook Your Biscuit
Now comes the fun part – cooking! You’ve got options here, and both work great:
Microwave Method (My Busy-Mom Lifesaver): Scoop your batter into that microwave-safe dish and smooth the top lightly. Microwave for 2 minutes first – peek inside! It should look set around the edges but maybe slightly wet in the center. Give it another 30 seconds if needed. When done, it’ll pull away from the sides slightly and spring back when gently pressed.
Oven Method (When You Want That Golden Touch): Preheat your oven to 350°F while you mix the batter. Spoon onto parchment-lined baking sheet, shaping into a nice round biscuit shape. Bake for 12-15 minutes until golden around the edges and firm to touch. Your kitchen will smell amazing!
Whichever method you choose, resist the urge to poke it constantly! Let it rest for a minute before slicing – patience pays off with perfect texture.
Step 3: Serve and Enjoy
The best part – eating! Slice your warm cottage cheese biscuit in half (careful, it’s hot!) and get creative. Here are my family’s favorite ways to enjoy them:
Sweet Lovers: Slather with butter and your favorite jam – strawberry is heavenly. A drizzle of honey with cinnamon? Yes please!
Savory Fans: Top with smashed avocado and everything bagel seasoning. Or make a breakfast sandwich with scrambled eggs and turkey bacon – total protein powerhouse!
My Current Obsession: Cream cheese schmear with thinly sliced cucumbers and fresh dill. So refreshing!
The beauty of these biscuits? They’re like a blank canvas for your morning cravings. Eat them straight out of hand, use them as sandwich bread, or crumble over yogurt – no wrong answers here!
If you love baking with cottage cheese, these Cottage Cheese Banana Bars are a moist and naturally sweet treat to try next.
Print
5-Minute Cottage Cheese Biscuit Recipe for Busy Moms
Fluffy, savory, high-protein cottage cheese breakfast biscuits perfect for a quick and low-carb morning bite.
- Total Time: 8-20 minutes
- Yield: 1 biscuit 1x
Ingredients
- 1/4 cup cottage cheese
- 1 large egg
- 3 tbsp almond flour
- 1/2 tsp baking powder
- Pinch of salt
Instructions
- Whisk together cottage cheese, egg, almond flour, baking powder, and salt in a bowl until smooth.
- Cook either in the microwave for 2–3 minutes or bake at 350°F (175°C) for 12–15 minutes.
- Slice the biscuit and serve with butter, jam, eggs, turkey bacon, or avocado.
Notes
- For best results, bake instead of microwaving.
- Toast in a frying pan with butter for extra crispiness.
- Texture differs from traditional flour-based biscuits.
- Prep Time: 5 minutes
- Cook Time: 3-15 minutes
- Category: Breakfast
- Method: Microwave or Oven
- Cuisine: American
- Diet: Low Carb
Nutrition
- Serving Size: 1 biscuit
- Calories: 150
- Sugar: 1g
- Sodium: 200mg
- Fat: 10g
- Saturated Fat: 2g
- Unsaturated Fat: 6g
- Trans Fat: 0g
- Carbohydrates: 5g
- Fiber: 2g
- Protein: 12g
- Cholesterol: 100mg
Tips for Perfect Cottage Cheese Biscuits

After making these more times than I can count (and yes, a few less-than-perfect batches along the way), I’ve picked up some game-changing tricks for cottage cheese biscuit success. Listen up – these will take your biscuits from good to “oh wow, you made these?!”
Baking beats microwaving – I know, I know, the microwave is SO tempting when you’re in a rush. But if you’ve got those extra 15 minutes? Pop them in the oven! Baking gives that gorgeous golden crust and fluffier interior that the microwave just can’t match. The heat circulates evenly, giving you that perfect rise. My test batch side-by-side was eye-opening – the oven version had my kids fighting over the last bite!
Toast for crunch magic – Here’s my favorite hack for leftovers (though they rarely last that long): Slice and pan-toast in butter the next day. That sizzle? Music to my ears. The edges get all crispy while the inside stays pillowy. Game. Changer. I do this even with freshly baked biscuits when I want that diner-style texture.
Texture reality check – These aren’t your grandma’s buttermilk biscuits, and that’s okay! The almond flour and cottage cheese create a heartier, slightly denser crumb that’s more satisfying than traditional biscuits. Think of it as the lovechild of a biscuit and an English muffin – perfect for holding toppings without falling apart. Once my brain made that shift, I stopped comparing and started appreciating them for their own delicious uniqueness.
The patience payoff – I get it, you want to eat NOW. But letting your biscuit rest for 2-3 minutes after cooking makes all the difference. That little break lets the structure set properly so it doesn’t taste eggy or fall apart when you slice it. I set a timer because otherwise I’ll burn my fingers diving in too soon (learned that the hard way!).
Moisture matters – If your batter looks too thick, don’t panic! Cottage cheese moisture varies by brand. I keep a tablespoon of water nearby to adjust – just a splash can make the perfect pourable consistency. But remember – thicker batter means taller biscuits, so sometimes I leave it as-is for extra height!
For a savory twist on cottage cheese baking, don’t miss the fluffy Everything Bagel Cottage Cheese Bites, perfect as a side or snack.
Cottage Cheese Biscuit Variations
One of my favorite things about this recipe is how easily it adapts to whatever flavors I’m craving that day! After making these biscuits nearly every week for months (no exaggeration), I’ve discovered some delicious twists that keep things exciting. Here are my go-to variations – perfect for when you want to mix it up while keeping that protein-packed goodness:
The Fiber Boost
When I want to make these even more filling, I stir in 1 tablespoon chia seeds or ground flaxseed. They add a lovely nutty crunch and extra fiber to keep me full until lunch. Just let the batter sit for 5 minutes after mixing – the seeds absorb some moisture and prevent dryness. My kids call these the “crunchy biscuits” and devour them with peanut butter!
The Cheesy Savory Twist
Oh boy, this one’s a game-changer! Add 2 tablespoons shredded cheddar cheese and 1/4 teaspoon garlic powder to the batter for the ultimate savory biscuit. The cheese melts into little pockets of gooey goodness – perfect with scrambled eggs or as a side for soup. Sometimes I’ll even sprinkle extra cheese on top before baking for that golden, crispy crust. Warning: These disappear FAST!
The Everything Bagel
My current obsession! Mix 1 teaspoon everything bagel seasoning right into the batter, then top with another sprinkle before cooking. The onion, garlic, and sesame flavors take these cottage cheese biscuits to a whole new level. I love them sliced open with cream cheese and smoked salmon – instant fancy breakfast that took me 5 minutes!
The Sweet Tooth Satisfier
For those mornings when I want something dessert-like (no shame!), I add 1/2 teaspoon vanilla extract and 1 teaspoon maple syrup to the batter. The subtle sweetness pairs perfectly with fresh berries or a dollop of Greek yogurt. Sometimes I’ll even mix in a handful of blueberries – they burst while baking creating little pockets of jammy goodness!
The beauty of cottage cheese biscuits is how forgiving they are – don’t be afraid to get creative! Just remember that wet additions (like veggies or fruit) might need a tiny bit more almond flour to balance the moisture. Start with small changes, taste as you go, and soon you’ll have your own signature version!
Storage and Reheating
Okay, let’s talk about what to do with any leftover cottage cheese biscuits (though in my house, that’s a rare problem!). These beauties are best fresh, but with a few simple tricks, you can keep them tasting great for your next breakfast rush. Here’s exactly what I do:
Storing Your Biscuits
First things first – let your biscuit cool completely before storing. I know it’s tempting to wrap it up warm, but that trapped steam turns into sog city (learned that the hard way!). Once cooled, pop it into an airtight container or zip-top bag. I sometimes wrap mine in parchment paper first for extra protection.
In the fridge, they’ll stay fresh for about 2 days. Beyond that, the texture starts to change – the almond flour can get a bit denser. If I know I won’t finish them quickly, I’ll slice them before storing. That way I can grab just what I need without thawing the whole thing!
Reheating Like a Pro
Now, here’s my secret for bringing these back to life: never microwave them straight from the fridge! That rubbery texture is no one’s friend. Instead, I use one of these two foolproof methods:
Toaster Method: Pop your biscuit halves in the toaster on medium – just until they’re warmed through and lightly crisped. Watch closely though! The high protein content means they can go from perfect to overdone in seconds. My perfect timing? About 1 minute 30 seconds in my old-school toaster.
Skillet Revival: This is my absolute favorite way! Melt a tiny bit of butter in a pan over medium-low heat. Add the biscuit halves cut-side down and cover with a lid for about 2 minutes. The steam helps revive the interior while the butter crisps up the outside. Flip for another minute if needed. The result? Tastes like you just made it fresh!
One last tip – if your biscuit seems a tad dry after storage, don’t panic! A quick brush of melted butter before reheating works wonders. Or do what I do – turn it into the most amazing breakfast sandwich where the toppings provide all the moisture you need. Problem solved!
While these biscuits can technically be frozen, I don’t recommend it – the texture really suffers when thawed. They’re so quick to make fresh, I’d rather whip up a new batch than deal with freezer compromises. But hey, if you’re in a pinch, wrap tightly and freeze for up to 2 weeks – just know it won’t be quite the same magical experience!
Frequently Asked Questions
Can I use regular flour instead of almond flour?
Oh honey, I wish it worked that easily! But no – regular flour completely changes the texture and nutritional profile. Almond flour absorbs moisture differently and gives that perfect dense-yet-tender crumb. All-purpose flour would make these gummy and weird (trust me, I tried it so you don’t have to!). If you’re nut-free, coconut flour might work but you’ll need to adjust liquids – it’s super absorbent!
Can I make these ahead of time?
They’re definitely best fresh, but I’ll let you in on my little secret: The batter keeps surprisingly well in the fridge for up to 24 hours! Just mix everything, cover tightly, and cook when ready. The texture might be slightly denser, but still delicious. Already cooked biscuits? Day-old tastes fine reheated, but that first-day magic is hard to beat!
Are these freezable?
I don’t recommend it, friend. The cottage cheese texture gets weird after freezing – kind of grainy and dry. They’re so quick to whip up fresh, it’s really not worth the freezer space. If you absolutely must freeze, wrap tightly in plastic and eat within a week – but expect some texture sacrifice. Better to just make a fresh batch!
Why does mine taste eggy?
Ah, the eggy dilemma! Usually this means either overmixing (be gentle!) or not cooking quite long enough. Make sure your edges are fully set before removing from heat. Also – room temperature eggs blend in better than cold ones straight from the fridge. My trick? A tiny pinch of nutmeg masks any egginess beautifully!
Can I double or triple the recipe?
Absolutely! This recipe scales up beautifully – just use a bigger dish if microwaving, or space out scoops on a baking sheet for oven batches. You might need to add 1-2 minutes to cooking time for larger quantities. I often make a triple batch on Sunday mornings – one for me, one for the kids, and one for my always-hungry husband!
For More recipes Follow me on Facebook!


