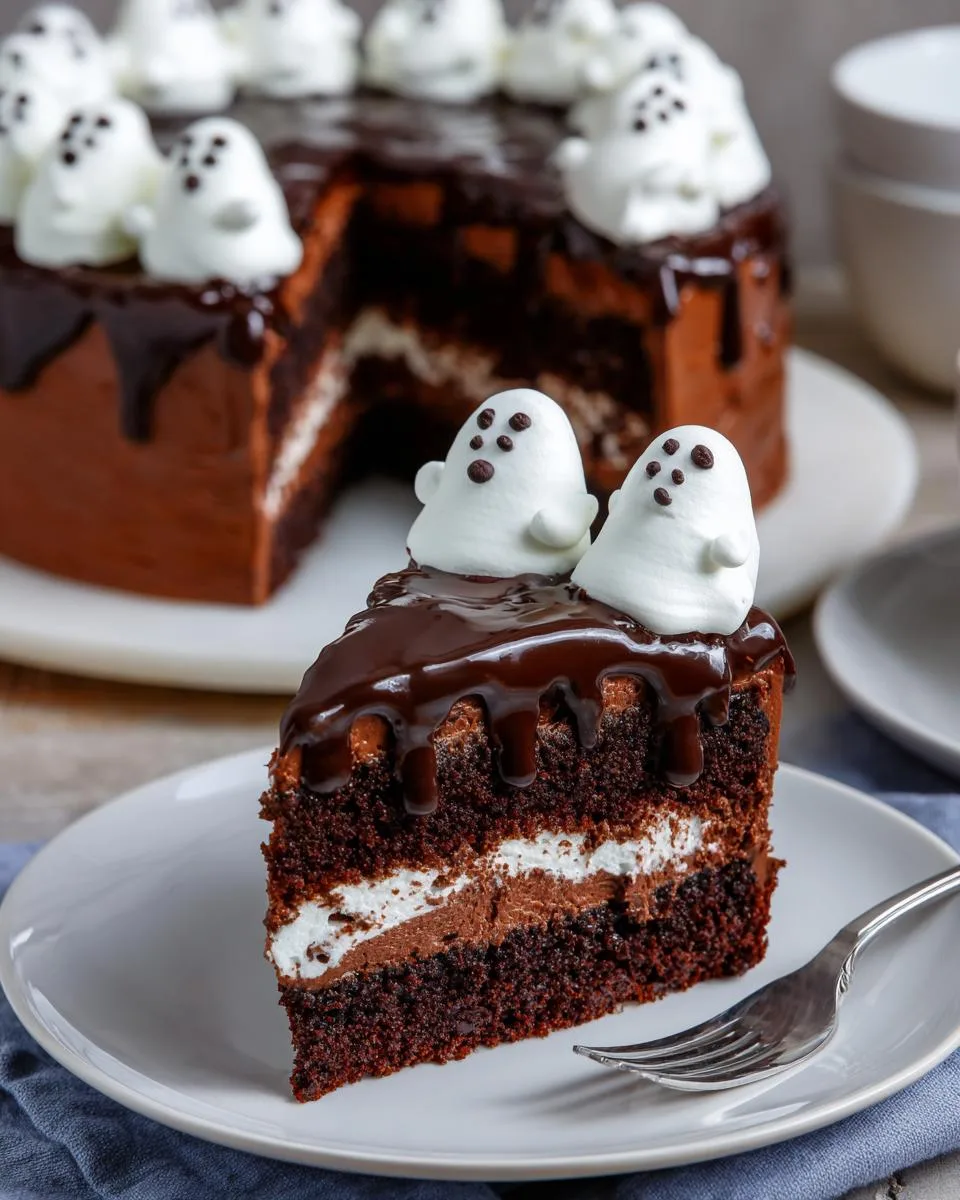
Okay, let me tell you about the ghost cake that absolutely stole the show at last year’s Halloween party! I’ve been making spooky treats for years, but this chocolate cake topped with adorable meringue ghosts became an instant family favorite. The moment I pulled it out with those little white spirits floating on a sea of dark chocolate ganache, my kids went wild – and honestly? So did the adults.
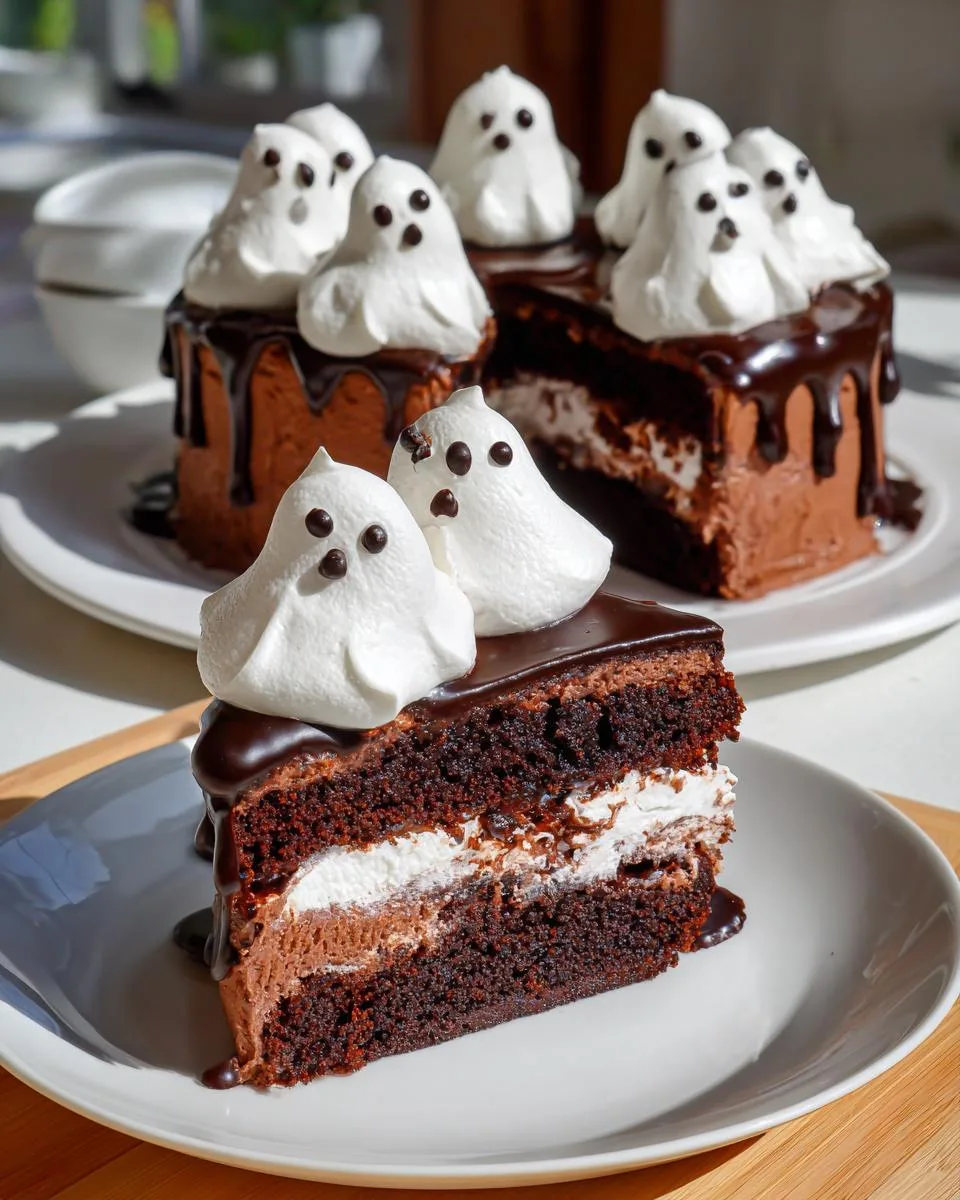
What makes this ghost cake special isn’t just its creepy-cute appearance (though those meringue ghosts are pure magic). It’s that perfect combination of rich, moist chocolate layers and light-as-air meringues that makes every bite heavenly. I developed this recipe after countless Halloween baking experiments – too many dry cakes, cracked meringues, and frosting disasters to count! But trust me, I’ve worked out all the kinks so you can skip straight to the “wow” moment.
Every October when I bake this ghost cake, the smell of chocolate and vanilla fills our kitchen, and suddenly I’m back to being a kid again, helping my mom decorate sugar cookies with black icing. That’s the real magic of holiday baking, isn’t it? The way food becomes part of our most cherished memories. Now I’m creating those moments with my own kids – and this ghost cake has become our sweet little Halloween tradition.
Table of Contents
Table of Contents
Why You’ll Love This Ghost Cake
This ghost cake isn’t just a dessert—it’s a showstopper that’ll have everyone talking. Here’s why it’s a must-make:
- Perfectly Spooky: Those little meringue ghosts are adorable and creepy in the best way. They’ll make your Halloween party unforgettable.
- Rich Chocolate Flavor: The cake is moist, fudgy, and deeply chocolatey—thanks to hot coffee in the batter that intensifies the cocoa flavor.
- Fun to Make: Piping the meringue ghosts is surprisingly easy and a great activity to do with kids (or friends who love baking).
- Crowd-Pleasing: It’s not just for Halloween—this cake works for any festive occasion where you want a dessert that’s both delicious and playful.
- Make-Ahead Friendly: You can bake the cake layers and meringues a day ahead, so assembly on the big day is a breeze.
Ingredients for the Ghost Cake
Here’s everything you’ll need to make this spook-tacular ghost cake. Trust me, it’s worth gathering every single ingredient—they all play a part in creating that perfect balance of flavors and textures.

- 2 cups all-purpose flour: The backbone of our cake—make sure it’s fresh and measured correctly.
- 3/4 cup unsweetened cocoa powder: Go for the good stuff—it’s what gives the cake its rich, chocolatey depth.
- 1 tsp. baking soda: Helps the cake rise beautifully.
- 1 tsp. kosher salt: Just a pinch to balance the sweetness.
- 1 cup hot coffee: Don’t skip this! It enhances the chocolate flavor without making the cake taste like coffee.
- 1 cup granulated sugar + 1/2 cup packed brown sugar: The combo gives the cake its perfect sweetness and moisture.
- 3/4 cup vegetable oil: Keeps the cake super moist.
- 1/2 cup sour cream (room temperature): Adds richness and helps create that tender crumb.
- 4 large egg whites (room temperature): Essential for the meringue ghosts—they need to be at room temp for the best volume.
- 1/4 tsp. cream of tartar: Helps stabilize the meringue so it holds its shape.
- 1/2 tsp. pure vanilla extract: Adds a subtle warmth to both the cake and meringues.
- 1 cup (2 sticks) butter, softened: For the frosting—make sure it’s soft but not melted.
- 4 cups powdered sugar: Sweetens and thickens the frosting.
- 1/4 cup heavy cream: Makes the frosting smooth and spreadable.
- Black food coloring: For the ghost faces—gel-based works best.
- 1 cup chocolate chips: For the ganache—use semi-sweet for the perfect balance.
- 1/2 cup heavy cream: Heated and poured over the chocolate chips for that silky ganache.
Gather your ingredients, and let’s get spooky! You’ll be amazed at how these simple components come together to create something truly magical.
Equipment Needed for the Ghost Cake
You don’t need anything fancy to make this ghost cake, but having the right tools will make the process smoother and more fun. Here’s what you’ll need:
- Two 8-inch cake pans: For baking those perfect chocolate layers. Line them with parchment paper and grease them well—trust me, it’s worth the extra step.
- Mixing bowls: A few different sizes are helpful for separating ingredients and prepping the meringue.
- Hand mixer or stand mixer: Essential for whipping up the meringue and frosting. If you’re using a hand mixer, make sure it’s powerful enough to get those stiff peaks.
- Piping bag with a large round tip: This is key for creating those adorable ghost shapes. If you don’t have one, a Ziploc bag with the corner snipped off works in a pinch.
- Baking sheet lined with parchment: For baking the meringue ghosts. The parchment prevents sticking and makes cleanup a breeze.
- Offset spatula: Makes frosting the cake so much easier—you’ll thank me later.
- Serrated knife: For leveling the cake layers. A sharp knife makes all the difference.
Gather your tools, and you’ll be ready to create a ghost cake that’s as fun to make as it is to eat!
How to Make the Ghost Cake
Okay, let’s dive in! Making this ghost cake is easier than you think, and I’ll walk you through every step. Trust me, the result is worth it—moist chocolate cake, silky ganache, and those adorable meringue ghosts that’ll steal the show.

First, preheat your oven to 350°F. Line two 8-inch cake pans with parchment paper and grease them with cooking spray. In a large bowl, whisk together 2 cups of flour, 3/4 cup cocoa powder, 1 tsp. baking soda, and 1 tsp. kosher salt. Set this aside—it’s your dry mixture.
Next, grab another bowl and whisk together 1 cup of hot coffee and 1 cup of granulated sugar until the sugar dissolves. Add in 1/2 cup of brown sugar, 3/4 cup vegetable oil, and 1/2 cup of sour cream. Whisk until everything’s smooth and combined. Now, pour this into your dry ingredients and mix until just combined—no overmixing here, or the cake will get tough!
Divide the batter evenly between your prepared pans and bake for 25 to 30 minutes. You’ll know it’s done when a toothpick inserted in the center comes out clean. Let the cakes cool in the pans for 15 minutes, then flip them onto a wire rack to cool completely. Pro tip: wrap the cooled cakes in plastic wrap and pop them in the freezer for 20 minutes. This makes them so much easier to frost later!
While the cakes chill, let’s make the meringue ghosts. Preheat your oven to 225°F and line a baking sheet with parchment paper. In a small bowl, mix 1/4 cup granulated sugar and 1/4 cup powdered sugar. In a large bowl, beat 4 egg whites and 1/4 tsp. cream of tartar on low until frothy. Gradually add the sugar mixture, then increase the speed and beat until you get stiff, glossy peaks. Add 1/2 tsp. vanilla and beat briefly to combine.
Transfer the meringue to a piping bag with a large round tip. Pipe your ghosts by making a big blob, lifting slightly, and adding smaller blobs on top. Bake them for 1 hour and 20 minutes, then let them cool completely.
Now, for the frosting: beat 1 cup of softened butter until smooth, then gradually add 4 cups of powdered sugar and a pinch of salt. Mix in 1/4 cup heavy cream and 1 tsp. vanilla until the frosting is smooth and spreadable. Frost your cake, then drizzle with chocolate ganache (made by pouring 1/2 cup hot heavy cream over 1 cup of chocolate chips and stirring until smooth). Finally, pipe little black eyes and mouths onto your meringue ghosts and arrange them on top of the cake. Ta-da! You’ve just made a ghost cake that’s equal parts spooky and delicious.
Print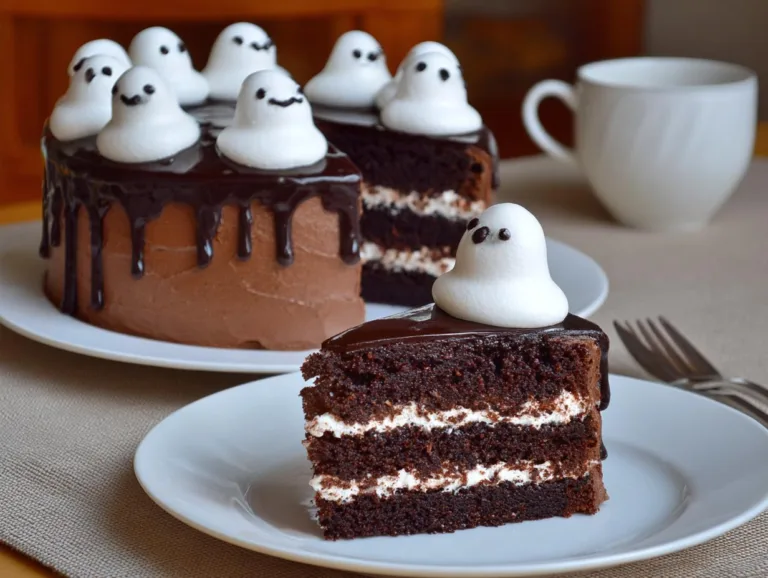
Spooky Ghost Cake That Haunts Taste Buds Magically
A spooky and delicious chocolate cake topped with ghost meringues, perfect for Halloween or any festive occasion.
- Total Time: 2 hours 20 minutes
- Yield: 1 cake (8 servings) 1x
Ingredients
- 2 cups all-purpose flour
- 3/4 cup unsweetened cocoa powder
- 1 tsp. baking soda
- 1 tsp. kosher salt
- 1 cup hot coffee
- 1 cup granulated sugar
- 1/2 cup packed brown sugar
- 3/4 cup vegetable oil
- 1/2 cup sour cream, room temperature
- 1/4 cup granulated sugar
- 1/4 cup powdered sugar
- 4 large egg whites
- 1/4 tsp. cream of tartar
- 1/2 tsp. pure vanilla extract
- 1 cup (2 sticks) butter, softened
- 4 cups powdered sugar
- Pinch kosher salt
- 1/4 cup heavy cream
- 1 tsp. pure vanilla extract
- Black food coloring
- 1 cup chocolate chips
- 1/2 cup heavy cream
Instructions
- Preheat oven to 350°. Line two 8” cake pans with parchment and grease with cooking spray. In a large bowl, whisk together flour, cocoa powder, baking soda, and salt.
- In another large bowl, whisk hot coffee and sugar together. Add oil and sour cream and whisk to combine. Pour into dry ingredients and whisk until just combined.
- Divide batter between prepared pans and bake until a toothpick inserted in middle comes out clean, 25 to 30 minutes. Let cool 15 minutes, then invert onto a wire cooling rack and let cool completely.
- Preheat oven to 225°. Line a large baking sheet with parchment paper. In a small bowl combine sugars. In a large bowl using a hand mixer, beat egg whites and cream of tartar on low speed until whites are broken up and cream of tartar is mostly mixed in. Increase speed to medium and continue beating. When egg whites are frothy, slowly pour in sugars a little at a time. Increase speed to high and continue beating until medium peaks. Slowly add vanilla and keep beating until egg whites are stiff peaks. Transfer egg whites to a piping bag with a large round tip.
- Pipe ghosts onto prepared baking sheet by piping a large circle, lifting slightly and piping a slightly smaller circle, then lifting slightly again and piping another slightly smaller circle. Bake meringues until outsides are hard, 1 hour and 20 minutes. Let cool completely.
- Wrap cooled cake layers in plastic wrap and freeze for 20 minutes. In a large bowl using a hand mixer, beat butter until smooth. Add powdered sugar and a pinch of salt and beat until no lumps remain. Add heavy cream and vanilla and beat until combined. Add more heavy cream, 1 tablespoon at a time, if needed until desired consistency is reached. Frosting should hold its shape, but be easily spreadable. Scoop out about ¼ cup of frosting and reserve for later.
- Unwrap cake layers and using a serrated knife, level tops of cakes if needed. Place one layer on a serving platter and spread about half of the frosting on top with an offset spatula. Place second layer on top and frost tops and sides with remaining frosting. Use a bench scraper to smooth sides and top.
- Dye the reserved buttercream black and place into a pastry bag with a small round tip. Pipe eyes and mouths onto cooled ghost meringues.
- Place chocolate chips into a heat safe bowl. In a small pot over medium heat, heat heavy cream until bubbles form around the edges of pan. Pour hot heavy cream over chocolate chips and let sit 1 minute. Whisk ganache until smooth and completely combined.
- Pour about half of the ganache onto the top of the cake and use an offset spatula to smooth ganache. Gently push ganache to the edges of the cake and help guide the chocolate to drip down the side. Add more ganache as needed. Arrange ghost meringues on top of cake.
Notes
- Make sure egg whites are at room temperature for best meringue results.
- Use a piping bag with a large round tip for ghost shapes.
- Chill cake layers before frosting for easier handling.
- Prep Time: 30 minutes
- Cook Time: 1 hour 50 minutes
- Category: Dessert
- Method: Baking
- Cuisine: American
- Diet: Vegetarian
Nutrition
- Serving Size: 1 slice
- Calories: 450
- Sugar: 35g
- Sodium: 300mg
- Fat: 25g
- Saturated Fat: 12g
- Unsaturated Fat: 10g
- Trans Fat: 0g
- Carbohydrates: 55g
- Fiber: 3g
- Protein: 5g
- Cholesterol: 45mg
Tips for Perfect Ghost Meringues
Let’s talk meringue ghosts—because honestly, they can be tricky little spirits if you don’t know the secrets! First, room-temperature egg whites are non-negotiable. Cold ones just won’t whip up as fluffy. And when you’re beating them, go slow at first—adding the sugar gradually helps stabilize the peaks so they don’t collapse. (I learned that the hard way after a batch of sad, flat ghosts!)
For piping, think “blobby snowman”—start with a big round base, then stack two smaller rounds on top. If the meringue sticks to the piping tip, just dip your finger in water and gently push it off. Bake them low and slow—225°F is perfect—to avoid cracking. And here’s my favorite trick: leave them in the turned-off oven for an extra 30 minutes after baking. It keeps them crisp without browning. Oh, and if they stick? A tiny spatula slid underneath saves the day. Now go forth and pipe some perfect spooky spirits!
Serving and Storing the Ghost Cake
Oh, presenting this ghost cake is half the fun! I love placing it in the center of a Halloween dessert table surrounded by candy corn and flickering LED tea lights—it instantly becomes the star of the party. Slice it with a warm knife (just run it under hot water and dry it quickly) for clean cuts through those chocolate layers.
Now, storing leftovers—because let’s be real, there probably won’t be any! But just in case: cover any remaining cake loosely with plastic wrap or pop it in an airtight container. The meringue ghosts might soften slightly overnight, but they’ll still taste delicious. Store at room temperature for up to 2 days, or refrigerate for up to 5 days (though the texture’s best at room temp). Pro tip: Freeze individual slices wrapped in parchment and foil for up to a month—perfect for surprising the kids with a spooky treat long after Halloween!
Ingredient Notes and Substitutions
Let’s be real—sometimes you’re missing an ingredient or need to tweak things for dietary needs. No worries! Here are my go-to swaps for this ghost cake. If you’re out of sour cream, plain Greek yogurt works just as well—it keeps the cake moist and tender. For a dairy-free version, swap the heavy cream in the frosting and ganache with canned coconut milk (just make sure it’s full-fat for that creamy texture).
Gluten-free? Use your favorite 1:1 gluten-free flour blend—I’ve had great results with King Arthur’s. And if coffee’s not your thing, hot water works fine, though it won’t deepen the chocolate flavor quite as much. Finally, for the egg whites, make sure your bowl and beaters are squeaky clean—any grease can sabotage your meringue. Happy baking, and don’t stress—this cake is forgiving and flexible!
Nutritional Information for the Ghost Cake
Now, I’ll be honest—this ghost cake is a treat, not health food! A single slice (about 1/8 of the cake) has roughly 450 calories with all that rich chocolate, buttercream, and ganache. But hey—it’s Halloween! Keep in mind, nutrition can vary based on brands and exact measurements. This is just a general estimate to help you plan your spooky indulgence.
Frequently Asked Questions About Ghost Cake
Got questions about this ghost cake? Don’t worry—I’ve got answers! Here are the most common ones I get, along with my tried-and-true tips.
Can I make the meringues ahead of time? Absolutely! The meringue ghosts can be baked up to 3 days in advance. Just store them in an airtight container at room temperature. If they soften slightly, a quick 5-minute bake at 225°F will crisp them right back up.
What can I use instead of coffee in the cake? If you’re not a coffee fan, hot water works fine—though it won’t enhance the chocolate flavor as much. For a caffeine-free option, try hot chocolate or even hot chai tea for a fun twist!
Can I freeze the cake layers? Yes! Wrap them tightly in plastic wrap and foil, and they’ll keep in the freezer for up to 3 months. Thaw overnight in the fridge before frosting.
Why do my meringues crack? Cracking usually happens if the oven’s too hot. Stick to 225°F and leave them in the turned-off oven to cool slowly. Patience is key!
Can I use store-bought frosting? Sure, but homemade buttercream is so much better! If you’re short on time, just doctor up store-bought frosting with a splash of vanilla and a pinch of salt.
For more spooky Halloween treats, check out our Halloween Oreo Stuffed Brownies and Mummy Halloween Brownies. You can also find other fun baking ideas on our Facebook page.