Oh, the smell of pumpkin pie baking in the oven—it just screams fall, doesn’t it? I’ll never forget the first time I made this pumpkin pie in a cup recipe. My youngest, who usually turns his nose up at anything that isn’t chocolate, took one bite and said, “Mom, this is better than Halloween candy!” Talk about a parenting win.
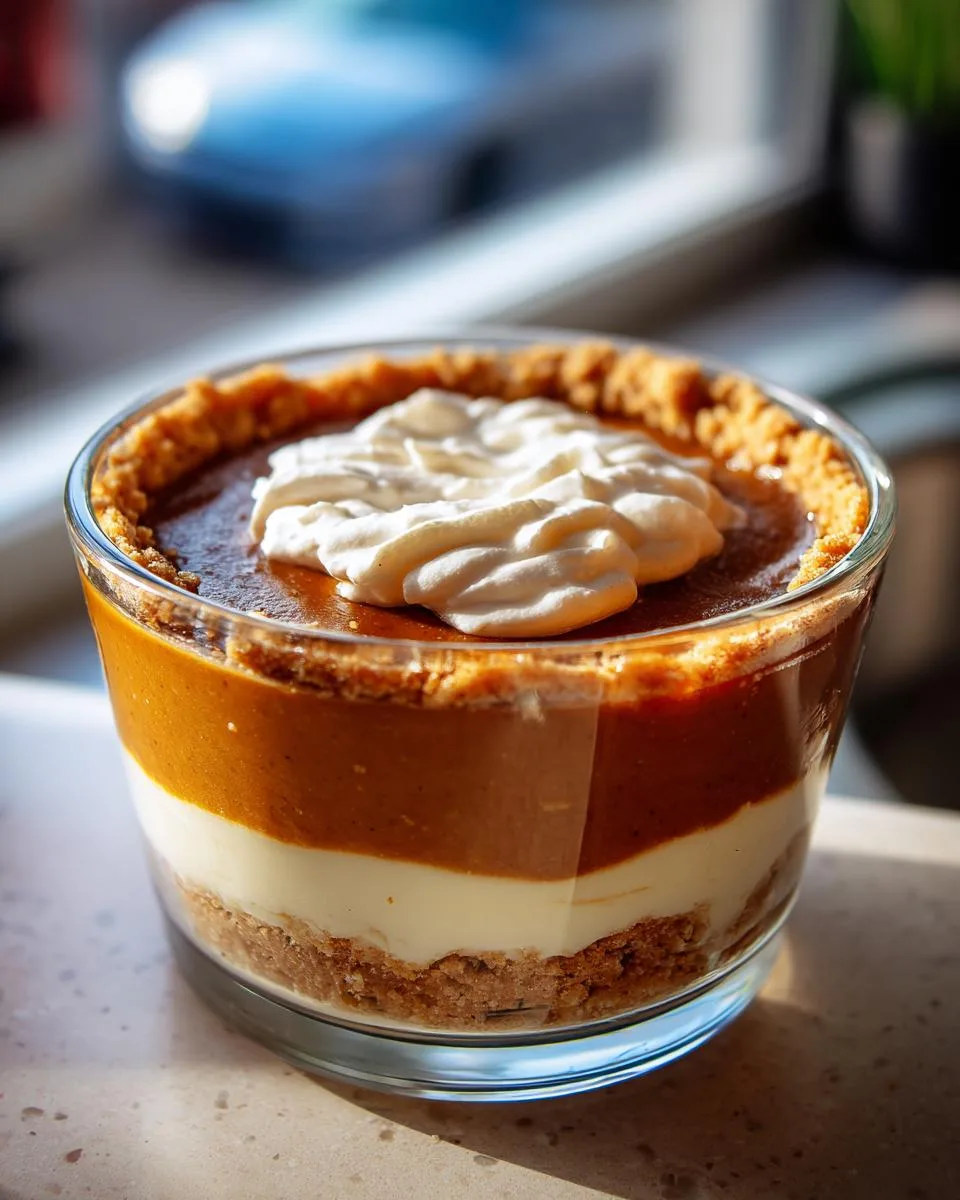
Now, I love a classic pumpkin pie as much as the next person, but there’s something so special about serving it in individual cups—no slicing, no mess, just perfectly portioned little cups of spiced, creamy heaven. Plus, it’s so easy. No need to stress about presentation—just spoon in the filling, bake, and let the warm spices do the talking. Whether you’re hosting Thanksgiving, a cozy Friendsgiving, or just craving a little autumnal comfort, this pumpkin pie in a cup recipe is your new best friend. Trust me—once you try it, you’ll never go back to the hassle of a whole pie again.

Table of Contents
Table of Contents
Why You’ll Love This Pumpkin Pie in a Cup Recipe
Listen, I know you’re busy—who isn’t?—but this recipe is about to become your fall MVP. Here’s why:
- No slicing drama: Individual cups mean zero fighting over who gets the “biggest piece.” Plus, no messy plates—just grab and go!
- Portion perfection: No more overindulging (okay, fine, maybe just one extra cup…). Perfect for when you want just a little sweetness without committing to a whole slice.
- Easy peasy serving: Great for potlucks, kids’ parties, or when you’re too cozy to bother with fancy plating. Just hand ‘em out and watch smiles appear.
- All the cozy vibes: That cinnamon-nutmeg-ginger combo? It’s like wrapping your taste buds in a flannel blanket. Classic fall flavor, zero fuss.
Seriously, once you taste that creamy, spiced filling in its own little crust cup, you’ll wonder why you ever bothered with a whole pie. Game. Changer.
The Ingredients That Make This Pumpkin Pie in a Cup Magic
Look, I’ve tried shortcuts before (who hasn’t?), but these ingredients? They’re non-negotiable for that perfect, velvety pumpkin pie in a cup. Here’s what you’ll need to make it right:

- 1 ⅓ cups all-purpose flour – The foundation of our little crust cups. Don’t even think about self-rising here.
- ½ teaspoon salt – Just enough to balance the sweetness without overpowering.
- ½ cup cold butter or shortening – Straight from the fridge! I’m team butter for flavor, but shortening makes flakier crusts.
- 3 tablespoons cold water – Ice cold is key – it keeps the crust tender.
- 2 cups mashed pumpkin – Homemade roasted pumpkin is dreamy, but a 15-oz can of pure pumpkin puree works in a pinch (not pumpkin pie filling!).
- 1 can (12 oz) evaporated milk – That rich, creamy texture? This is the secret weapon.
- 2 large eggs – Room temp is best – they’ll blend smoother into the filling.
- ¾ cup packed brown sugar – Pack it tight, friends! Dark brown gives more molasses depth.
- The spice trio: ½ tsp cinnamon, ½ tsp ginger, ½ tsp nutmeg – Adjust these to your taste, but this ratio is my happy place.
- ½ teaspoon salt – Yes, again! It balances the sweet filling beautifully.
Pro tip from my many baking fails: measure everything before you start. Nothing worse than realizing you’re short on evaporated milk mid-recipe while covered in flour!
The Tools That Make Pumpkin Pie in a Cup a Breeze
Don’t worry – you won’t need any fancy gadgets here! Just grab:
- A trusty mixing bowl (or two if you’re messy like me)
- Pastry blender – or two forks if you’re improvising
- Measuring cups and spoons – eyeballing never works with pie crust!
- Rolling pin – or that wine bottle in your fridge (washed, obviously)
- Individual ramekins or oven-safe cups – I use 6-oz size, but whatever fits your craving
That’s it! Now let’s get baking before the pumpkin spice cravings hit too hard.
How to Make Pumpkin Pie in a Cup Recipe
Okay, let’s get to the fun part – making these adorable little pumpkin pies! Don’t let the steps intimidate you – I’ve broken it down so even my 8-year-old could follow along (and he has!). Just take it one step at a time, and you’ll be scooping creamy pumpkin goodness into cups before you know it.
Preparing the Crust
First things first – preheat that oven to 400°F (200°C). While it’s heating up, let’s make our crust. In a big bowl, whisk together the flour and salt. Now grab that cold butter (I keep mine in the freezer for about 15 minutes before using) and start cutting it into the flour mixture with a pastry blender. You want it to look like coarse crumbs with some pea-sized butter bits remaining – those little butter pockets are what make the crust flaky!
Here’s my trick: add the ice water one tablespoon at a time, mixing gently with a fork after each addition. The dough should just barely hold together when you pinch it – not too sticky, not too dry. If it’s still crumbly after 3 tablespoons, add just a teaspoon more water. Then gather it into a ball with your hands (don’t overwork it!) and let it rest for 5 minutes while you make the filling.
Making the Pumpkin Filling
This part is so easy it almost feels like cheating! In another bowl (or just wash your first one), whisk together the pumpkin puree, evaporated milk, eggs, brown sugar, and all those warm spices. I like to mix the spices together in a small bowl first to make sure they’re evenly distributed. Whisk until everything is completely smooth – no eggy streaks allowed!
Give it a quick taste (I won’t tell) and adjust the spices if needed. Want more cinnamon? Go for it! This is your pumpkin pie moment. Just remember the flavors will deepen as it bakes, so don’t go overboard.
Baking and Serving
Roll out your dough to about ⅛ inch thickness – no need to be perfect here, rustic is charming! Cut circles slightly larger than your cups and gently press them in, crimping the edges prettily if you’re feeling fancy. Fill each cup about ¾ full with the pumpkin mixture – it’ll puff up as it bakes.
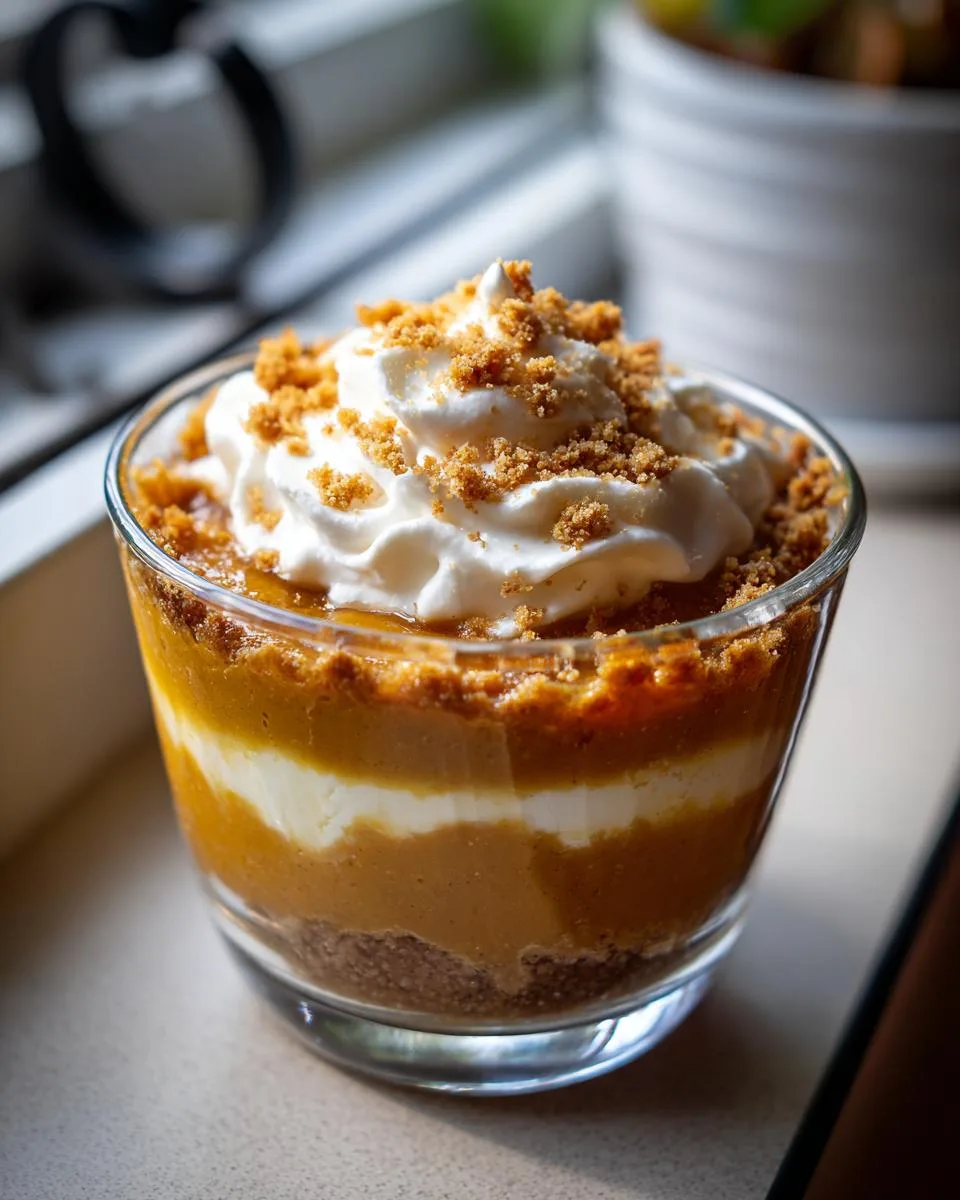
Pop them in the oven for about 40 minutes. Around the 30-minute mark, check the crust edges – if they’re browning too fast, cover them with little foil hats. The pies are done when a knife inserted near the edge comes out clean (the center will still be slightly jiggly – that’s normal!). Let them cool completely before serving – I know it’s hard to wait, but this helps the filling set up perfectly. Top with whipped cream if you’re feeling extra, or just dig in as-is!
Print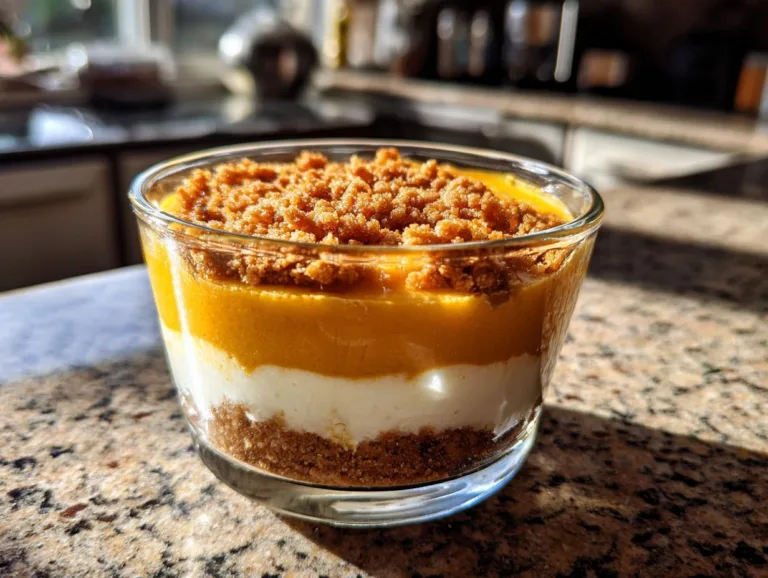
Irresistible Pumpkin Pie in a Cup Recipe Kids Love
A simple and delicious pumpkin pie recipe served in individual cups, perfect for fall gatherings or a cozy dessert.
- Total Time: 90 minutes
- Yield: 1 pie (8 servings) 1x
Ingredients
- 1 ⅓ cups all-purpose flour
- ½ teaspoon salt
- ½ cup cold butter or shortening
- 3 tablespoons cold water, or more as needed
- 2 cups mashed, cooked pie pumpkin
- 1 (12 fluid ounce) can evaporated milk
- 2 large eggs, beaten
- ¾ cup packed brown sugar
- ½ teaspoon ground cinnamon, or more to taste
- ½ teaspoon ground ginger, or more to taste
- ½ teaspoon ground nutmeg, or more to taste
- ½ teaspoon salt
Instructions
- Gather all ingredients and preheat the oven to 400 degrees F (200 degrees C).
- Mix flour and salt together in a bowl. Cut in butter with a pastry blender until mixture resembles coarse crumbs.
- Mix in 3 tablespoons water, one at a time, until dough is moist enough to hold together. Add up to 1 more tablespoon water if needed.
- Shape dough into a ball with lightly floured hands. Roll dough on a lightly floured surface to a thickness of 1/8 inch.
- Cut a circle of dough 1 ½ inches larger than the pie pan and place it into the pan. Flute the edges.
- Beat pumpkin, evaporated milk, brown sugar, eggs, and spices in a bowl until well combined. Pour into the crust.
- Bake for 40 to 60 minutes until a knife inserted near the edge comes out clean. Cover edges with foil if needed.
- Cool to room temperature before serving.
Notes
- Use homemade or canned pumpkin puree.
- Adjust spices to your taste.
- Cover crust edges with foil if they brown too quickly.
- Prep Time: 30 minutes
- Cook Time: 60 minutes
- Category: Dessert
- Method: Baking
- Cuisine: American
- Diet: Vegetarian
Nutrition
- Serving Size: 1 slice
- Calories: 320
- Sugar: 25g
- Sodium: 280mg
- Fat: 14g
- Saturated Fat: 8g
- Unsaturated Fat: 5g
- Trans Fat: 0g
- Carbohydrates: 42g
- Fiber: 2g
- Protein: 6g
- Cholesterol: 75mg
Tips for Perfect Pumpkin Pie in a Cup
After making this recipe more times than I can count (my neighbors now expect deliveries every fall!), here are my hard-earned secrets:
- Spice it your way: Love ginger? Add an extra pinch. Not a nutmeg fan? Swap in allspice. Taste the filling before baking – it should make your taste buds dance!
- Keep that crust crisp: Blind bake your crust cups for 5 minutes before adding filling if you’re paranoid about sogginess (I do this when using fresh pumpkin).
- Foil is your friend: When those crust edges start browning too fast, make little foil rings to protect them while the center finishes cooking.
- The patience payoff: I know it’s hard, but let them cool completely – that’s when the filling gets that perfect creamy-set texture.
Bonus tip: For extra pretty cups, brush the baked crust edges with melted butter and sprinkle with coarse sugar pre-baking. Shh… nobody needs to know your secret!
Variations for Pumpkin Pie in a Cup Recipe
Listen, rules were made to be broken—especially in the kitchen! Here are my favorite ways to mix up this pumpkin pie in a cup recipe when I’m feeling adventurous (or just cleaning out the pantry):
- Graham cracker crust hack: Skip the pastry dough and press crushed graham crackers mixed with melted butter into the cups. Bake for 5 minutes before adding filling—instant nostalgia!
- Whipped cream cloud: Top each cup with a generous dollop of homemade whipped cream right before serving. Bonus points for a cinnamon dusting.
- Chocolate-swirl magic: Melt some chocolate chips and swirl it into the filling before baking—my kids go wild for this version.
- Pecan praline twist: Sprinkle a mix of chopped pecans and brown sugar on top before baking for a crunchy, caramelized lid.
The beauty? These little cups are the perfect canvas for creativity—have fun with it!
Storage and Reheating Instructions
Okay, confession time—I rarely have leftovers because these disappear so fast! But if you do manage to save some, here’s how to keep them perfect:
- Fridge life: Cover tightly and refrigerate for 3-4 days. The crust might soften a bit, but the flavors get even better!
- Microwave magic: 20-30 seconds takes the chill off. Add whipped cream after heating—trust me on this.
- Oven refresh: For crispier crusts, reheat at 300°F for 10 minutes. Foil the edges if they’re already browned.
Pro tip: These freeze beautifully too—just thaw overnight in the fridge before reheating.
Nutritional Information
Now, I’m no nutritionist, but here’s the scoop on what’s in these little cups of fall joy. Keep in mind, nutrition can vary based on the ingredients and brands you use, but here’s a rough estimate per serving: 320 calories, 14g fat, 42g carbs, and 6g protein. Not too shabby for a dessert that tastes like a hug in a cup, right? Just remember—everything’s better in moderation (or, in my case, with an extra dollop of whipped cream on top).
Frequently Asked Questions
Alright, let’s tackle the burning questions about this pumpkin pie in a cup recipe. Trust me, I’ve been asked these more times than I can count!
- Can I use canned pumpkin? Absolutely! Just make sure it’s 100% pure pumpkin puree, not pumpkin pie filling. I’ve used both homemade and canned, and both work beautifully. Just drain any excess liquid if your puree looks watery.
- How do I prevent cracks in the filling? The key is to avoid overbaking. Take the cups out when the edges are set but the center still has a slight jiggle. Also, let them cool gradually in the oven with the door cracked open for about 10 minutes before moving them to the counter.
- Can I freeze leftovers? Yes! These freeze like a dream. Just wrap them tightly in plastic wrap or foil, and they’ll keep for up to 2 months. Thaw in the fridge overnight before reheating.
- What if I don’t have ramekins? No worries! Any oven-safe cups or even muffin tins work in a pinch. Just adjust the baking time if they’re smaller or larger than the standard 6-ounce size.
There you go—happy baking, and don’t hesitate to experiment! After all, the best recipes are the ones you make your own.
Share Your Pumpkin Pie in a Cup Experience
I’d love to hear how your pumpkin pie in a cup adventure turns out! Snap a photo, tag me, and let me know what you think. Did you add a fun twist? Rate the recipe below—your feedback helps me create more cozy, delicious treats for you. Happy baking!
You can also follow us on Facebook for more delicious recipes!