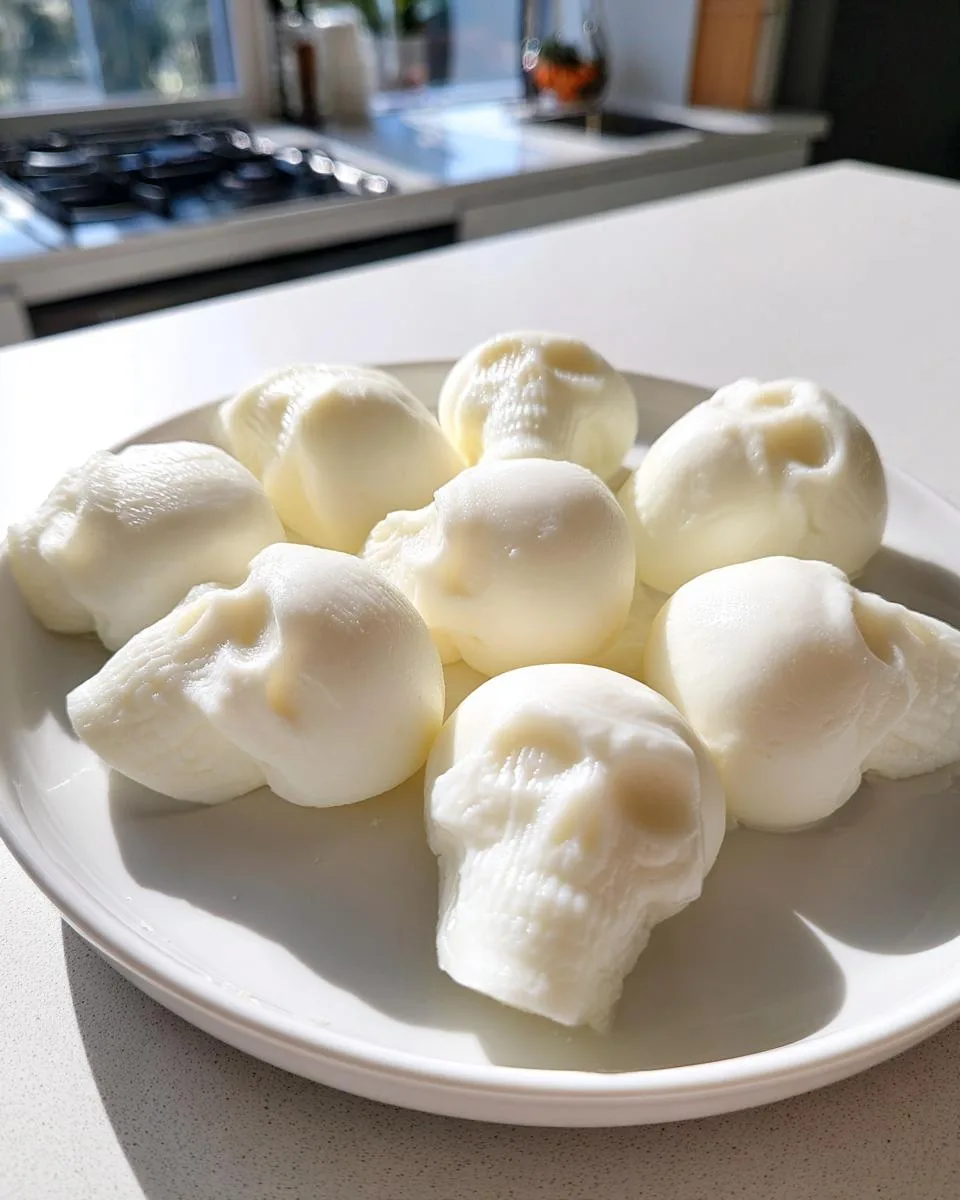
Okay, so picture this – last Halloween, my kids begged me to make something “spooky but not scary” for their school party. I was scrolling through Pinterest at midnight (because, let’s be real, that’s when all the best ideas happen) and stumbled on the genius concept of Spooky Mozzarella Skulls. I mean, cheese that looks like tiny skulls? Yes, please! The next morning, I grabbed my trusty silicone mold and mini mozzarella balls, and 15 minutes later – boom – the easiest, creepiest-cute appetizer ever. The teachers raved, the kids devoured them, and now? They’re a must-have for every Halloween bash. Trust me, these little guys are as fun to make as they are to eat!
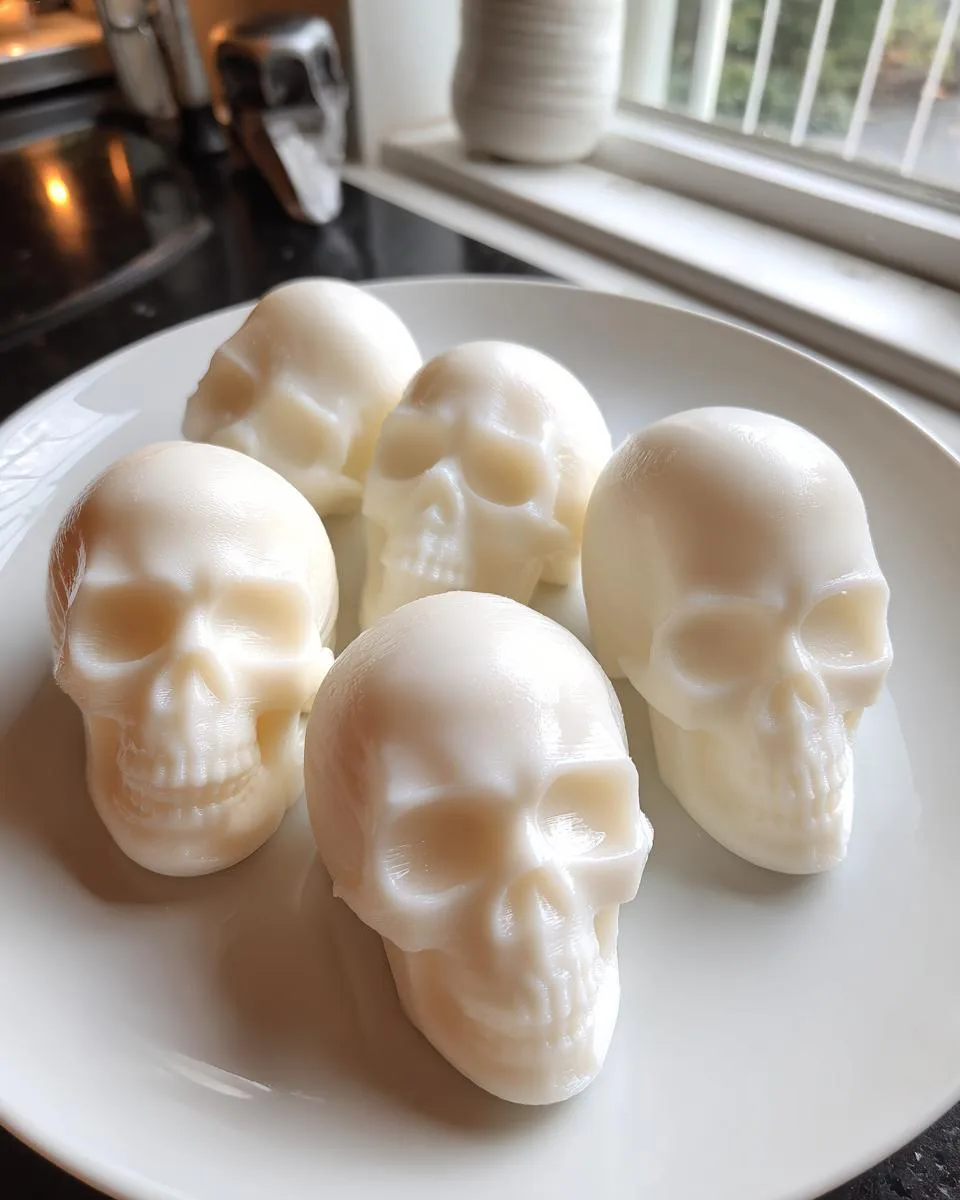
Table of Contents
Table of Contents
Why You’ll Love These Spooky Mozzarella Skulls
Listen, these little guys are absolute game-changers for three big reasons:
- Seriously simple – Five ingredients (basically just cheese!), 15 minutes, and zero fancy skills needed
- Kid-approved magic – My picky eaters go wild for “monster cheese,” and they love helping press the mozzarella into the molds
- Party superstar – They disappear faster than ghosts at sunrise on any Halloween snack table or creepy charcuterie board
Plus? That squeaky-cheese texture makes the most satisfying zombie-brain bite. Boo-yah!
Ingredients for Spooky Mozzarella Skulls
Here’s all you need for these ghoulishly good bites:
- 8 oz mini mozzarella balls (ciliegine) – pat them dry—this is key!
- Pinch of salt – just a whisper to wake up the flavors
- Optional: Black sesame seeds – for creepy “eyes” if you’re feeling fancy
That’s it—no witchcraft required. Though if you’ve got edible glitter or paprika for “blood splatter,” I won’t stop you!
Equipment You’ll Need for Spooky Mozzarella Skulls
Gather these trusty tools – I promise you probably already have most:
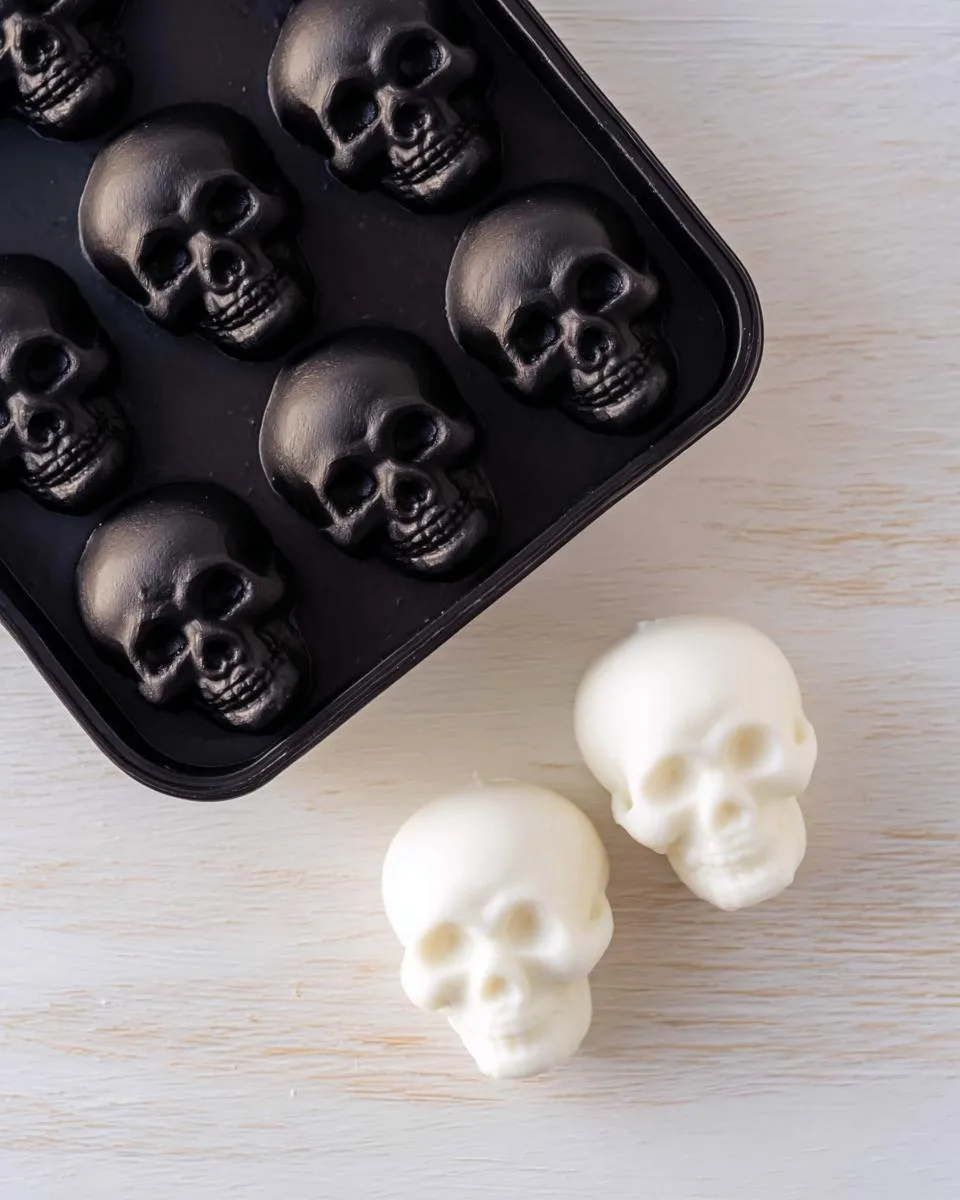
- Oven-safe silicone skull mold – the star of the show! (Mine’s from the dollar spot, no shame)
- Paper towels – for blotting—skip this and you’ll get soggy skulls
- Small spoon – a baby spoon works perfectly for pressing
Bonus points if you use a Halloween-themed baking sheet for extra spooky vibes while they bake!
How to Make Spooky Mozzarella Skulls
Okay, here’s the step-by-step magic – it’s so easy you’ll cackle with delight:
- Heat things up: Preheat your oven to 350°F (175°C). While it warms, blot those mozzarella balls super dry with paper towels – soggy cheese means sad skulls.
- Skull prep: Pop one cheese ball into each mold cavity. Don’t overcrowd – they’ll puff up like little ghosts!
- Bake ’em dead: Slide the mold onto a baking sheet and bake for 8-10 minutes until the cheese gets soft and melty (but not fully melted – we want definition!).
- The fun part: Use the back of a spoon to gently press the cheese into all the creepy crevices. Too hard and you’ll lose details, too soft and they won’t hold shape.
- Patience, my dear: Blot any excess moisture with a paper towel, then refrigerate for 10 minutes to set. The wait is torture, I know!
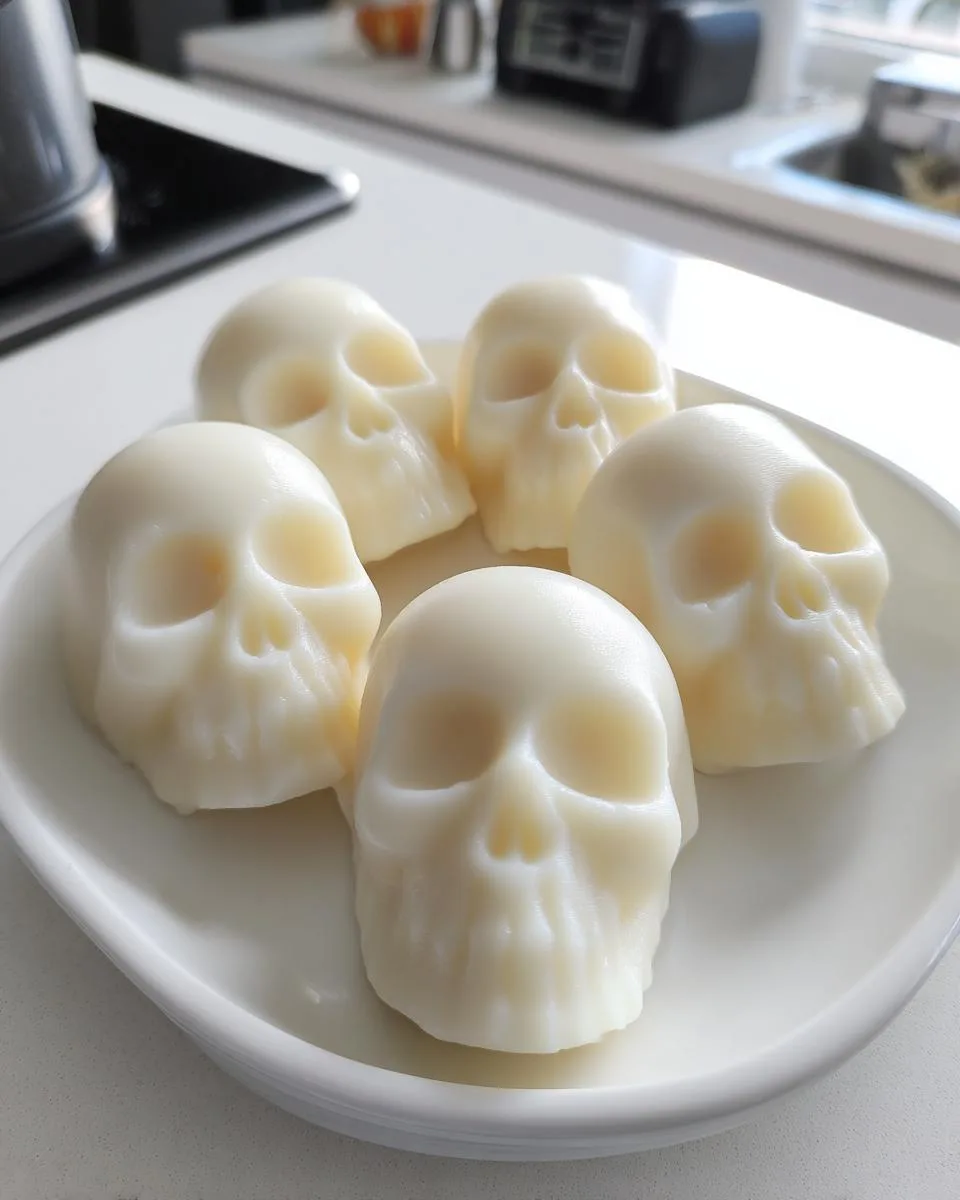
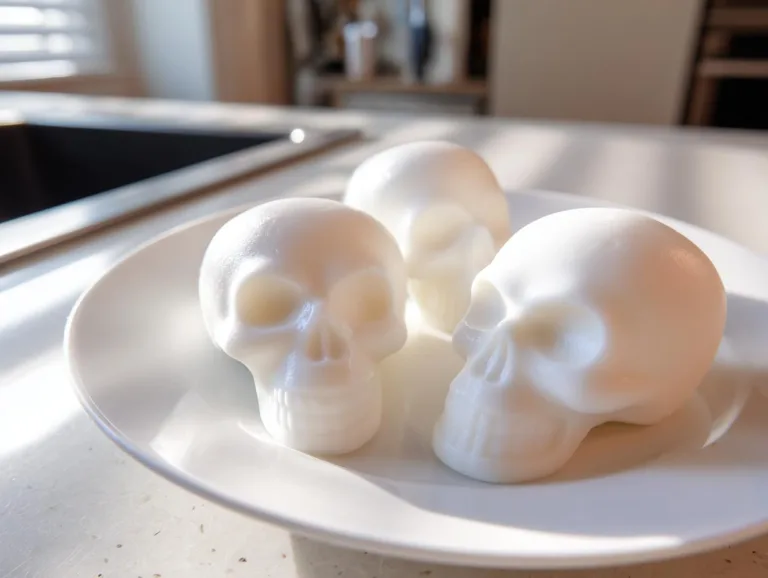
- Unveil your masterpiece: Carefully pop them out – if they stick, run a butter knife around the edges first. Ta-da! Instant graveyard glam.
Pro tip: Work fast between steps 3-5 – warm cheese molds best but cools quickly. And don’t worry if your first skull looks more “abstract art” than “perfect specimen” – they all taste deliciously creepy!
Tips for Perfect Spooky Mozzarella Skulls
After making these way too many times (okay, fine – I got obsessed), here are my foolproof tricks:
- Fresh is best – That watery grocery store mozzarella? Nope. Seek out the freshest ciliegine you can find – the drier texture holds details better.
- Blot like your life depends on it – I press those balls between paper towels with my full body weight. Okay, slight exaggeration – but seriously, dry them thoroughly!
- Work warm – If your cheese cools too much before pressing, just pop the mold back in the oven for 30 seconds to soften it up again.
And if your first batch looks more “ghoulish blob” than “perfect skull”? Lean into it – call them “zombie brains” and watch them disappear just as fast!
Variations for Spooky Mozzarella Skulls
Want to get extra creative? Try these fun twists:
- Bloody Vampire Skulls: Dab on tomato paste “blood” with a toothpick or mix in a drop of red food coloring before baking
- Herb-Infused: Roll finished skulls in everything bagel seasoning for “dirt” or finely chopped parsley for “mold” (kids love the gross-out factor!)
- Spicy Ghosts: Add a pinch of cayenne to the mozzarella before molding for a fiery bite
The best part? No wrong answers – just deliciously creepy experiments!
Serving Suggestions for Spooky Mozzarella Skulls
Oh, the possibilities! I love arranging these little guys on a “graveyard” charcuterie board with crackers as tombstones and olive spiders. They’re also perfect perched on bloody mary skewers or nestled next to pumpkin-shaped hummus. My kids go nuts when I serve them with marinara “blood dip” – dunking optional but highly encouraged!
Storing and Reheating Spooky Mozzarella Skulls
These little skulls keep their creepy charm for 3-4 days in the fridge – just tuck them in an airtight container with a paper towel to soak up any extra moisture. Want to revive them? A quick 5-second microwave zap brings back that fresh-from-the-mold look, or let them come to room temp naturally if you’re patient. Fair warning though – they rarely last long enough to store in my house!
Nutritional Information for Spooky Mozzarella Skulls
Each creepy-cute skull clocks in at about 70 calories, with 5g protein and 5g fat (hey, it’s cheese – worth it!). They’re naturally low-carb with just 1g carbs per serving. Of course, these numbers might shift if you go wild with toppings – but let’s be real, nobody’s counting calories when there’s cheese shaped like skulls involved!
Frequently Asked Questions About Spooky Mozzarella Skulls
Can I use regular mozzarella instead of ciliegine?
Absolutely! Just tear a large ball into 1-inch chunks – the rustic edges make for extra-creepy skulls. Pat them extra dry since fresh mozzarella holds more moisture.
My skulls stuck to the mold – help!
No panic! Next time, give the mold a light spritz of cooking spray first. For rescue missions now, pop them in the freezer for 5 minutes – they’ll usually release easier when chilled.
Can I make these ahead for a party?
You bet! Shape them up to 2 days before, then store layered with parchment in the fridge. They might “sweat” a bit – just blot before serving and they’ll look freshly haunted.
Are there dairy-free options?
I’ve had decent luck with almond milk mozzarella, but it won’t hold details as well. For vegan friends, try pressing firm tofu into the molds instead – season it well!
Final Thoughts
Alright, spooky chefs – give these mozzarella skulls a whirl and watch them steal the show at your next Halloween bash! Tag me @FrostyRecipes with your creepy creations – I live for those “OMG I made this?!” kitchen victory moments. Now go forth and cheese-ify your Halloween!
Spooky Mozzarella Skulls: 15-Minute Halloween Magic
Learn how to make fun and spooky mozzarella skulls, perfect for Halloween or themed parties.
- Total Time: 15 minutes
- Yield: 6-8 skulls
Ingredients
- Mini Mozzarella Balls (ciliegine)
- Silicone Mold (oven-safe)
Instructions
- Preheat oven to 350°F.
- Blot mozzarella balls dry with a paper towel and place one in each mold.
- Bake for 8-10 minutes until soft.
- Press mozzarella gently into the mold with the back of a spoon.
- Blot excess moisture if needed.
- Refrigerate for 10 minutes, then carefully unmold.
Notes
- Ensure molds are heat-safe.
- Use fresh mozzarella for best results.
- Store leftovers in the fridge.
- Prep Time: 5 minutes
- Cook Time: 10 minutes
- Category: Appetizer
- Method: Baking
- Cuisine: American
- Diet: Vegetarian
Nutrition
- Serving Size: 1 skull
- Calories: 70
- Sugar: 0g
- Sodium: 150mg
- Fat: 5g
- Saturated Fat: 3g
- Unsaturated Fat: 1g
- Trans Fat: 0g
- Carbohydrates: 1g
- Fiber: 0g
- Protein: 6g
- Cholesterol: 20mg