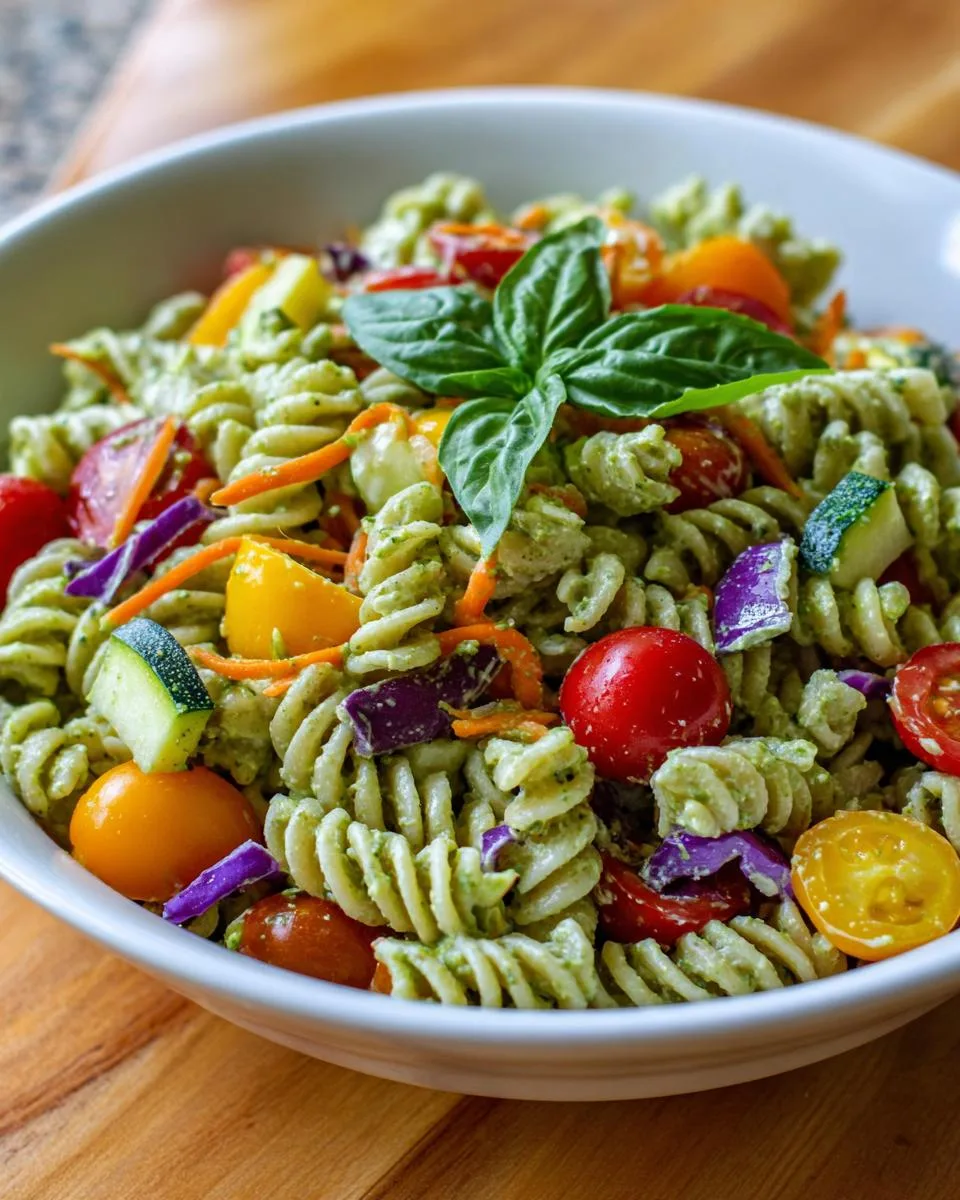
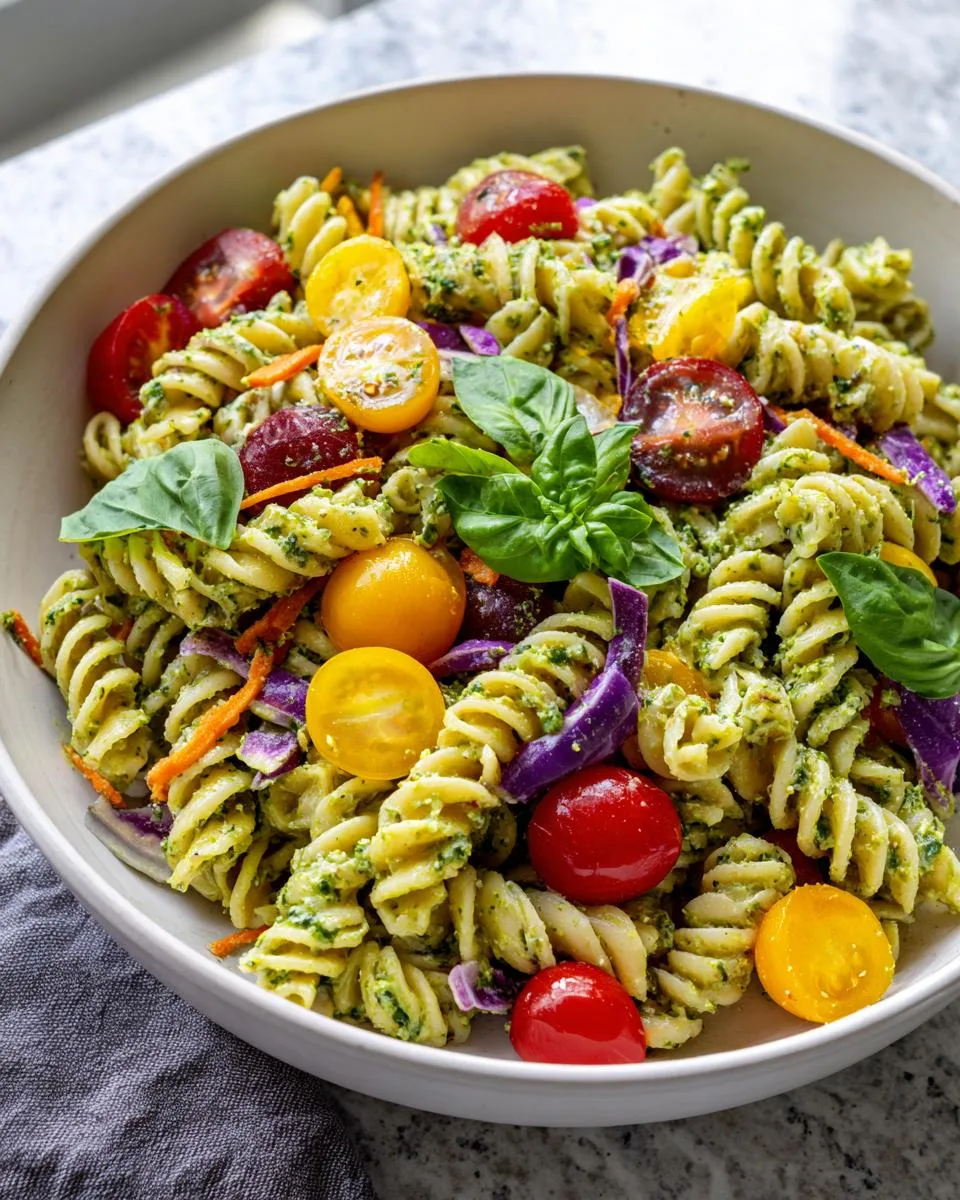
Some days you just want a lunch that actually fills you up without leaving you feeling sluggish afterward. That’s exactly why I keep coming back to this Cottage Cheese Pesto Pasta Salad – it’s fresh, colorful, and seriously satisfying. I first made it for a summer cookout, and now it’s basically a weekly meal prep staple in my house. The star of the whole thing is the creamy homemade cottage cheese pesto, which coats every bite in the most delicious way. You’re also getting 22g of protein per serving, so this isn’t just a pretty salad – it actually keeps you full. Get ready for a recipe you’ll want to make on repeat.
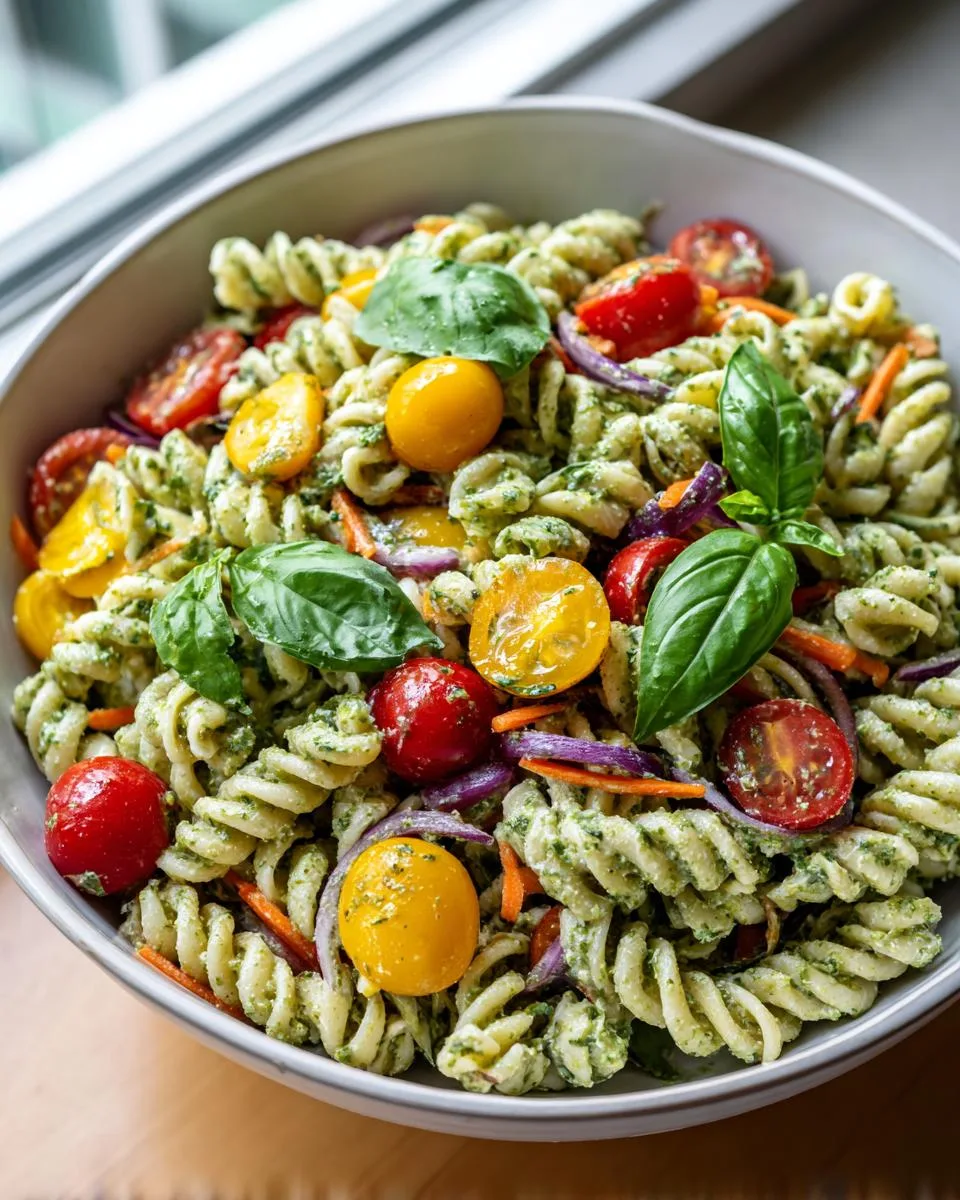
Table of Contents
Table of Contents
Why You Will Love This Cottage Cheese Pesto Pasta Salad
Honestly, I could go on about this salad all day. But let me just give you the highlights so you can get to the kitchen faster.
- 22 grams of protein per serving. That creamy cottage cheese pesto is doing serious work here.
- Only 20 minutes of active prep. The chilling time does the rest for you.
- Perfect for meal prep. It stays great in the fridge for up to 4 days.
- Completely vegetarian. And still totally filling.
- Crowd-friendly and colorful. It looks gorgeous on a table and feeds six people easily.
Ingredients for Cottage Cheese Pesto Pasta Salad
Here’s everything you need to pull this together. I like to get all my prep done before I start cooking, so I’ve listed things exactly how you’ll need them ready to go.
For the pasta salad:
- 8 oz protein-added rotini pasta, dry
- 1 cup zucchini, shredded
- 1 cup carrots, shredded
- 1½ cups colorful cherry tomatoes, halved
- ¾ cup red cabbage, finely shredded
- 1 yellow bell pepper, diced
- 3 (6-inch) celery stalks, finely chopped
- 4 cups fresh spinach, chopped
- 2 tablespoons fresh lemon juice
- 2 tablespoons fresh basil, chopped
- Salt and black pepper to taste
- 1½ cups creamy cottage cheese pesto (recipe below)
For the creamy cottage cheese pesto:
- 1½ cups 2% cottage cheese
- 1½ cups fresh basil leaves, packed
- 1½ tablespoons walnuts
- 1½ tablespoons olive oil
- 1½ tablespoons fresh lemon juice
- 1½ tablespoons Parmesan cheese, grated
- 1 to 2 garlic cloves
- Salt and black pepper to taste
Ingredient Notes and Substitutions
Protein-added rotini is my go-to here because it bumps up the protein without any extra effort. But honestly, any short pasta works fine – penne, farfalle, or fusilli are all great options.
The 2% cottage cheese gives the pesto that creamy, smooth texture without feeling too heavy. I wouldn’t go lower-fat than that or the pesto loses some of its richness.
Walnuts add a nice earthy depth to the pesto, but if you have a nut allergy or just don’t love them, swap in sunflower seeds. Pine nuts work beautifully too if you want something a little more traditional.
For the spinach, baby spinach is a totally easy substitute – just toss it in without chopping if you prefer.
Equipment You Will Need
Grab these before you start and you’ll move through this recipe without any scrambling around.
- Large pot for boiling the pasta
- Colander for draining and rinsing
- Food processor or high-speed blender for the pesto
- Box grater or food processor for shredding the zucchini and carrots
- Large mixing bowl for tossing everything together
- Cutting board and a sharp knife
How to Make Cottage Cheese Pesto Pasta Salad
This comes together really easily once you know the order of things. Here’s exactly how I do it every time.
- Bring a large pot of salted water to a boil. Cook the rotini for 8 to 10 minutes according to the package directions.
- Drain the pasta in a colander and rinse it well under cold water. This stops the cooking right away and keeps the noodles from clumping together.
- Spread the pasta out or leave it in the colander and let it cool completely before you mix anything. Warm pasta will wilt your vegetables and make the pesto slide right off.
- While the pasta cooks, get all your vegetables ready. Shred the zucchini and carrots, halve the cherry tomatoes, dice the yellow bell pepper, finely chop the celery and spinach, and shred the red cabbage.
- Make your cottage cheese pesto. Add all the pesto ingredients to a food processor or high-speed blender and blend until completely smooth. Taste it and adjust the salt and pepper before you set it aside.
- In a large mixing bowl, combine the cooled pasta, all your prepared vegetables, the lemon juice, chopped basil, salt, and black pepper. Give everything a good toss.
- Pour all 1½ cups of the cottage cheese pesto right over the top. Yes, add it all at once. Toss gently until every piece is evenly coated.
- Cover the bowl and refrigerate for at least 30 minutes. Don’t skip this step – the chilling time is when all those flavors really come together and the pesto settles into the pasta beautifully.
- Give it a good toss again right before serving and you’re ready to go.
How to Make the Creamy Cottage Cheese Pesto
This pesto is honestly the whole reason this salad is so good, so it deserves its own moment. Add 1½ cups of 2% cottage cheese, 1½ cups of packed fresh basil leaves, 1½ tablespoons each of walnuts, olive oil, lemon juice, and grated Parmesan, plus 1 to 2 garlic cloves, salt, and pepper to your food processor or blender.
Blend everything until it’s completely smooth and creamy. No chunks, no bits of walnut – just a silky, vibrant green sauce.
Taste it before you use it and adjust the seasoning. A little extra salt or a tiny squeeze more lemon can make a real difference. The great news is you can make this pesto up to 3 days ahead and keep it in an airtight container in the fridge, which makes the whole recipe even easier to pull together on a busy day.
Tips for the Best Cottage Cheese Pesto Pasta Salad
These are the little things that actually make a difference. I learned most of them the hard way, so you don’t have to.
- Rinse the pasta right away. The second it’s drained, run cold water over it. It stops the cooking instantly and keeps the noodles from turning into one big clump.
- Let the pasta cool completely. I mean fully cool, not just warm. Hot pasta will wilt your vegetables and make the pesto watery.
- Use a box grater or food processor for the zucchini and carrots. It takes two minutes instead of ten.
- Make the pesto ahead of time. It keeps in the fridge for up to 3 days, so you can knock it out the night before.
- If the salad looks dry after chilling, don’t panic. Just add a splash of lemon juice or an extra spoonful of pesto and toss it again. Good as new.
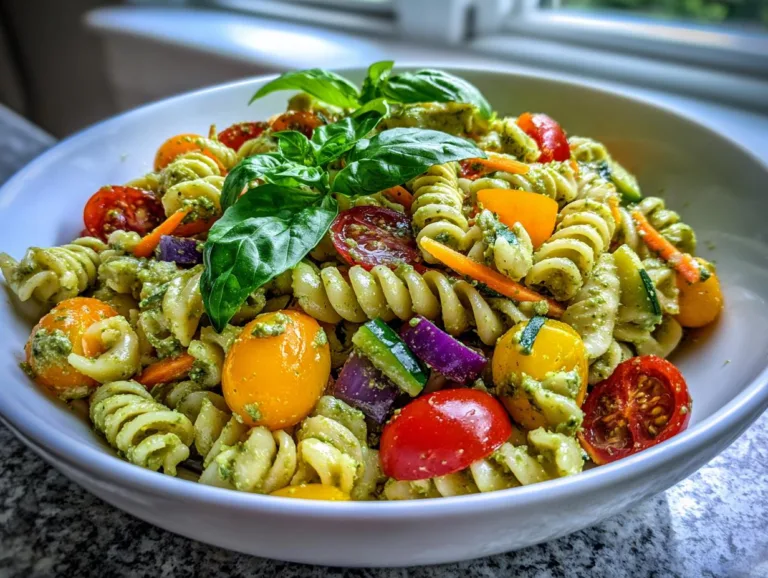
Cottage Cheese Pesto Pasta Salad With 22g Protein
Cottage Cheese Pesto Pasta Salad is a fresh, protein-packed dish that combines rotini pasta with colorful vegetables and a creamy homemade cottage cheese pesto. It works as a light lunch, a meal prep option, or a side dish for gatherings.
- Total Time: 1 hour (including 30 minutes chilling time)
- Yield: 6 servings 1x
Ingredients
- 8 oz protein added rotini pasta, dry
- 1 cup shredded zucchini
- 1 cup shredded carrots
- 1½ cups colorful cherry tomatoes, halved
- ¾ cup finely shredded red cabbage
- 1 yellow bell pepper, diced
- 3 (6-inch) celery stalks, finely chopped
- 4 cups fresh spinach, chopped
- 2 tablespoons fresh lemon juice
- 2 tablespoons chopped fresh basil
- Salt and black pepper to taste
- 1½ cups creamy cottage cheese pesto (see below)
- For the Creamy Cottage Cheese Pesto:
- 1½ cups 2% cottage cheese
- 1½ cups fresh basil leaves, packed
- 1½ tablespoons walnuts
- 1½ tablespoons olive oil
- 1½ tablespoons lemon juice
- 1½ tablespoons grated Parmesan cheese
- 1 to 2 garlic cloves
- Salt and black pepper to taste
Instructions
- Bring a large pot of salted water to a boil. Cook the rotini according to package directions, about 8 to 10 minutes. Drain and rinse under cold water. Let it cool completely.
- While the pasta cooks, shred the zucchini and carrots, halve the cherry tomatoes, dice the yellow bell pepper, chop the celery and spinach, and shred the red cabbage.
- Add all pesto ingredients to a food processor or high-speed blender. Blend until smooth. Taste and adjust salt and pepper as needed.
- In a large bowl, combine the cooled pasta, all prepared vegetables, lemon juice, chopped basil, salt, and black pepper. Toss to mix.
- Pour the 1½ cups of cottage cheese pesto over the pasta and vegetables. Toss gently until everything is evenly coated.
- Cover and refrigerate for at least 30 minutes before serving. Toss again before serving.
Notes
- Rinse the pasta with cold water after draining to stop cooking and keep it from sticking together.
- You can make the pesto up to 3 days ahead and store it in an airtight container in the fridge.
- Swap walnuts for pine nuts or sunflower seeds if preferred.
- This salad keeps well in the fridge for up to 4 days, making it a great meal prep option.
- If the salad looks dry after chilling, add a splash of lemon juice or a spoonful of pesto before serving.
- Use a box grater or food processor to shred the zucchini and carrots quickly.
- Prep Time: 20 minutes
- Cook Time: 10 minutes
- Category: Salad
- Method: Blending, Boiling
- Cuisine: American
- Diet: Vegetarian
Nutrition
- Serving Size: 1 serving (approximately 1.5 cups)
- Calories: 320 kcal
- Sugar: 6g
- Sodium: 380mg
- Fat: 9g
- Saturated Fat: 2g
- Unsaturated Fat: 6g
- Trans Fat: 0g
- Carbohydrates: 38g
- Fiber: 5g
- Protein: 22g
- Cholesterol: 10mg
Serving Suggestions for Cottage Cheese Pesto Pasta Salad
This salad is genuinely versatile, which is one of my favorite things about it. Here are a few ways I like to serve it.
- As a standalone lunch. A big bowl of this on its own is completely filling, especially with that protein punch.
- At a cookout or potluck. It travels well and looks beautiful on a table. It holds up at room temperature for about 30 minutes, so no stress.
- Alongside grilled chicken or fish. If you want a heartier dinner, this makes a fantastic side.
- Portioned into meal prep containers. Divide it into individual portions on Sunday and lunch is handled for the whole week.
Storage and Reheating for Cottage Cheese Pesto Pasta Salad
Store any leftovers in an airtight container in the fridge and they’ll keep perfectly for up to 4 days. Just give it a good toss before you eat it each time, since everything settles a bit as it sits.
If you want to get ahead, make the cottage cheese pesto on its own and store it separately in an airtight container for up to 3 days. Then toss the whole salad together when you’re ready.
This one is best served cold straight from the fridge – no reheating needed. If it looks a little thick or dry after chilling, just add a small splash of lemon juice and toss to loosen it right back up.
Cottage Cheese Pesto Pasta Salad FAQs
Got questions? I’ve got answers. Here are the ones I hear most often.
Can I use regular pasta instead of protein rotini?
Absolutely. Any short pasta works great here – penne, fusilli, or farfalle are all solid choices. You’ll just get a little less protein per serving, but the salad will taste just as good.
Can I make this ahead of time?
Yes, and I actually recommend it. The flavors get even better after a night in the fridge. Just toss it again before serving and add a splash of lemon juice if it looks a little dry.
How long does cottage cheese pesto last in the fridge?
The pesto keeps in an airtight container for up to 3 days. The full assembled salad stays fresh for up to 4 days.
Can I add chicken to this salad?
Definitely. Grilled or shredded rotisserie chicken is a great addition if you want an even heartier meal.
Is this recipe gluten-free?
Not as written, but it’s an easy swap. Just use your favorite gluten-free rotini and you’re good to go.
Nutritional Information
One serving is approximately 1.5 cups. Here’s the estimated breakdown per serving:
- Calories: 320 kcal
- Fat: 9g (Saturated Fat: 2g, Unsaturated Fat: 6g, Trans Fat: 0g)
- Carbohydrates: 38g
- Fiber: 5g
- Sugar: 6g
- Protein: 22g
- Sodium: 380mg
- Cholesterol: 10mg
These are estimates based on the ingredients I used. Your numbers may vary a little depending on the specific brands and ingredient choices you go with.
Share Your Cottage Cheese Pesto Pasta Salad
If you try this recipe, I’d love to hear how it turned out for you. Come back and leave a comment or drop a star rating below – it really does mean so much. And if you snap a photo, share it on social media and tag Frosty Recipes so I can see your beautiful bowl. You’ve got this! Follow us on Facebook for more delicious recipes.