Halloween at our house means one thing – the kitchen turns into a mad scientist’s lab of sugary experiments! And these Wicked Witch Cupcakes? Oh, they’re the star of the show every single year. I stumbled upon this idea when my youngest declared store-bought treats “too boring” for her school party. Now? It’s our October tradition – flour everywhere, giggles guaranteed, and that magical moment when Oreos and Hershey Kisses transform into crooked little witch hats.
What I love most is how these let kids go wild with creativity (glitter gel mustaches on witches? Sure!). They’re foolproof for busy parents too – box mix works beautifully, and wobbly witch legs just add character. Trust me, when those green-straw legs peek out from under cupcake skirts, even the “too cool” tweens can’t resist snapping pics for Instagram.
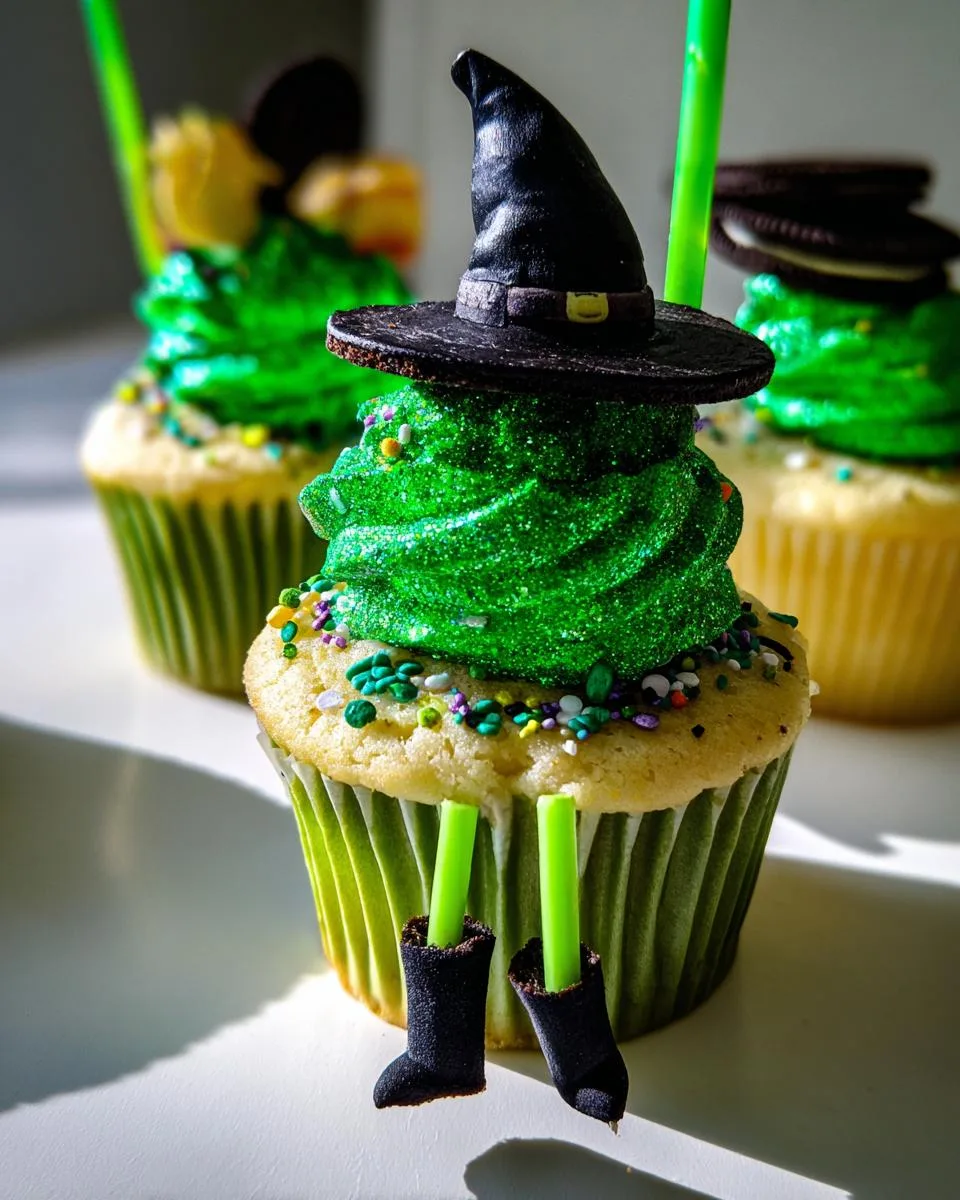
Table of Contents
Table of Contents
Why You’ll Love These Wicked Witch Cupcakes
Okay, let me count the ways these little witches cast their spell on everyone – from hyper kids to exhausted parents who just need a win. First off, they’re the ultimate “looks fancy, actually easy” Halloween hack. Here’s why they’ve earned a permanent spot in my recipe box:
- Kid-tested, chaos-approved: My kids can assemble these with minimal supervision (read: I get to sip coffee while they smear glitter gel “hats” with wild abandon). The Oreo-and-Kiss hats? Pure edible engineering genius – even when they’re lopsided, they’re adorable.
- Pantry superhero: Boxed cake mix, store-bought frosting, and basic candies? Check. No hunting for obscure ingredients at 8 pm the night before the school party. (We’ve all been there.)
- Instant Halloween vibes: Those paper-straw legs poking out kill me every time. They turn basic cupcakes into a story – perfect for spooky tea parties or neighbor gifts.
- Messy = charming: Unlike finicky fondant witches, these embrace the “hot mess” aesthetic. Smudged gel? Extra sprinkles? Now your witch just partied too hard at the cauldron.
Seriously – if my kids’ sugar-crazed classmates could vote, these would win “Best in Show” every Halloween.
Ingredients for Wicked Witch Cupcakes
Alright, let’s raid the pantry for these little magic-makers! Here’s what you’ll need to conjure up a coven of deliciously spooky cupcakes:
- 12 vanilla cupcakes – Homemade or from a box mix (my secret? I doctor up store-bought mix with an extra egg and a splash of vanilla)
- 12 Oreo cookies – Gently twist them apart to keep one side with all the cream (those become your hat brims!)
- 1 cup white frosting – The kind that comes in a tub works perfectly – no need to be fancy here
- 12 Hershey Kisses – Unwrapped, obviously, unless you want foil-hatted witches
- Green glitter gel – Look for the squeeze tubes in the cake aisle (the messier it looks, the better!)
- Halloween sprinkles – The more neon and chaotic, the better – ours always end up looking like witch confetti
- 6 green paper straws – Cut in half to make 12 little legs (bend them for “running” witches!)
- Black construction paper – For those iconic pointy witch boots – scissors optional if you’re feeling wild with the tearing
Pro tip: Double the Oreos – someone will “accidentally” break a few while assembling!
Equipment You’ll Need for Wicked Witch Cupcakes
Here’s the beauty of these cupcakes – you probably already have everything lurking in your kitchen drawers! No fancy gadgets required, just grab:
- Mixing bowls – One for batter, one for frosting disasters (I mean, decorating)
- Piping bag with 1M tip – Or a ziplock bag with the corner snipped off in a pinch
- Butter knife – For spreading frosting like a wild artist
- Glue stick or hot glue gun – To attach those wobbly witch legs (non-toxic, please!)
- Scissors – For cutting straws and paper boots
That’s it! Unless you count tiny fingers covered in glitter gel as “equipment” – then add napkins. Lots of napkins.
How to Make Wicked Witch Cupcakes Step-by-Step
Alright, witches and wizards of the kitchen – let’s brew up some magic! These cupcakes come together faster than you can say “double double toil and trouble.” Just follow my messy-but-foolproof steps:
Baking the Cupcakes
First, preheat that oven to 350°F (or whatever your cake mix box says – no judgment here). Mix up your batter – I like to add an extra teaspoon of vanilla for that “grandma’s kitchen” smell. Fill those cupcake liners about ⅔ full (trust me, overflowing witch skirts aren’t cute). Bake for 15-18 minutes until they spring back when poked. Let them cool completely – rushing this step leads to melty witch hats!
Decorating the Witch Hats
Now for the fun part! Carefully twist apart your Oreos – save the cream-less halves for snacking (baker’s privilege). Dab a pea-sized blob of frosting on each Kiss and stick it to the cream side of an Oreo half. Squeeze green glitter gel around the base to make a wonky hat brim – the messier, the more “authentically witchy” it looks! Toss on some sprinkles while the gel’s still wet so they stick. Pro tip: Let these dry upside down so the Kiss doesn’t slide off.
Adding the Witch’s Legs
Cut your green straws in half – bend some at crazy angles for “mid-flight” witches! Cut little boot shapes from black paper (or just tear them – witches aren’t perfect). Glue the boots to the straw ends, then gently poke the legs into the cupcake’s side. If they won’t stay, a dot of frosting works as edible glue. Voila – your witches are ready to run (or stumble) away!
See? Even if your cupcakes look like they survived a broomstick crash landing, they’ll be the hit of any Halloween party!
Print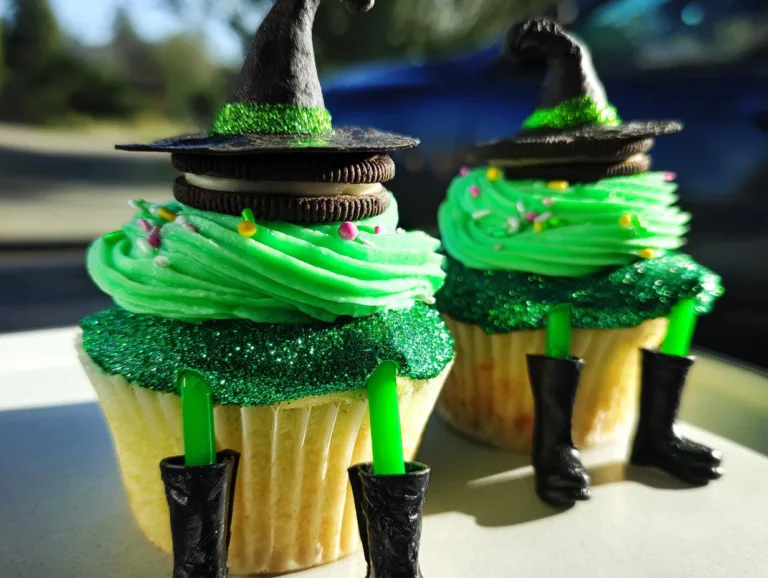
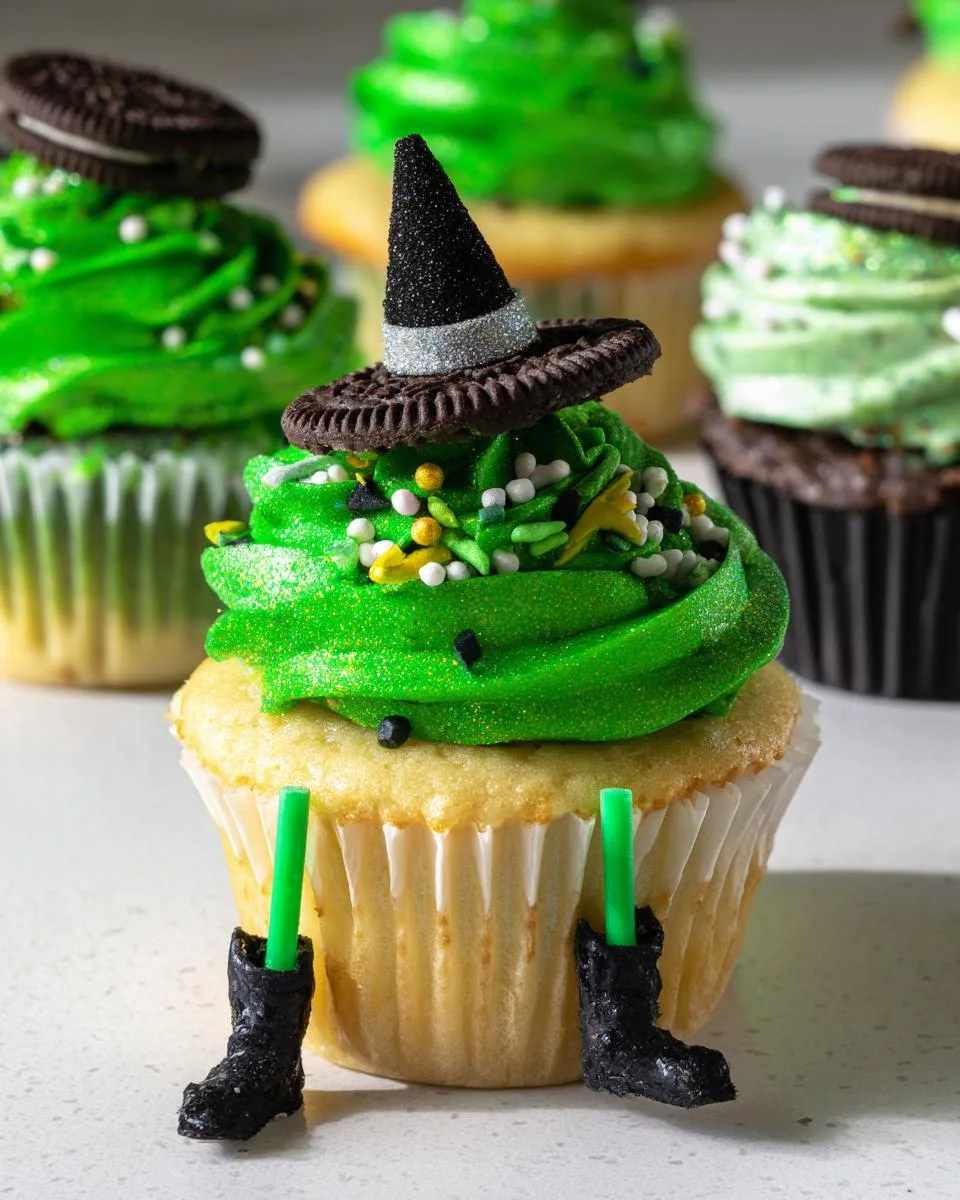
Spooky Wicked Witch Cupcakes Kids Will Devour in 5 Minutes
Wicked Witch Cupcakes are a fun and easy Halloween treat that kids will love to make and eat. These cupcakes feature witch hats made from Oreos and Hershey Kisses, with green glitter gel and spooky sprinkles for decoration. Paper straws and black construction paper create the witch’s legs and boots.
- Total Time: 35 minutes
- Yield: 12 cupcakes
Ingredients
- Vanilla cupcakes (or chocolate cake mix if preferred)
- Oreo cookies
- White icing/frosting (homemade or store-bought)
- Hershey Kisses
- Green glitter gel (found in cake decorating section)
- Cupcake liners
- Halloween nonpareils or sprinkles
- Green paper straws
- Black construction paper or cardstock
Instructions
- Prepare cupcakes by mixing and baking according to the box directions. Let them cool on a wire rack.
- Frost the cupcakes using a decorator bag with a 1M tip. The frosting doesn’t need to be perfect.
- Split Oreo cookies in half and use icing to attach a Hershey Kiss to the center of each half.
- Apply green glitter gel around the Hershey Kiss for the hat’s brim and add Halloween sprinkles.
- Cut green paper straws for legs and black paper for the witch’s feet. Glue the feet to the straws.
- Place the witch’s hat on one side of the cupcake and the legs on the other side.
Notes
- Kids will enjoy decorating their own cupcakes.
- Use any cake flavor or frosting you prefer.
- Store-bought frosting works just as well as homemade.
- Prep Time: 20 minutes
- Cook Time: 15 minutes
- Category: Dessert
- Method: Baking
- Cuisine: American
- Diet: Vegetarian
Nutrition
- Serving Size: 1 cupcake
- Calories: 250
- Sugar: 20g
- Sodium: 180mg
- Fat: 10g
- Saturated Fat: 4g
- Unsaturated Fat: 5g
- Trans Fat: 0g
- Carbohydrates: 35g
- Fiber: 1g
- Protein: 3g
- Cholesterol: 5mg
Tips for Perfect Wicked Witch Cupcakes
Listen, I’ve made enough of these cupcakes to know where things can go hilariously wrong – here’s how to avoid total witch-tastrophes:
- Chill those hats! Pop your assembled Oreo hats in the fridge for 10 minutes before decorating – cold frosting holds its shape better when little hands get over-enthusiastic with sprinkles.
- Thick frosting saves lives (of cupcakes). If your frosting’s too runny, add powdered sugar a tablespoon at a time until it can hold a peak. Wimpy frosting means sliding witch hats!
- Bendy straw magic: Curl the paper straw legs around a pencil first – it gives them that perfect “flying mid-spell” curve.
- Glitter gel hack: Squeeze it onto a plate first, then dip a toothpick to apply – saves you from neon green fingerprints on everything.
Remember – crooked hats and wobbly legs just mean your witches have character!
Variations for Wicked Witch Cupcakes
Oh, the magic you can work with these little witches! Once you’ve mastered the basic spell – er, recipe – try these fun twists to keep things exciting:
- Chocolate coven: Swap vanilla cupcakes for devil’s food cake – the dark color makes the green legs pop even more. Bonus: chocolate hides sprinkles mishaps!
- Purple people eaters: Tint your frosting lavender and use black gel for hat brims – suddenly you’ve got a whole coven of midnight witches.
- Gluten-free ghouls: Use gluten-free cake mix and gluten-free chocolate cookies (check labels on Kisses too).
- Zombie edition: Add red gel “blood” dripping from hats and use broken straw legs for that “just escaped the graveyard” look.
My kids once made “unicorn witches” with rainbow sprinkles – because why should vampires have all the fun?
Storing and Serving Wicked Witch Cupcakes
These little witches are happiest at room temperature – store them in an airtight container for up to 3 days (if they last that long!). For a showstopper display, arrange them on a cake stand with cotton candy “smoke” or crushed Oreo “dirt.” Pro tip: Add the legs right before serving so they don’t get soggy!
Nutritional Information for Wicked Witch Cupcakes
Now, let’s be real – these are treats, not health food! But for those who like to know (or need to track), here’s the scoop: One cupcake with all the fixings is roughly 250 calories. Keep in mind, these numbers can change based on your specific ingredients – store-bought vs. homemade frosting, different cake mixes, or if someone “accidentally” eats three extra Hershey Kisses during assembly (we’ve all been there!).
FAQs About Wicked Witch Cupcakes
I’ve fielded enough panicked texts from friends mid-witch-crafting to know exactly what questions pop up! Here are the answers to all your burning (cauldron?) questions:
Q: Can I assemble these the night before?
A: Absolutely! Bake and frost the cupcakes ahead, but wait to add the hats and legs until the morning of – Oreos get soggy if they sit too long on frosting. Store everything separately at room temp.
Q: Help! My Hershey Kisses keep sliding off!
A: Been there! Chill your Kisses first – cold chocolate sticks better. If they’re still rebellious, use toothpicks as tiny supports (just warn eaters to remove them first).
Q: Can I make these nut-free for school?
A: Yes! Swap Hershey Kisses for nut-free chocolate buttons or mini peanut butter cups (check labels). Most store-bought frostings are nut-free too.
Q: What’s the easiest way to transport these?
A: Cupcake carriers are great, but a baking sheet with crumpled foil “nests” works too. Pack extra sprinkles and glue sticks for on-the-go repairs!
Q: My kid wants purple witches – will food coloring work?
A: Go wild! Gel food coloring mixes beautifully into frosting. Just avoid liquid dyes – they can make frosting runny.
Final Thoughts
Now go forth and create your own cupcake coven! I’d love to see your spooky (or silly) witchy creations – tag me @FrostyRecipes so I can cheer on your edible magic. And hey, if your witch legs end up doing the splits or your hats look drunk? That’s just extra Halloween charm, my friend. Happy baking!
For More recipes Follow me on Facebook!